
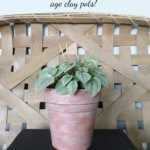
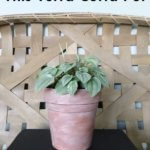


Hey there friends! Want to try out some easy ways to age a terra cotta pot? Let’s take those orange clay pots and make them look beautifully old in a few simple steps. And we’ll try out three different ways to make this happen.
I don’t know about you all, but I love all things vintage! It’s a good day for me if I find a great vintage piece at a yard sale, thrift store or on Facebook marketplace.
Even more awesome is old stuff sitting for free by the side of the road or in my mother-in-law’s basement.
So, when I can’t find something like that, I like to use paint and other materials to make new things look old!
Here are three super simple ways to easily age a terra cotta pot! Read on for the do-it-yourself!
First DIY Idea – Aged Clay Pot with Baking Soda, Paint and Chippy Paintbrush
The first two ways to age your terra cotta planters use baking soda and paint. However, in each of them, the application process creates a different look on your clay pot. So, you could easily try out both! 🙂
HELPFUL HINT: This 1st way is the easiest and takes the least number of materials!
Product List
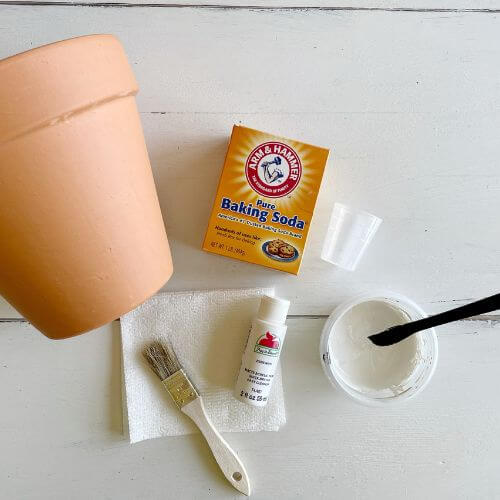
- White Acrylic Paint (Walmart) – .50 cents
- Baking Soda – $1.00
- Clay Pots (Walmart)
- Chippy Paintbrush (Walmart) – under $1.00
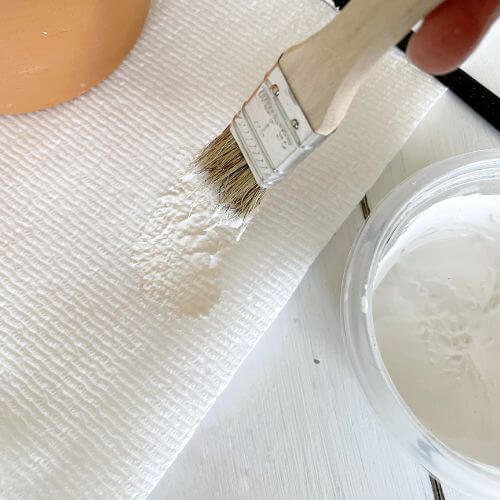
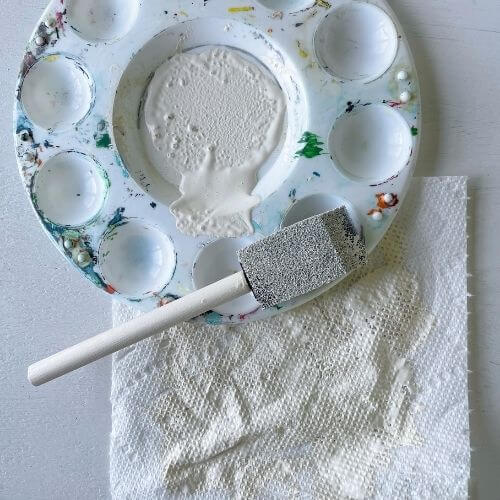
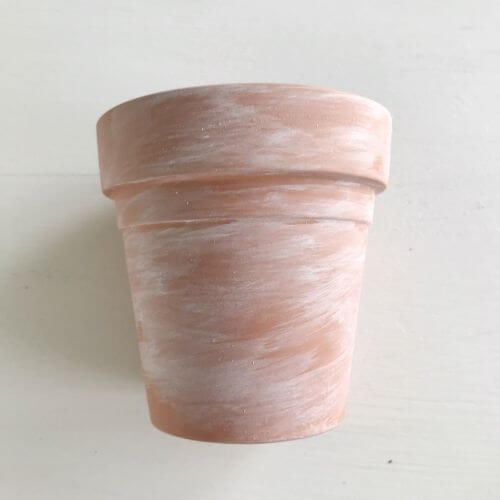
Mix Baking Soda and White Acrylic Paint
First, mix your baking soda and acrylic paint at a 1:1 ratio. I mixed about an ounce of each in an old plastic container I had on hand.
Apply to Clay Pot Using Chippy Paintbrush
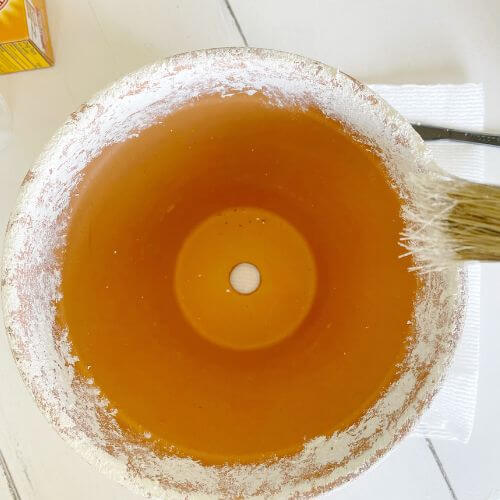
I dipped my chippy brush into the mixture, but before applying it to my clay pot I blotted it onto a paper towel.
Then I blotted it onto my pot. I did not use long paint strokes, but instead dabbed it onto the terra cotta planter with the end of the brush.
As you can see some areas had more of the mixture, and some had less. This gave the pot a varied, textured appearance.
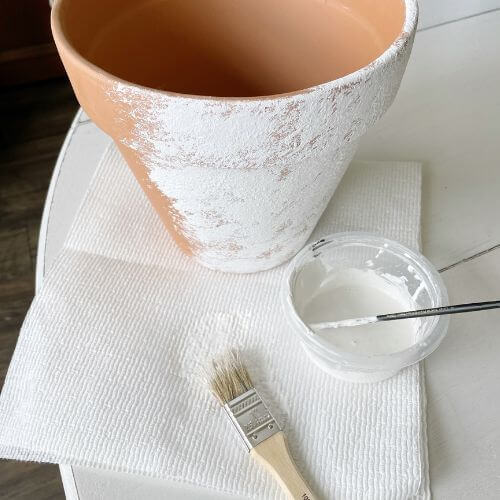
I blotted the paint/baking soda mix all over the pot and also applied it on the inside about an inch down. Basically, to where my soil line would be.
Optional – Can Apply Topcoat to Increase Durability
If left out in the weather, it will tend to wear away the finish. If you want to give more durability to your planter you can add a topcoat.
***UPDATE*** A reader had a great question…should you coat the inside of the pots with topcoat too? Well, I think it would give you a more long-lasting finish, since these clay pots are semi-permeable. The link for the results is below!
I ended up trying out two clear sealers for these aged terracotta pots and left them out in the weather for 4 weeks. Check out this link to see the results for which CLEAR SEALER had the BEST DURABILITY for protecting painted terracotta pots!
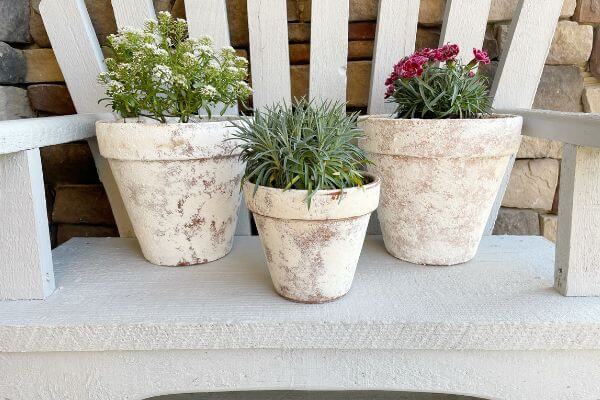
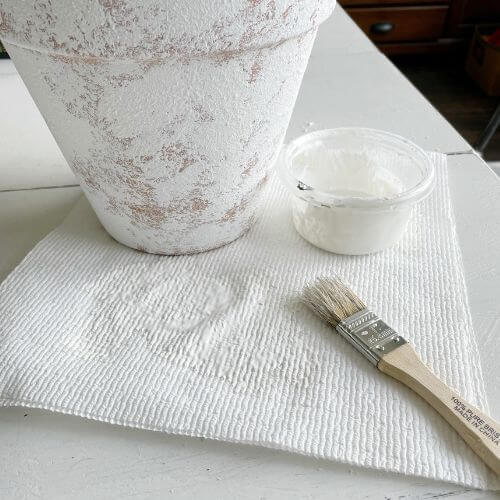
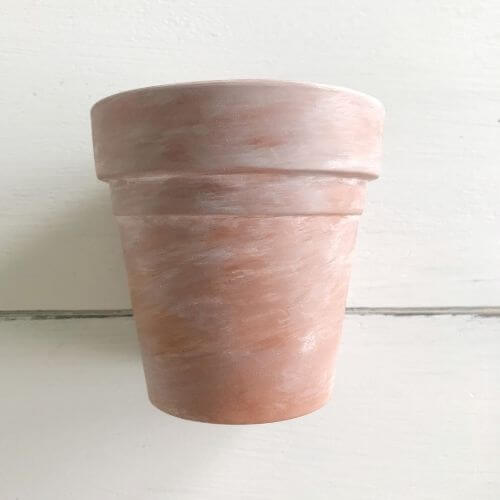
Allow to Dry and Add Your Favorite Plants
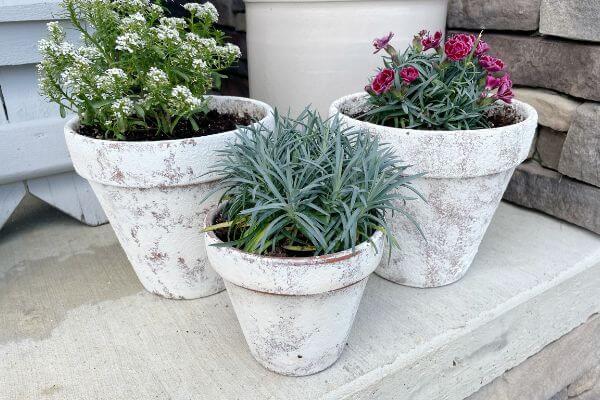
Allow your clay pot to dry overnight and then add your favorite plants! And that’s all it takes to create this textured aged finish on your terracotta pot!
Above are the finished terra cotta pots!
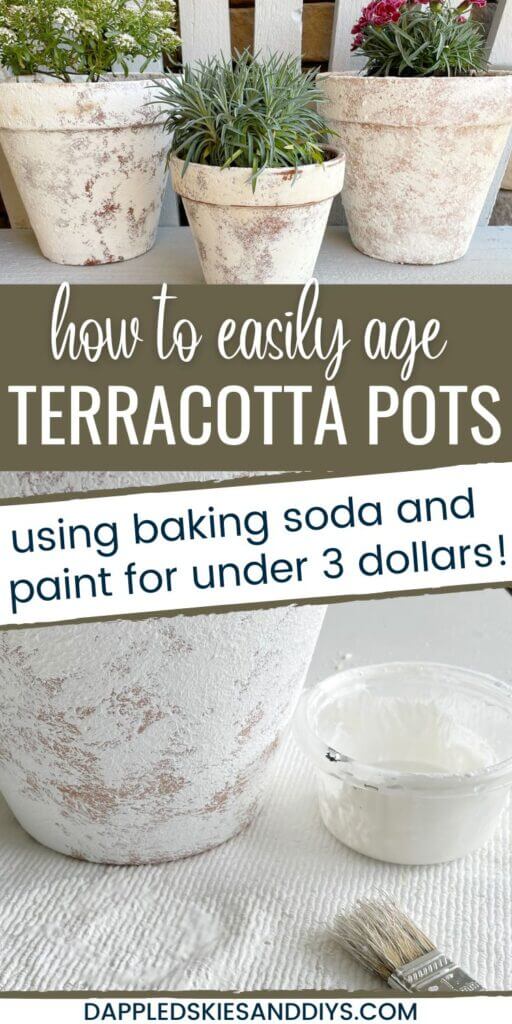
Consider pinning this post on Pinterest to save the idea! ⬇️
And for a way to add a faux stone finish to a vase using similar ingredients, be sure to check out this post… DIY Textured Vase
Now on to the next way to DIY clay planters…
Second DIY Idea – Aged Textured Planter DIY Using Paint/Baking Soda and Foam Brush
I saw these beautiful terra cotta planters from Pottery Barn (check them out here) and wanted to recreate the look for less! So, the second way uses just paint and a bit of baking soda to do this…let’s create!
Product List
- Antique Parchment paint (Walmart) – .50 cents
- Burnt Umber paint (Walmart) – .50 cents
- Baking soda – $1.00
- Sponge brush (Walmart) – $1.00
- Terra cotta pots (Hobby Lobby)
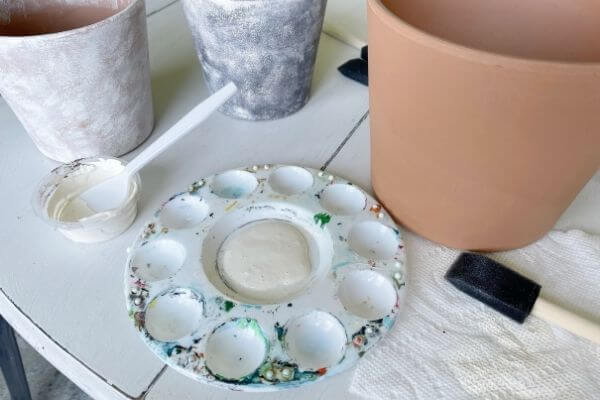
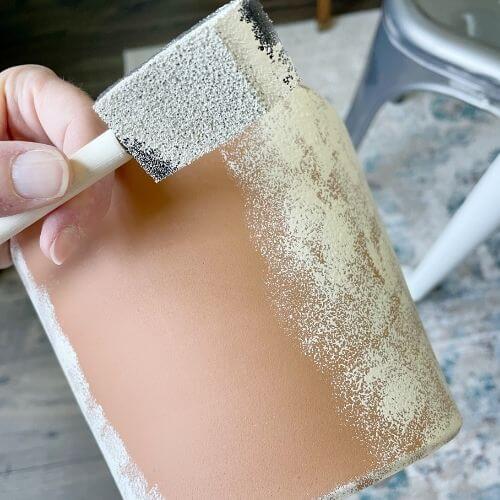
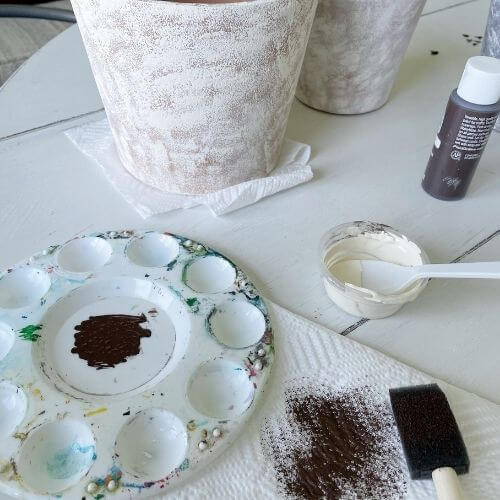
Mix Antique White Paint With Baking Soda and Apply to Clay Pot
First, mix just a bit of baking soda into your antique parchment paint in a small bowl. This is just to give it a little texture.
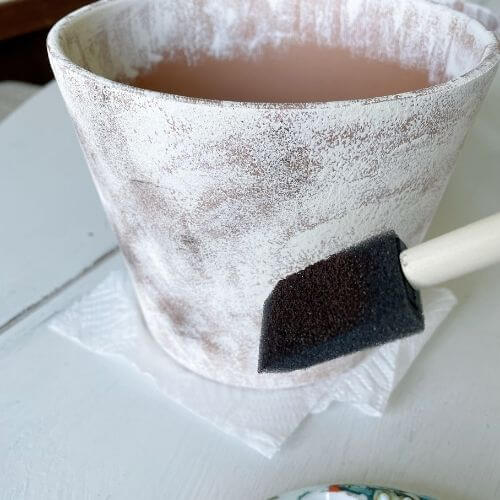
Next, take your sponge brush and dip the flat part into the paint/baking soda mixture. The next thing you want to do is blot it onto a paper towel. This removes any thick painted areas.
Then gently blot it onto your clay pot. Do this slowly and carefully so as not to make too many thick areas. You want the texture of the sponge brush to show on the terra cotta pot.
Complete this by blotting the sponge all over your terra cotta pot.
Below are the steps in pictures.
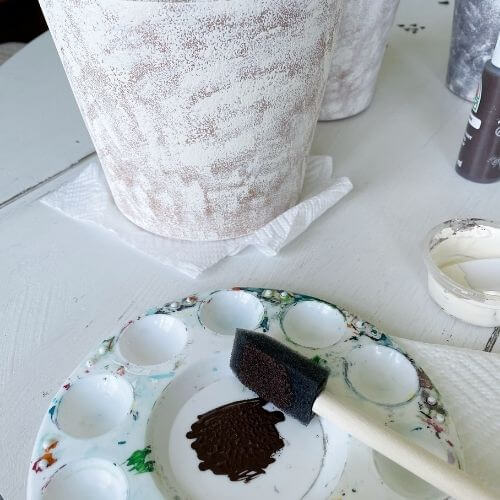
Apply Burnt Umber Paint to Planter
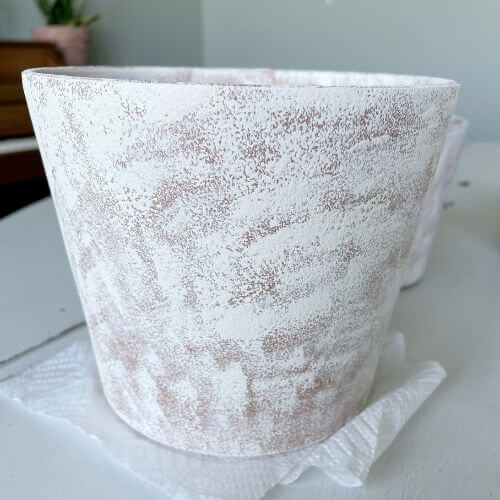
The first picture below is how the pot looked after applying the Antique Parchment paint mixed with baking soda.
After allowing about 1-2 hours for dry time, I applied some of the Burnt Umber paint to my paint tray and used it in the same fashion. Minus the baking soda, however.
I dipped the flat side of my sponge brush into the Burnt Umber paint and then blotted it on the paper towel.
Then I applied it to my pot only in random areas, not all over. This gave the terra cotta pot a little more depth.
A little trick – if you get too much in one area, then you can sand it off when dry.
Add Your Plant and Display Your DIY Textured Terra Cotta Pot
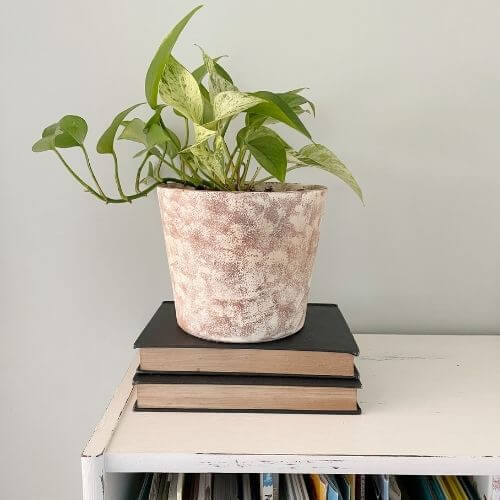
This is the finished product! Do you think this dupe was a #failedit or #nailedit compared to the pottery barn planter?
I love the texture that the planter has because of the baking soda and feel that the colors give it an aged appearance.
And the Antique Parchment paint is the perfect color because it’s not too bright white!
All in all, I’m happy with how this terra cotta pot DIY turned out. And the paint, baking soda and brushes came in under 3.00. Win-win!
But that’s not all…let’s look at just one more way to create an aged look.
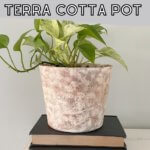
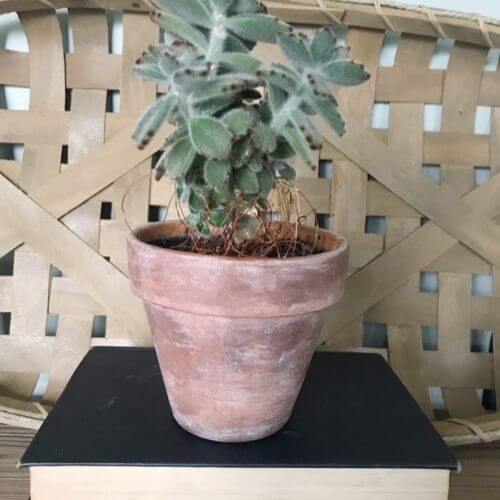
Third DIY Idea – Creating Your Vintage Clay Pot Using Paint/Stain
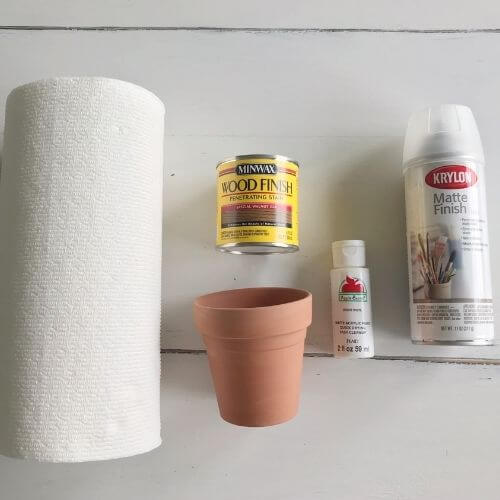
Products used for this are a terra cotta pot, white acrylic paint, special walnut stain, and Krylon matte clear spray. Oh, and a bit of water and some paper towels too.
Apply the White Paint to Your Terra Cotta Pot
First, I diluted the paint with water at a 1:1 ratio in a small medicine cup. You don’t need much…I used 5 ml of water and 5 ml of paint.
Next I used a paper towel to apply the paint to the terra cotta pot. I used a horizontal stroke to lightly coat the pot.
It doesn’t have to be even or cover every area, so don’t worry about perfection here!
Then I used a damp paper towel to blend any areas that looked too thick.
Apply the Stain to Your Clay Pot
Next, I used the stain to make the same horizontal strokes on the terra cotta pot. Some of the strokes covered over the white which worked out well!
I love how the white and dark combine to make the terra cotta pot look aged! You may need to use extra paper towels to blend the white or stain in different areas.
I used dry paper towels to remove excess stain. Apply and blend until you get the exact look you want!!
Coat Your Newly Aged Terra Cotta Pot with Topcoat
I waited about two hours before applying my topcoat to the terra cotta pot. The dry time for the Krylon matte spray is also two hours.
Now this is an optional step. I’ve made some without coating them with topcoat and they are holding up well!
But if you want a little extra protection for your paint then adding the topcoat is a good option!
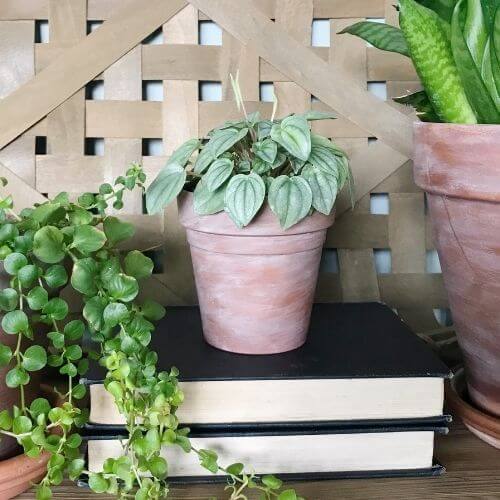
After I was done with the aging process, I added this sweet little Peperomia plant into my newly aged terra cotta pot! This is the finished product! Here are some items you can use for this DIY on Amazon!
This post contains affiliate links. As an Amazon Associate, I earn from qualifying purchases. This means when you click a link, I may earn a small commission at no cost to you. This helps me to run this website. Thanks in advance for your support!
Product List
- 6″ terra cotta pots
- 4″ terra cotta pots
- Special walnut stain, quart (I have the 1/2 pint)
- White acrylic paint
- Krylon matte clear spray
- Paper towels
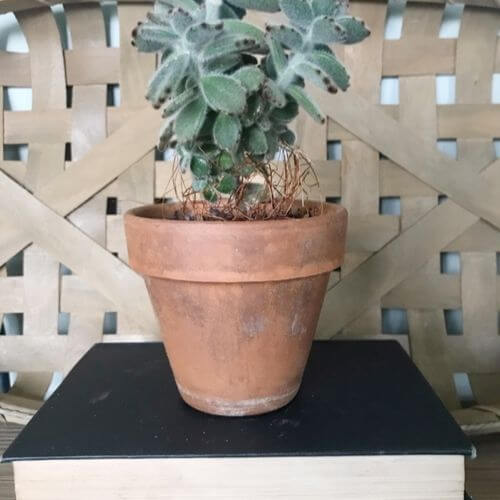
Here is an example of an older terra cotta pot that I aged using this technique! I diluted the paint a little bit more with this pot using four parts water to one part acrylic white paint.
I then applied the stain. The white effect is a little more subtle. Each terra cotta pot that you age can look a little different which I love!
Just one more tip! I’d probably recommend coating the inside of the pot with shellac if you are planting something edible such as an herb. That way the chemicals from the stain don’t leach into the soil. My favorite nontoxic shellac is here!
Final Thoughts on Aged Terra Cotta Planter
All of these DIY-aged planters use inexpensive materials to create a vintage appearance.
My initial post on this project was the paint/stain version. However, I was looking for some alternative ways to create an aged look. And the baking soda/paint versions were both easy and budget-friendly!
I also love that my updated DIYs used baking soda to add texture to the aged finish.
So, which one was your favorite? Tell me in the comments!
Related Posts for Budget Friendly Planter DIY
How to Make a Rope Wrapped Planter DIY
Now, who’s ready to try out an aged terra cotta planter DIY? Grab a few clay pots and make those new orange pots look old and vintage! And be sure to grab a few hardy plants to display too.
Please consider subscribing to my newsletter below for unique DIYs delivered right to your inbox! 👇
Thank you
Great idea, can’t wait to try this.
Hi there! Thanks so much for your comment! 😊 I have a post about which sealer performed the best for the pots (it’s linked within the post), if you’d like to check that out too!
Could you use different color paint? Other than white ?
Hello! I think another color would look great too! I may have to try it myself! Another reader shared a comment about topcoats and coating the inside of the pot. It gave me a great idea for writing a post about durability of this baking soda/paint finish with different topcoats. I’ll just need a few weeks to experiment, but I’ll share it when it’s completed. Thanks so much for your comment! 😊
Hi there! The results of the experiment for different topcoats for the aged terracotta pots are in! In case you’d like to check them out in my latest post! 😊
Don’t painted terra cotta pots need to be sealed inside also??
Hi there! I did not, but I think that’s a great idea, since clay pots are semi-permeable, and it may help give you a more long-lasting finish. You’ve given me a great idea for a post about trialing different topcoats on these planters! Give me just a few weeks and I’ll comment again when it’s completed! Thanks for your comment! 🙂
Hi there! The results of the experiment for sealing the aged terracotta pots are in! Check out my latest post! 😊