

This post is all about how to make these easy faux concrete planters with only 5 supplies, some of which you should definitely have on hand!
It seems I’m always on the hunt for ways to make pots look like concrete. Real concrete is so hard to move around, especially if it has a bunch of dirt in it! So faux concrete I found is absolutely the way to go!
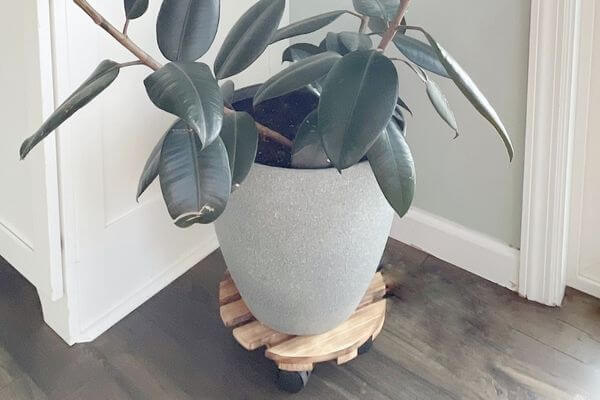
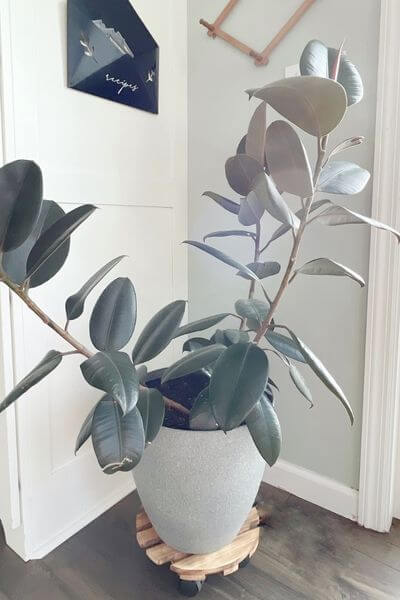
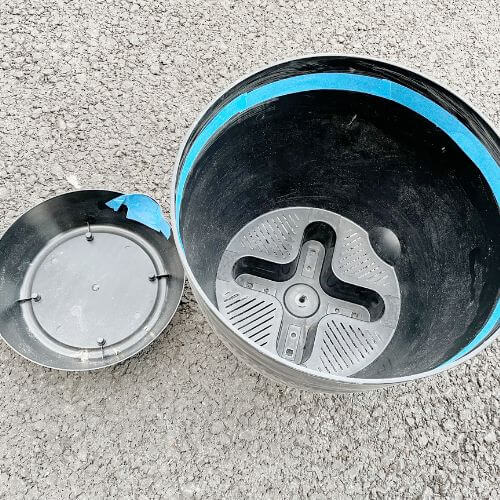
I had an old black self-watering pot at my house that had been sitting in the corner for way too long and gathering dust. I also had a rubber tree plant that had outgrown its container.
So, as I was browsing the paint section at Walmart, I found this spray that makes things look like concrete! And I thought, well it’s definitely worth a try to make my old plastic planter look like cement!
This DIY actually couldn’t be much easier. All it takes is 5 supplies and you’ll be good to go! And some of them I’m sure you should have on hand at your home already!
Supplies for Faux Concrete Planter DIY
Five simple supplies are all that’s needed for this DIY. Here they are!
This post contains affiliate links. As an Amazon Associate, I earn from qualifying purchases. This means when you click a link, I may earn a small commission at no cost to you. This helps me to run this website. Thanks in advance for your support!
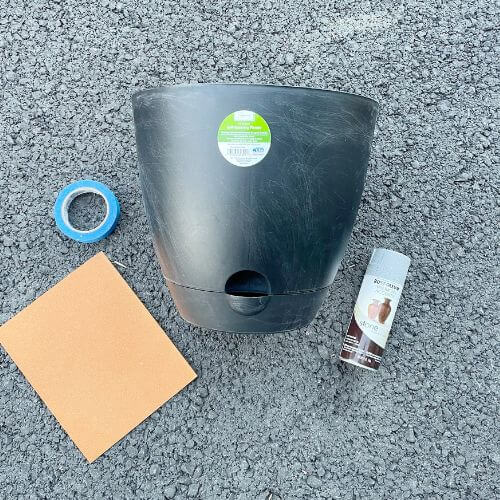
- Plastic Self-Watering Planter – Walmart
- Rust-oleum Gray Stone Textured Finish Spray – Amazon or Walmart
- Paper Towels (not pictured)
- Painter’s Tape – Walmart
- Sandpaper – Walmart
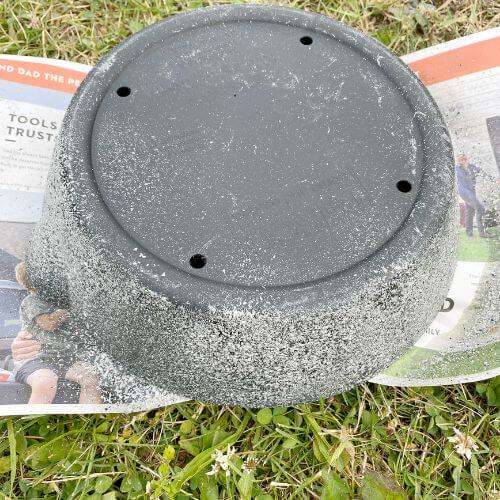
Scuff Up the Outside of Self-Watering Plastic Pot
The first step is to just scuff up your plastic planter with sandpaper. I would use whatever you have on hand, mine was 180 grit.
It took me just a few minutes to do a quick scuff of the surface of the pot. You can see in the supplies picture above that I’ve already scuffed it.
Cover the Inside of Your Planter
First, I used my painter’s tape to make a line around the inside of my pot. This would be the line I stopped my spray at, so the inside wasn’t coated with the cement spray paint. I also put a little tape in that hole that allows you to put water in the planter.
I tried several ways to fill the pot so that the spray didn’t get down in there. The first time I just stuffed old newspaper in there. That wasn’t the best way to do it though, I learned this several sprays later.
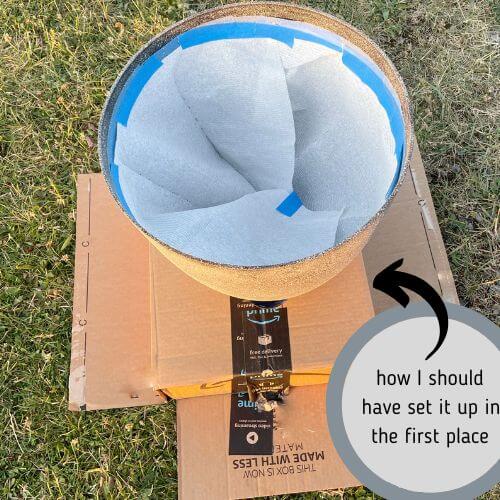
This is the absolute best way I found to set up your planter to prepare for spraying!
Spray Coat #1 for Soon-to-Be Concrete Look Planter
This was the first coat of spray. I held the can about 10 inches away from the pot as recommended and then did light horizontal strokes. I moved around the pot until all the surfaces were coated, including the inside up to my tape line.
It was pretty wet to the touch (try not to touch it!) when I was finished with this coat.
And quite honestly at this point, sadly I thought this DIY was going to be a fail. But keep reading!!
I dragged it inside my garage for the night so it could dry.
That’s why it would be so nice to have started with it on the old amazon box instead of newspaper! It makes it so much easier to drag in and out of the garage too!
Spray Coat #2 for DIY Faux Cement Planter
Concrete spray number 2 started to look a little bit better. I repeated the same process as noted above holding the can about 10 inches away.
However, there were still some areas where the black color of my plastic planter was showing through. It still looked pretty rough though.
So, I dragged it back into the garage for another night. Sigh.
Spray Coat #3 for this Faux Concrete Planter Project
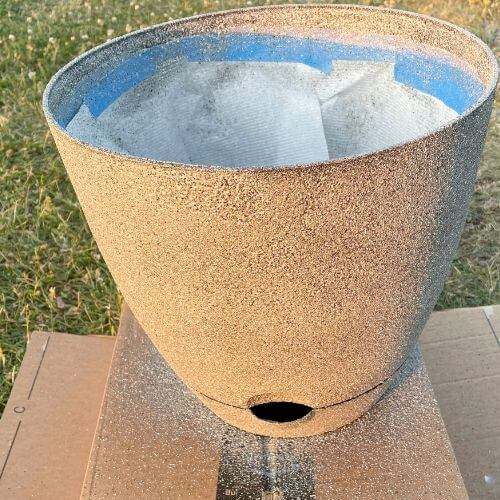
I think this is when I got the bright idea to put it up on the Amazon box. And to tape paper towels inside!
I sprayed all the surfaces outside, as well as inside above my tape line. The paper towels kept the excess out well.
The plastic pot was starting to look more like a concrete planter now. Woohoo!
Back into the garage it went for the night.
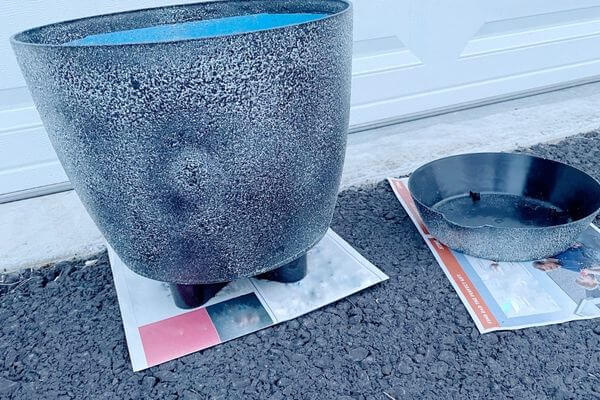
Spray Coat #4 – Final Touch Up Spray

This last coat was just to touch up any areas that might have a little bit of black plastic showing through.
And she was done!
Last Thoughts on How to Make this DIY Cement Planter Pot
So, just a few last thoughts.
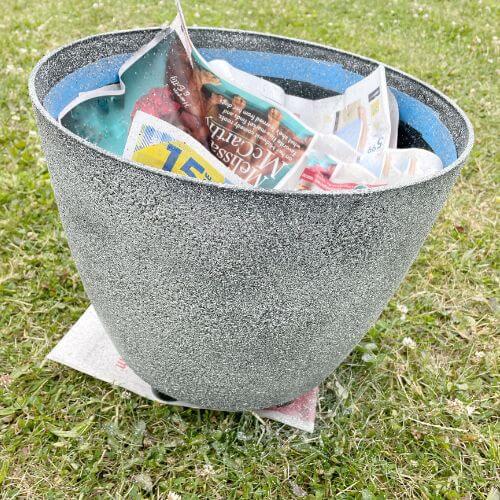
I was concerned about there being a line where the top and bottom parts of the planter come together. When I put the dirt in, however, it kind of compressed them together removing much of that seam. Here is a close-up pic of the seam.
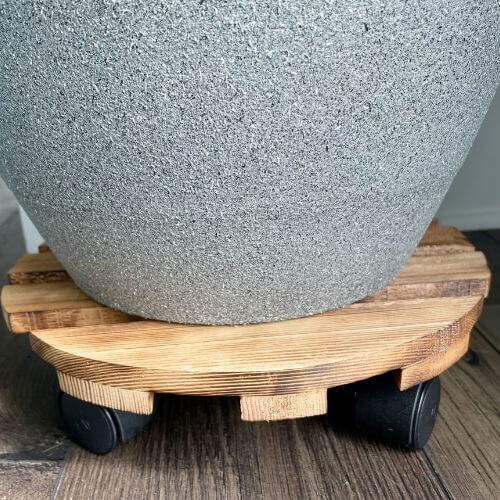
Also, this is strictly an indoor planter for me. I don’t think it will hold up with the weather beating on it but might do alright on a covered porch.
This looks so much like a cement planter, and it was so easy with only a few supplies to purchase! This textured spray paint also comes in a variety of different colors…I used the Gray Stone color.
And the best part is, if you have an old plastic pot sitting in a corner somewhere you may only need to buy the stone spray! I would recommend a self-watering planter, so your faux cement finish isn’t sitting in water at its base.
Happy planting and, of course, DIYing!