


Did you ever wonder…how do I make a rope planter DIY at home? Well, then this is the post for you! And all you need is a plastic self-watering pot, rope, and a glue gun.
Hi there and welcome to autumn weather! Woohoo! I’m sort of still in summer mode, repotting a lot of my indoor plants as they’ve grown too big for their containers. But I sure am enjoying the cooler, crisper weather!
My snake plant has been growing a good bit lately and needed a new home. Fortunately, in the spring, I had purchased a 10-inch-high self-watering plastic planter that was pretty inexpensive, I’m thinking it was 3.00 to 5.00 at Walmart.
I also had some sisal rope on hand from a previous DIY project. So, I decided to decorate my planter with the rope to create some texture.
I love to use natural materials and am drawn to products like yarn, cloth, jute twine, sisal and cotton rope, wood and the list could go on.
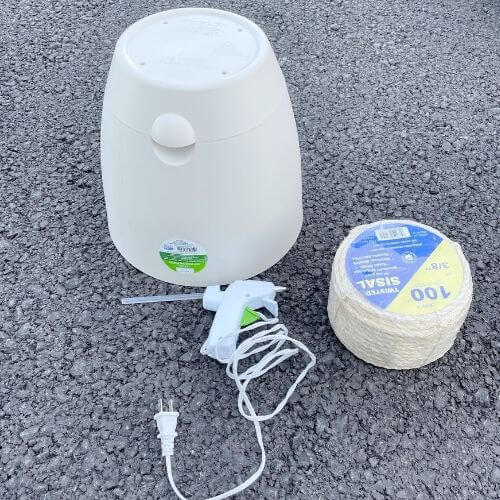
What’s great is that this is a super simple tutorial and I only needed three supplies. Rope, a plastic (self-watering) planter, and a glue gun. Oh, and maybe a pair of scissors too that you have on hand.
And when you’re done you get a custom-made rope planter that looks like you’ve spent a lot of money. The whole project cost me under 20 dollars. I did have the glue gun and glue sticks on hand, however.
Supplies for Rope Wrapped Planter
This post contains affiliate links. As an Amazon Associate, I earn from qualifying purchases. This means when you click a link, I may earn a small commission at no cost to you. This helps me to run this website. Thanks in advance for your support!
- Sisal Rope
- Self-watering planter
- Glue Gun
- Extra Glue Gun Sticks
- Scissors
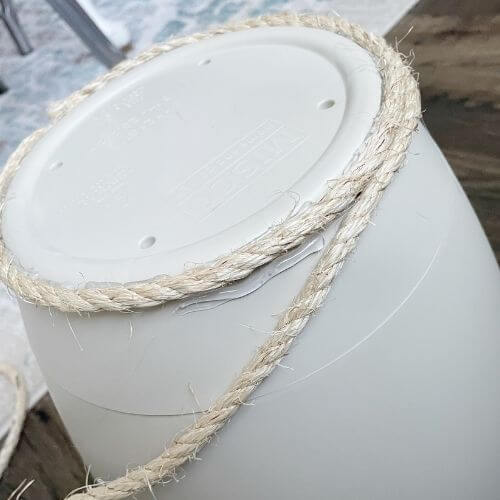
Use the Glue Gun to Secure Rope at Planter’s Base
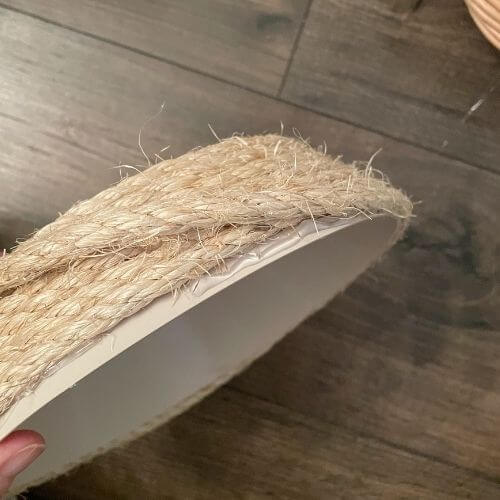
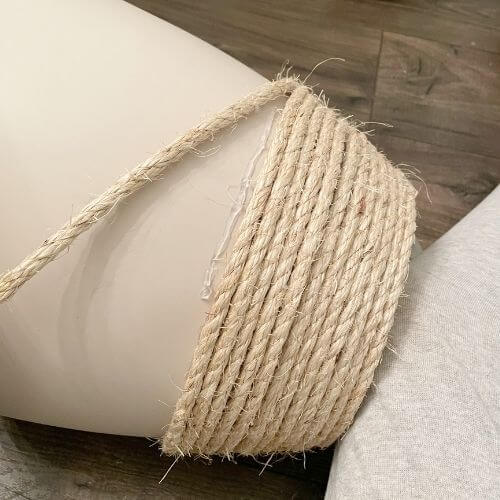
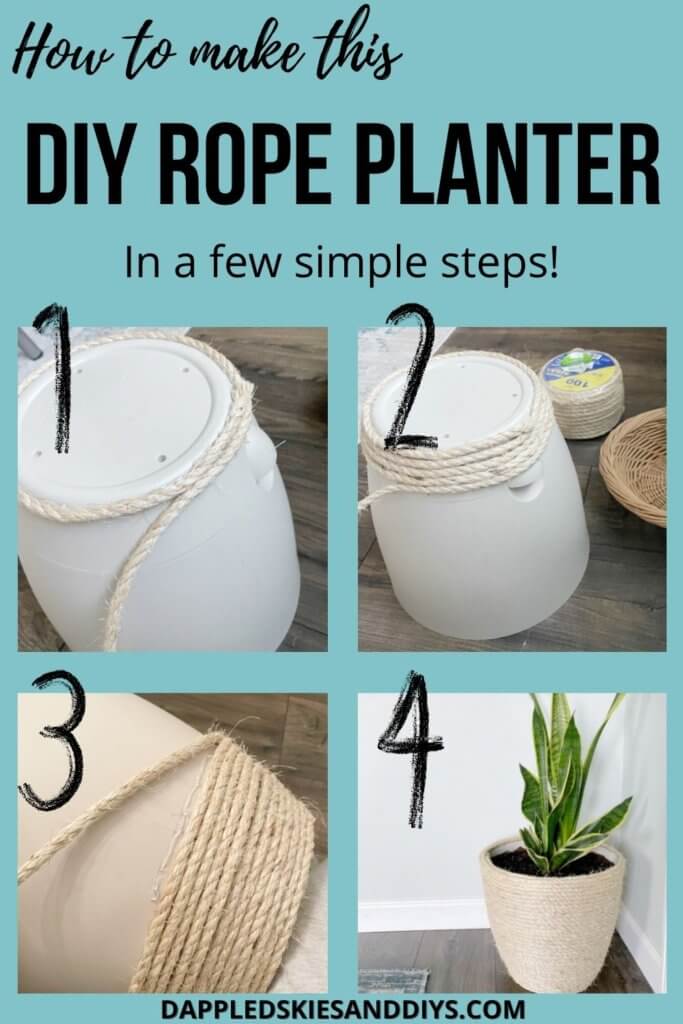
The first step is to secure the end of the rope using the glue gun at the bottom of the planter. Start on the side where the self-watering drainage hole is. That way you can face this part toward the wall if needed.
Then wrap it the whole way around the bottom using the glue gun in small sections as shown below.


Important to note is that by using a self-watering planter, you don’t have to worry about the rope getting wet and yucky at the bottom during watering.
Wrap Rope Around Entire Pot Base Securing with Glue
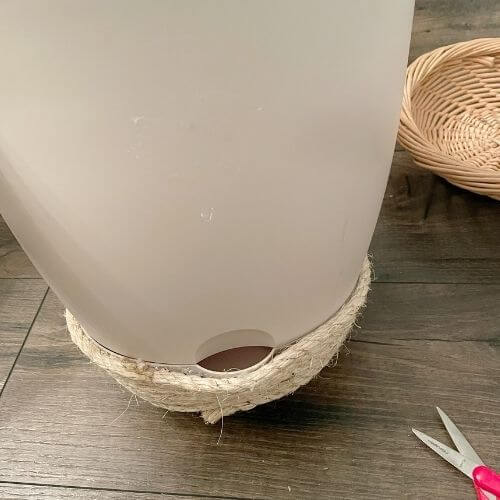
Continue to wrap sisal rope working around the entire base of the planter. When you get to the part that has a bump, just glue the rope over that too.
It’s easiest to work in small sections, making sure that the rope is wrapped around securely and butted up against the previous strand. This helps it look cohesive and doesn’t leave any gaps.

Hot glue the rope right up to the edge of your self-watering planter base (as shown in the below pics). When you have the bottom of the plastic pot finished, cut the end of the rope and secure it with the hot glue gun. Blend it in as much as possible with the previous strands of rope.
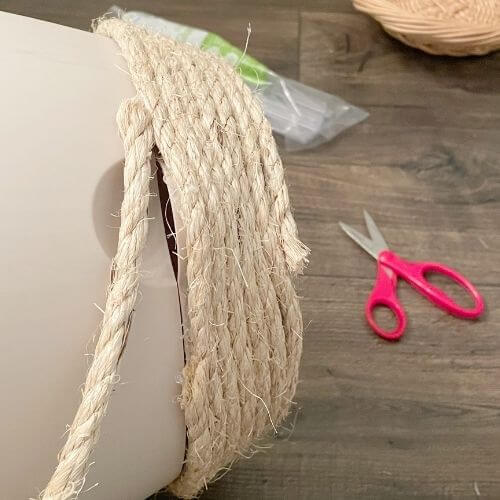
Next, Glue Rope Around Main Part of Plastic Pot
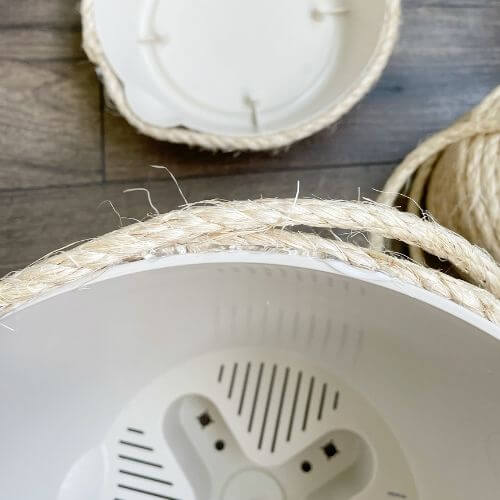
Start again with a new piece of rope right about where the self-watering indent it. Glue all the rope all the way around with the base connected to ensure there will be no gaps.
After you’ve made your first circle around the main part of the pot (as shown below), pull the base off to ensure that the glue hasn’t connected the two parts of the pot. This is an IMPORTANT step because you want to make sure that the parts of the pot will be able to be disconnected. And not hot glued together!
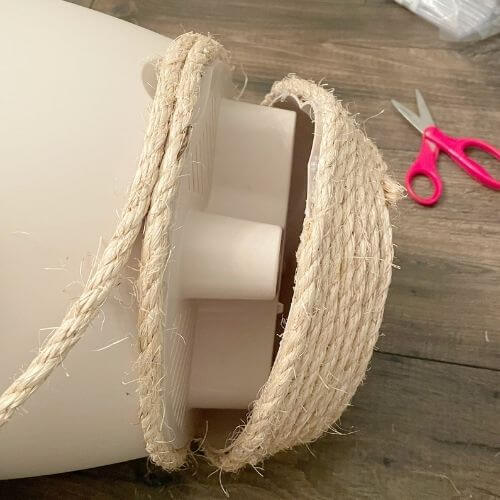
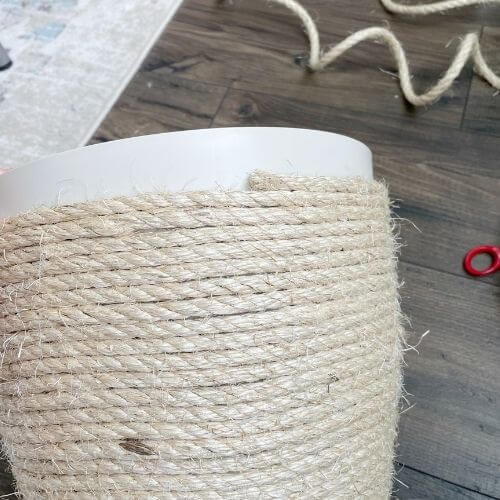
Continue to wrap your sisal rope all around the main part of your plastic planter. I found it was easiest to hold the pot between my knees and spin it as I went. I continued to work in small sections with the hot glue, which worked out well.
However, that second picture shows how I ran out of rope 🙃. I was actually using extra from another project I had done for a rope tree collar DIY, and I ran out of rope. I then started with another strand and blended the two pieces in.
Finish Up Your Rope Planter DIY
Lastly, I hot glued up around the edge of the planter and made one strand down inside the pot. This was so that when I cut the rope the edge of it would be inside the planter and wouldn’t be visible.
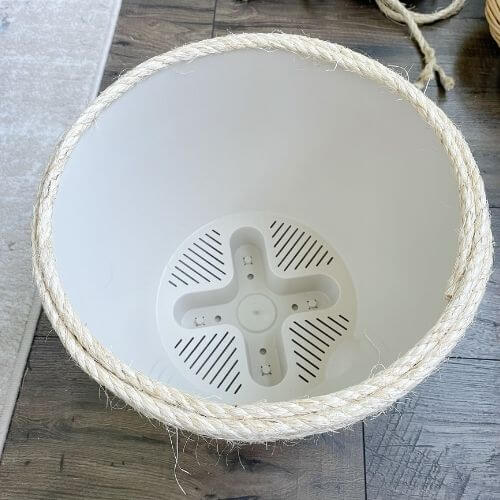
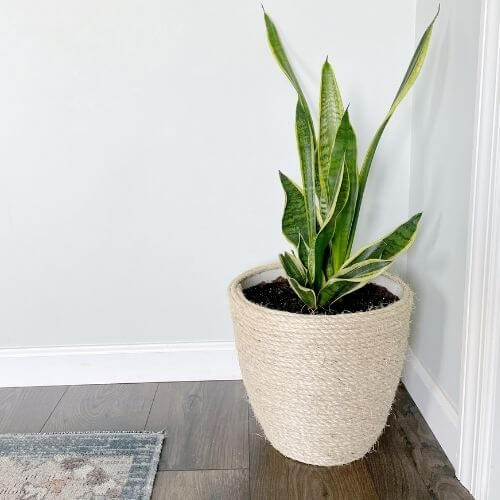
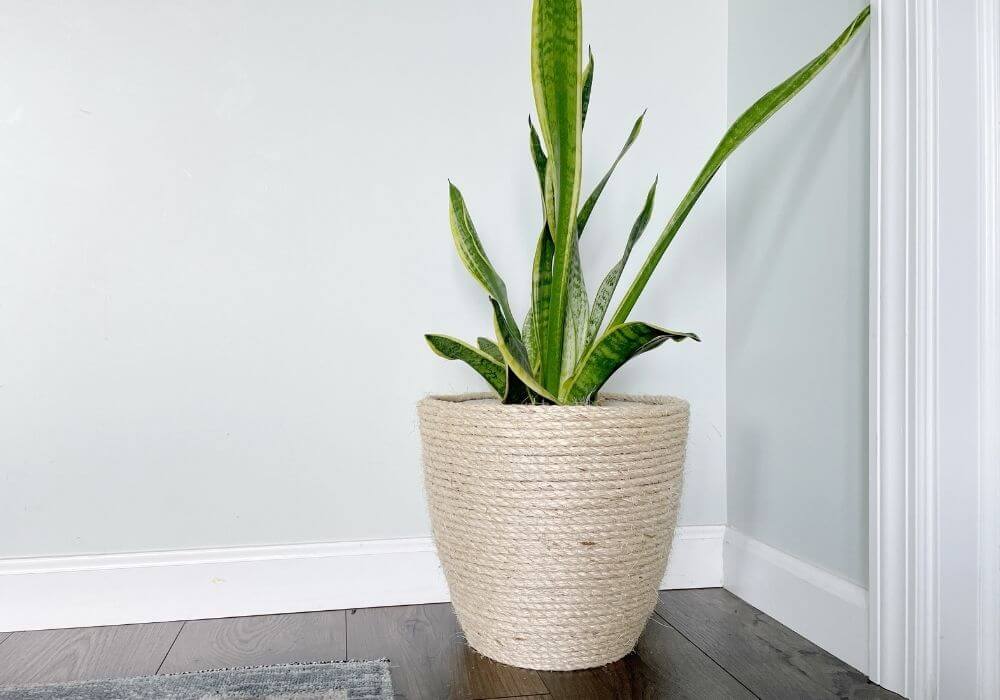
The finished product looks like this! Hoping my snake plant will be happy in its new home!
Final Thoughts on Planter DIY Using Rope and Hot Glue
Some final thoughts on this DIY planter project, first a bit about self-watering pots…
It’s pretty important to purchase a self-watering planter as then you won’t have to worry about an external base, and your rope getting wet and yucky.
Fortunately, they are usually pretty inexpensive! I grabbed mine for under 5 dollars at Walmart. Just FYI it was labeled an 11.5 inch (must be the top width) but it was only about 10.5 inches high.
Oh, and just to note too, I myself, do NOT use these self-waterers correctly. I still water from the top (even though it’s a self-waterer). For the first few waterings, I get an idea of how much I need so that just a little drains out the bottom. That way it doesn’t overflow the base.
If you wanted to use it as a self-waterer is intended, then I would just cut out some of the rope where the opening is to allow for watering. Or make sure there is a gap when you’re wrapping your rope. Does this make sense? 😉
For additional information, here’s a good post on self-watering containers from mindbodygreen.com.
And a bit about the rope…
The rope that I linked to at the beginning of the post is 100 feet long. I measured it out and mine (about 10.5 inches high) would have been fine with just one coil of the 100-foot rope.
However, planters do come in all different widths and sizes. You most likely will only need one set of rope if you get a planter about my height, but I can’t guarantee that.
I do really like the texture that the sisal rope gives the planter, and it sure did spice up this plastic pot! And the whole project cost me under 20 dollars (although I did have the glue gun and sticks on hand).
If you have any questions, please leave me a comment, and, as always, happy DIYing!
Related Articles for Indoor Plant Decor
DIY Faux Cement Planter Using Plastic Self-Watering Pot
8 Nearly Impossible-to-Kill Houseplants for Your Home
This rope plastic pot DIY is inexpensive to create but gives you a higher-end planter look. And with only 3 supplies (rope, plastic pot, glue gun) it’s a win-win-win!
Pin me on Pinterest! ⬇️
Please consider subscribing to my email newsletter below for more DIY ideas delivered right to your inbox! 👇
Could you use clear glue?
Hello there and thanks for the comment on this post! There are a lot of different types of clear glue. I would think you could use a strong clear glue like E6000 or silicone glue, however I haven’t tried out any other glues for this project. An advantage of hot glue is that it dries and adheres faster than other glues, which makes the project quicker to complete. With the other glues, you may have to hold the rope on for a longer time (as you wrap it) to allow the glue to adhere. If you try out another kind of glue, definitely let me know how it turns out! Hope that helps! 🙂
is every bit of the rope hot glued, or only jut sections?
Hi there! I applied the glue to the pot, and then pressed the rope onto the glue. I applied a little line of glue at a time. Then pressed the rope onto the glue, making sure it was butted up against the previous strand. But yes, every bit of the rope has glue between itself and the pot, so that it stays in place better. If this didn’t answer the question, then reply back and I will try to explain it better. Thanks so much for reading! 🙂
I have the same pot and I didn’t know until now that they are self watering. How do you use it as self watering por? Thank you
Hi Janice! In this tutorial I used mine just for regular waterings at the top. If you plan to use this as a self-watering planter, you’ll need to either leave a gap by the hole or cut the rope a bit to allow access to the hole for watering. To use it as a self-waterer, you just fill the base with water through the hole and add more when the water gets low. The article from mindbodygreen.com I linked to toward the end of this post explains more about it and says it’s usually about every 3 weeks depending on the plant. A self-waterer isn’t recommended for shallow rooted plants, such as succulents, like the snake plant I have in there. So, I guess it depends on the type of plant you plan to put in there too. Hope this information helps! Thanks for your comment and if you have any other questions just let me know! 🙂