

Want to make a Valentine’s Day no-sew gnome with all Dollar Tree supplies? Read on…all you’ll need to have on hand for this Valentine DIY is a glue gun, a fork, and scissors.
Gnomes are pretty popular right now. I’ve been seeing them everywhere. From huge ones in storefront windows to pine trees made into gnomes (such a stinkin’ cute idea).
They’ve come a long way since the days when they used to be just cemented statues positioned within people’s gardens and lawns.
Dollar Tree even has some premade ones, but when I was there over the weekend, I gathered up some supplies to make a Valentine’s Day gnome.
And of course, it’s made to be “no-sew” to make the project super quick and easy! So on to the how-to of making these DIY Valentine gnomes.
Grab Your Supplies from Dollar Tree
This post contains affiliate links. As an Amazon Associate, I earn from qualifying purchases. This means when you click a link, I may earn a small commission at no cost to you. This helps me to run this website. Thanks in advance for your support!
All items are from the Dollar Tree except the glue gun, scissors, and fork.

- Floral Foam (3)
- Microfiber washcloths (pack of 3)
- Pom-Poms (not pictured)
- Satin Pillow Case
- Yarn
- Glue Gun (Amazon or Walmart)
- Scissors
- Fork
Create Your No-Sew Gnome Body
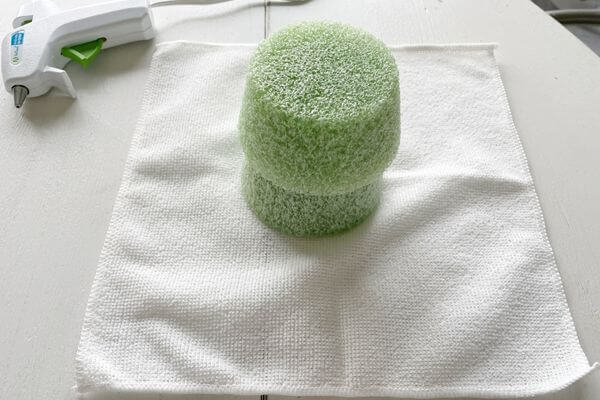
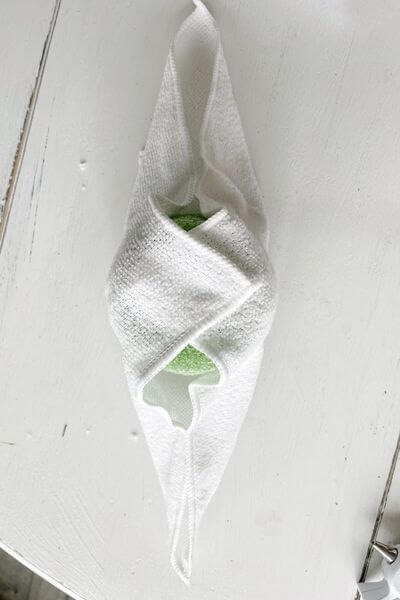
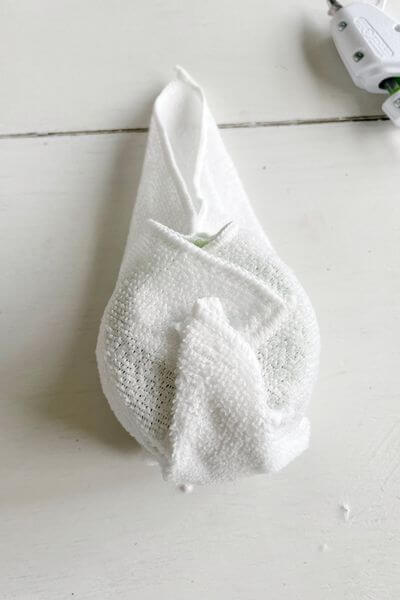
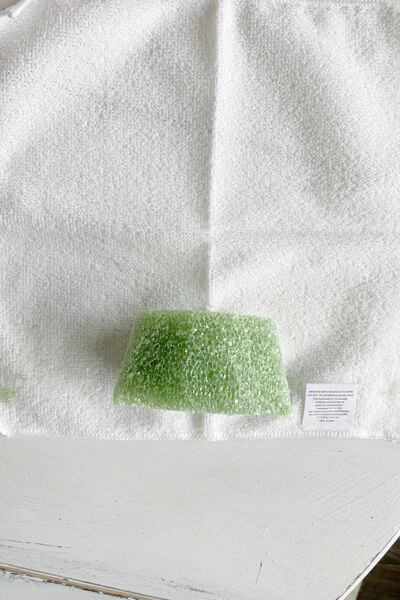
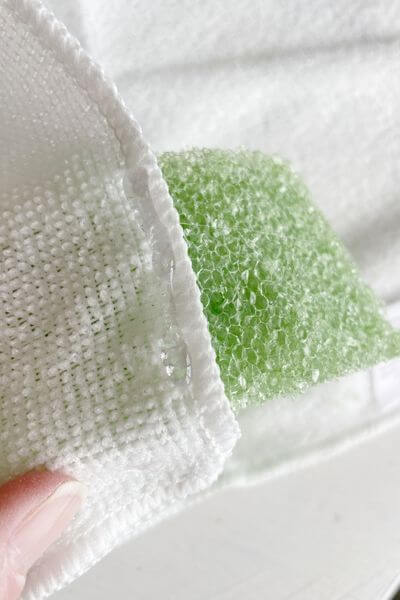
First, stack 2 foam cylinders in the middle of the microfiber cloth. Then, fold up 2 corners of the cloth and secure them with hot glue.
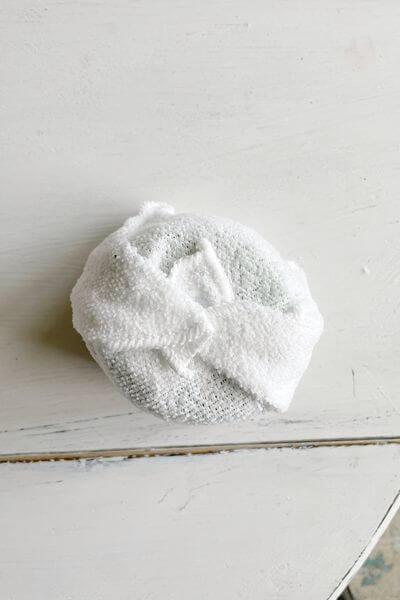
Next, fold up another corner and secure it with hot glue. Lastly, fold up the final corner and secure it. Your Valentine gnome body is complete!
Create the Yarn Beard for Valentine Gnome

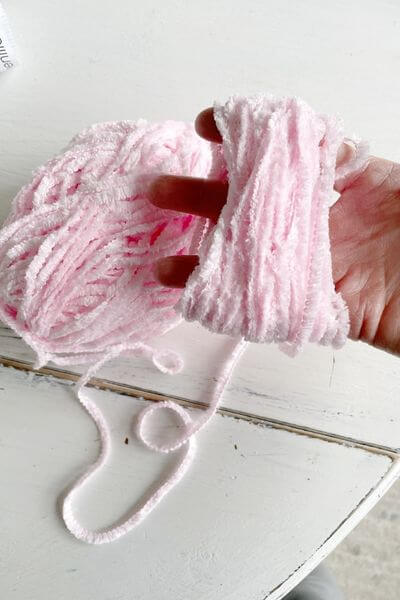
Begin by spreading your four fingers apart and begin wrapping the pink yarn around them. Continue wrapping…I wrapped mine around about 52 times.


Tie one side of the yarn. Then cut the other side. This will form your yarn beard tassel. Now the gnome beard is completed. Easy peasy!
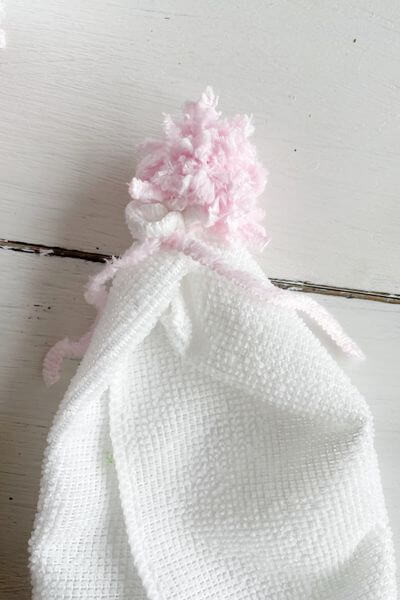
Attach the Yarn Beard Tassel to the Gnome Body
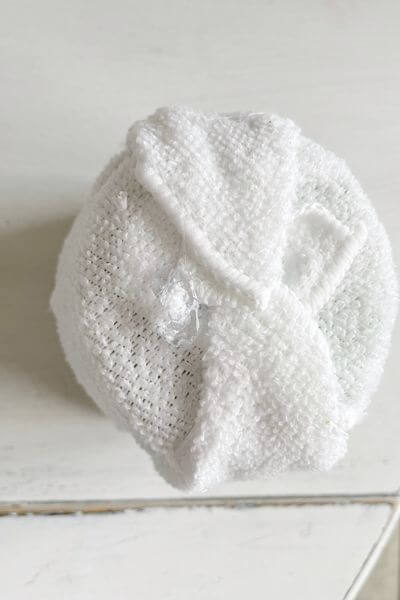

To attach the yarn beard to the body, put a glob of hot glue near the top edge. You can see it there on the left. Then place the knotted part of the yarn beard on the glue to adhere it to the top of the gnome’s body.
Ok now, all we have to do is make the hat for our gnome.
Create the No Sew Gnome Hat

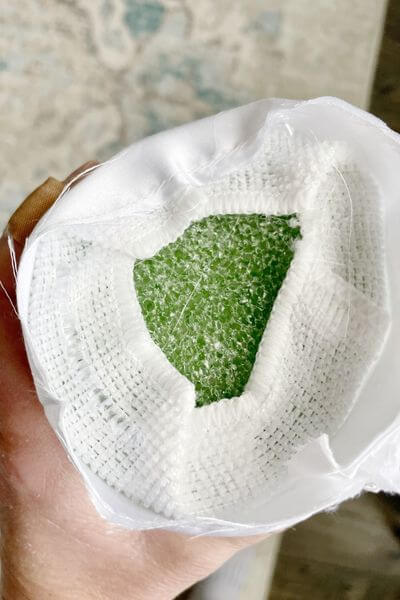
Use your 3rd piece of foam to make the gnome hat. First, trim off some of the foam so that your microfiber washcloth can fit all the way around.

Next, glue the microfiber ends together around the foam. Leave some excess at the bottom…judge how large you want your hat to be and adjust the excess at the bottom accordingly.

Finally, glue the excess microfiber cloth around the bottom of the foam.
Make the Pom-Pom for the Gnome Hat
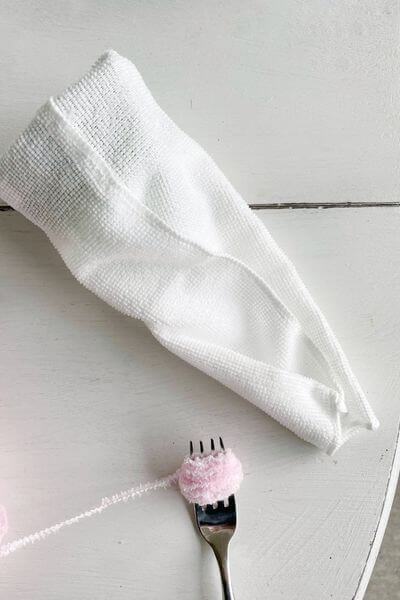

Wrap the yarn around the fork about 50 times. Next, tie it off in the middle leaving excess at the ends of the string as shown above. Remove the yarn from the fork.

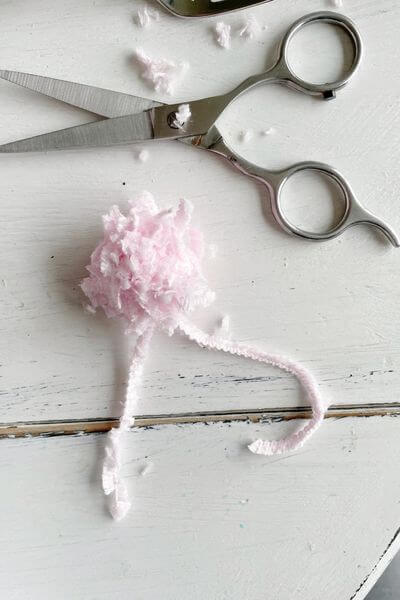
Cut both sides of the yarn, creating your pom-pom, and fluff it up. You should have two long ends of the yarn that you tied the pom-pom with.
Tie the Pom-Pom onto the Hat
Pinch the ends of the microfiber cloth together and tie on the pink pom-pom. You can also place a line of glue to secure the seams of the hat. However, I ended up stuffing some tissues into the hat at the end, to make it stand up.
So, I’d say it’s a good idea to wait until the end to seal up the seams of the gnome hat.
Dress Up the DIY Valentine Gnome with the Satin Pillowcase


Measure out the length of the satin pillowcase that’s needed to go around the hat. Then cut just above the seam of the pillowcase.
Wrap the satin around the hat and secure it with hot glue.

Hot glue the excess satin fabric around the bottom of your gnome hat. Decide how wide you want the “brim” to be and then hot glue the excess.
Cut out a few hearts in different sizes (I used 5 and they don’t have to be perfect since it adds to the homemade charm). Then hot glue them to your gnome hat to dress it up!
I ended up stuffing a few tissues in the hat so that it was able to stand up. That way you can see the hearts more easily. After that, I hot glued the seams.
You could also use batting if you have that on hand!
Hot Glue Pom-Pom Nose and Hat to the Gnome Body


Spread the middle of the yarn a bit and place a glob of glue onto the yarn beard. I used the hat to get an idea of where I wanted the pom-pom nose before applying the glue.
I tried out different pom-poms and a few wood beads (all from Dollar Tree) and decided on the pink pom-pom nose. The pink pom=pom that I used comes in a pack of pom-poms at the Dollar Tree.
Then, place lines of glue all over the top of the gnome’s body and place the gnome hat on top.
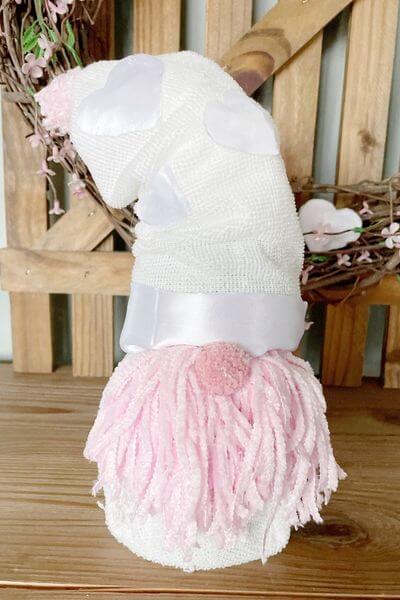
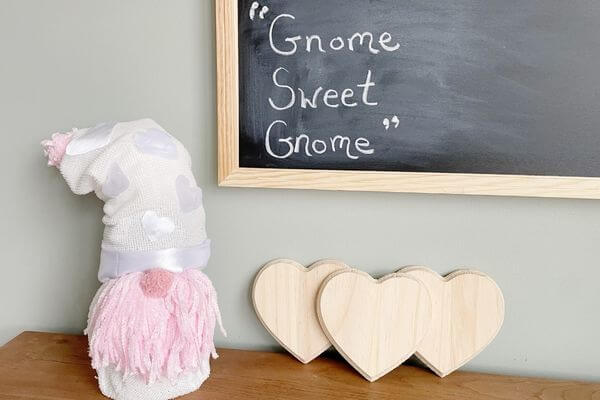
Your Dollar Tree Valentine’s Day gnome is complete! You can trim the beard as needed once this lil’ gnome is finished.
Final Thoughts on This Valentine Gnome DIY
Who knew you could make a Valentine gnome out of a pack of washcloths and a few other Dollar Tree supplies? One thing’s for sure, there’s always, always, always something interesting to find at Dollar Tree.
My favorite part is the hat with white satin hearts although the brim makes him look a little like a chef! 😉 You could eliminate the chef look by making the brim a little thinner when you’re crafting your own gnome.
I think this guy will blend right in with my other neutral farmhouse-style Valentine’s Day decor and add a touch of whimsy!
Related DIY Gnome Posts
Next time you’re by the Dollar Tree pick up washcloths, pom-poms, a pillowcase, foam, and some fluffy yarn and craft your own easy Dollar Tree Valentine’s Day gnome!
Pin me for Later!

This gnome is so cute!!
Thanks so much! More gnome crafts coming soon! 🤗