


In this how-to, let’s talk about some fun and easy faux concrete Easter egg DIY decor! I tried 2 different ways to get that cement look!
Concrete finishes give such a cool farmhouse industrial vibe to a space. I love all the cement and concrete looks out there, so I wanted to do some creating with Easter eggs this year!
Easter eggs are such a great sign of new life and spring! And why not examine a few different finishes to get that faux concrete look!
The first one is inspired by some concrete-look eggs with Easter words on them that I saw at Walmart.
The second one I’ve seen color-blocked on glass vases and is achieved by mixing together paint and baking soda.
Read on to see how these faux concrete DIY finishes came out and the different materials I used for the Easter eggs!
First Faux Concrete Easter Egg DIY Finish
As I was strolling through the Easter section at Walmart I noticed some faux concrete eggs with writing. I thought to myself that they might be a fun project to try.
Air-dry clay was something we had on hand that the kids use. As well as plastic Easter eggs I had collected over the years. I used some of the larger plastic eggs for this DIY.
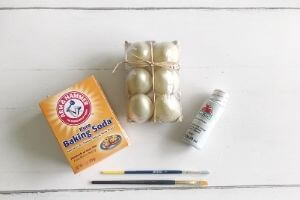
Supply List for Concrete-Look Using Different Paint Colors
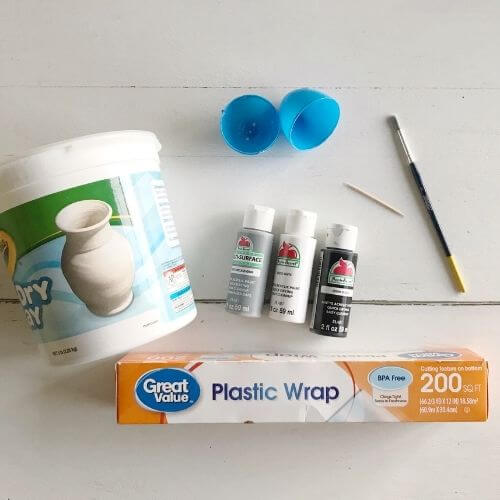
- Air dry clay
- Plastic Easter eggs
- Plastic wrap
- Multi Surface Acrylic Satin Paint in Timeless Gray
- Acrylic Matte Paint in Black
- Acrylic Matte Paint in White
- Toothpicks
- Craft Paintbrushes
*All supplies purchased at Walmart*
Create Your Easter Egg With Air Dry Clay
First, we’ll make the Easter egg using your plastic egg and air dry clay. Take 2 pieces of plastic wrap and push them into each side of the egg. This is so that the clay doesn’t stick.
Then using the air-dry clay, push that into both sides. Fill them just enough so that the clay is pretty flat, then push the two egg sides together.
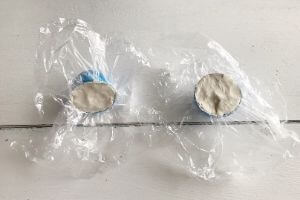
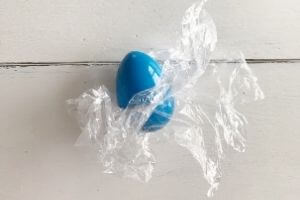
Next, remove the plastic eggs from the air dry clay. They won’t stick because of the plastic wrap!
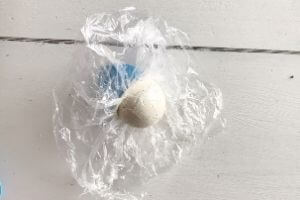
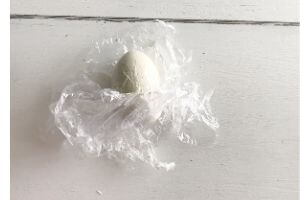
After pulling off the plastic wrap the egg will look a little wrinkly. I dipped my finger in water and smoothed out the edges and wrinkles.
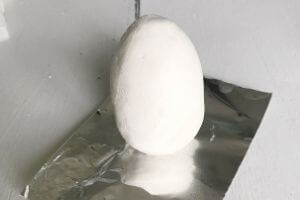
Place your clay on a non-stick surface such as tin foil. Be sure to flatten the bottom a bit so the egg will be able to stand up.
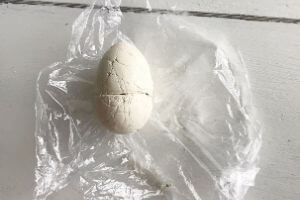
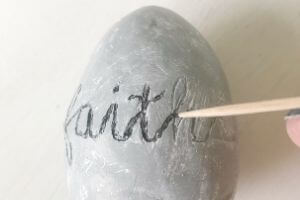
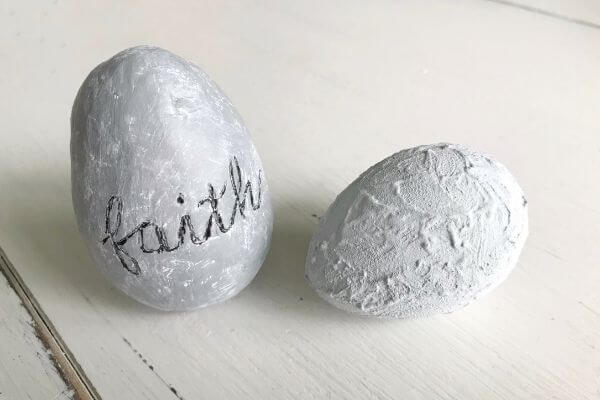
Then I used a toothpick to “carve” out the words “faith”, “grace” and “joy” on my eggs (shown below in the first picture).
You could use cursive words as I did, but printed ones would look great too!
I placed the words in the middle of my egg. Because the toothpick created a bumpy surface where it was carved, I smoothed the word out a bit by dipping my finger in water.
Then I allowed about 3 days for the clay to dry. You can tell when they are dry, as the clay changes color from grayish to white.
Paint Your Egg For Faux Concrete-Look
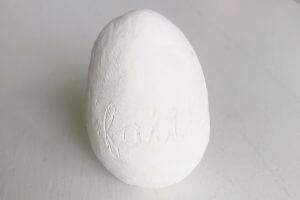
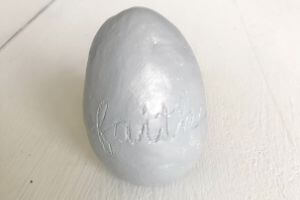
After the egg has dried, use “Timeless Gray” paint to coat the egg using a craft paintbrush. Mine looked like the one below.
Allow the gray paint to dry for at least an hour.
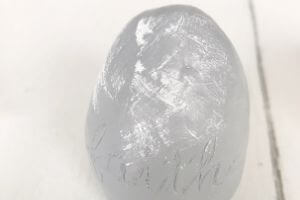
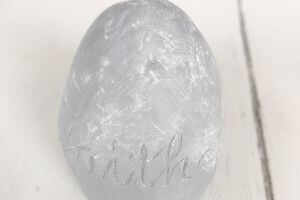
Next apply your white acrylic paint, using strokes going different directions as shown.
Immediately take a dampened paper towel and lighten/smear the white paint to obtain the concrete-look finish!
Our last step is to make the words stand out. Using black acrylic paint and a toothpick, I filled in the carved area that makes up the word “faith”.
It doesn’t have to look perfect, the air dry clay doesn’t allow for a completely flawless finish. I think that adds to the charm of it though!

Allow some time for the paint to dry, and then display your faux concrete Easter eggs!
I love that the words symbolize Easter and springtime and feel the concrete finish helps to achieve a farmhouse-style industrial look!
Now on to the second type of faux cement-look finish in this DIY! This one is even easier to achieve…read on!
Second Faux Concrete Egg DIY Finish
This finish achieves a faux concrete or cement look using baking soda.
Basically, you mix the paint and baking soda to the desired consistency and apply it to the surface. It sticks really well and I liked the texture that the baking soda adds!
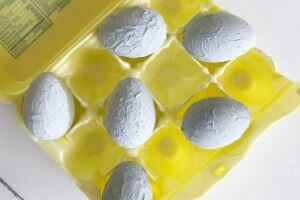
I found a set of 6 plastic eggs at the Dollar Tree, but you could easily use the plastic Easter eggs that many probably already have for egg hunts!
Supply List for Cement-Look Using Paint/Baking Soda
- Plastic eggs (Dollar Tree)
- Baking soda
- Granite Gray Matte Acrylic Paint
- Craft Paintbrushes
*All but the plastic eggs, were purchased at Walmart*
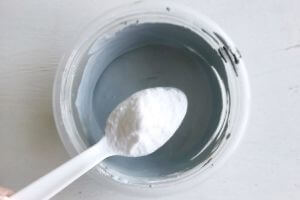
Mix Together Paint and Baking Soda
The first step is to mix your paint and baking soda together. I used Granite Gray acrylic paint for this finish.
Place 1 ounce of paint in a mixing bowl. I then added 6 teaspoonfuls (semi-heaping) one at a time to the paint. I mixed the paint after each teaspoonful of baking soda until I achieved the desired consistency.
Mine was grainy but I liked that look, it reminded me of concrete. If you want a more smooth finish do not add as many teaspoons of the baking soda.

Next, simply apply the mixture to your plastic eggs using a paintbrush. Coat half of the egg first and allow them to dry. I sat mine on an old egg carton I had on hand.
Allow the first half of the egg to dry for about an hour. I then turned it over and coated the other half and allowed it to dry resting on the egg carton.
This is shown in the pictures below.

Final Thoughts on the 2 Faux Concrete Egg Finishes
So which concrete look of these two is your favorite? Tell me down in the comments!
Personally, I like that the baking soda gives the egg both a cement finish and texture to go with it.
I also like the Granite Gray color a bit better than the Timeless Gray paint, but you could easily swap the colors out for that first tutorial.
I have both of these projects displayed in my home right now and feel like it creates a farmhouse-industrial sort of spring style.
I’m thinking of trying these finishes out on some pots and planters too. Bring on the spring vibes and flowers, my friends!
If you’re in the market for more spring decor, here’s a Spring wreath DIY that’s easy to create yourself!
Drop me a line with any questions and let me know if you have a favorite way of getting that sought after cement finish!