


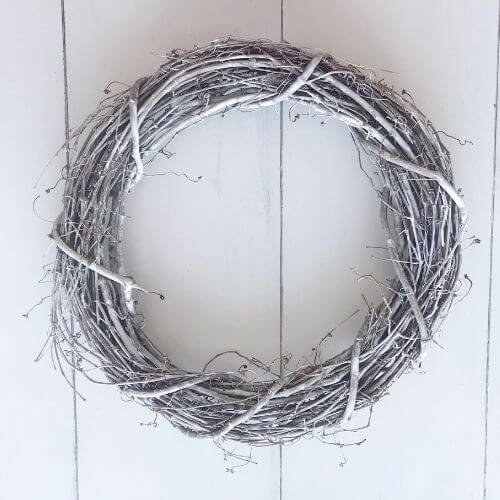
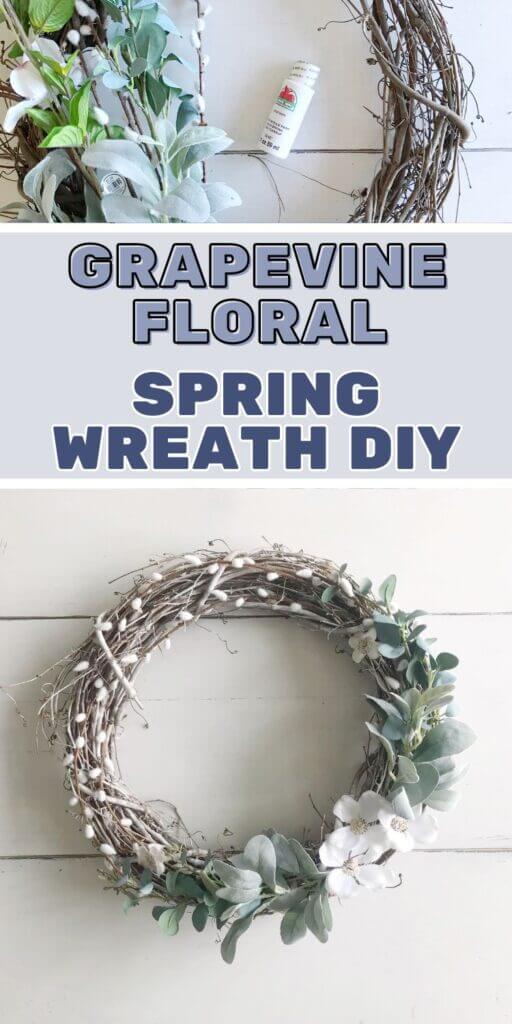
Let’s craft this DIY spring wreath using a grapevine wreath form, white acrylic paint, pussy willow stems, and florals!
Today, let’s create a DIY spring grapevine wreath. I don’t know what it is about wreaths, but I love them! Especially inexpensive ones that I can make myself.
They can be hung on front doors, window frames, signs, indoor walls, cabinets, the possibilities are endless.
If you read my DIY Valentine’s Day wreath post, this is the follow-up to that one. And if you created that wreath already then congrats, you are a step ahead. We’ll be turning that one into a wreath that is perfect for spring.
What’s great about this wreath too is the fact that the price tag comes in under 20 dollars. Frugality for the win! Read on to find out how to make a DIY spring grapevine wreath.

Grab Supplies For Your DIY Spring Grapevine Wreath

- 18″ Grapevine Wreath ($3.00 Hobby Lobby with 40% off coupon)
- White acrylic paint (.50 cents Walmart)
- Gray Pussy Willow Branch ($6.50 Hobby Lobby 1/2 off floral)
- Green Eucalyptus Spray ($3.00 Hobby Lobby 1/2 off floral)
- Lamb’s Ear Pick (2 for $2.00 at Walmart)
- White Dogwood Spray ($4.00 Hobby Lobby 1/2 off floral)
- TOTAL: $19.00 tax not included
For any of you that created the DIY Valentine’s Day wreath from my previous post, skip this next step. You already have the base for your spring wreath. You just need to remove your white dough hearts.
A quick tip: I never buy full-price faux floral at Hobby Lobby. Floral is 50% off every other week so it’s worth it to wait until it’s half off.
Paint Your Grapevine Wreath for Whitewash Effect
Using your white acrylic paint, dilute it slightly. A little over 3/4 parts paint to about 1/4 parts water will do the trick!
I just used one of those little medicine cups because a little goes a long way.
Then take a craft paintbrush, I used one that was flatter instead of rounded. Dip it into the paint, but before applying it to the wreath blot it on a paper towel.
Blotting on the paper towel is important because, if not, your wreath will have too much white.
A good idea is to test the technique on the back of the wreath first. That way you can get the technique right before applying paint to the “able to be seen” part!
Paint your wreath leaving some of the brown showing through. This gives it a bit of a whitewashed, dogwood bark effect.

Add Pussy Willow Branches to Your DIY Wreath
After the wreath has dried, then it’s time to weave in your pussy willow branches. Snip off the branches from the central stem and weave them into the wreath.
The reason I love these grapevine wreaths is that it’s so easy to change out stems! And they stick in there so well, that you really don’t need to use floral wire unless your wreath is in a particularly windy location!
Your DIY wreath should look like this when this step is completed.

Weave In Your Florals
I gathered one eucalyptus stem, two lambs ear picks, and one dogwood spray.

First I clipped the branches off the eucalyptus central stem. After I cut them, I had 3 branch pieces.
I put the larger piece toward the top of the wreath as shown, and 2 smaller ones toward the bottom.
I wove them in and arranged them until I liked the look.

Next, I used my 2 lambs ear picks (they come two in a pack at Walmart).
I cut a bit off the stem, about 3.5 inches.
Then I weaved them in, one just below each of the eucalyptus branches as shown.

Lastly, I clipped off several of the dogwood spray flowers and placed 3 larger ones between the other floral as shown.
I put 2 of the smaller ones at each end too. You could cut off and weave in as many as you like.
I didn’t secure mine with floral wire, but you could do so if you have any branches that are unruly and just won’t stick in there!
Wrapping Up the DIY Spring Wreath Tutorial
And that’s a wrap! Ready to hang on your front door or anywhere inside your home.
If you are a sucker for silvery-blue florals like I am, then this is just the wreath for you!
What I love about this DIY wreath too, is that it can carry you from winter to spring. And it’s simply by changing out some of the embellishments.
Hope you enjoyed this tutorial on how to make a DIY spring grapevine wreath. If you tried this project then let me know in the comments! As always, thanks so much for reading!
So, who’s ready to create a DIY grapevine wreath using paint and florals that’s perfect for spring?!
Pin me on Pinterest! ⬇️
Please consider subscribing to my email newsletter below for more DIY ideas delivered right to your inbox! 👇