


Top of the morning to ya! Ready for an easy St. Patty’s Day wreath DIY with farmhouse-style!
Back in the day, we used to celebrate St. Patrick’s Day by going to pubs to listen to Irish bands and drinking a bit of green beer.
These days, the leprechaun may visit us to pull some pranks and leave a few chocolate coins for us to find. Ah, how times do change, but each season brings good things and hopefully a little luck of the Irish with it!
I wasn’t planning on doing a St. Patrick’s Day DIY. However, I was in the Dollar Tree recently looking for gardening gloves and I spotted this cool shamrock-shaped wire wreath form.
I just had to buy it! And it was only a dollar, so I figured why not?
I also had some 6″ wide burlap ribbon that I figured I could put to use, that I dug out of my storage bins downstairs.
Read on for how to make this St. Patrick’s Day wreath with farmhouse-style!
Supplies for St. Patrick’s Day Wreath Farmhouse-Style
*Quick Note* I have not seen this shamrock form in my Dollar Tree this year (2023). I have only seen them on sites such as Etsy, Amazon, Walmart and Hobby Lobby (Hobby Lobby has one with green pipe cleaners that I assume are removable), but they are more money.
However, a reader was kind enough to let me know that they found one in their local Dollar Tree, so some stores are definitely carrying them! Yay! ☘️

- Wire Shamrock Form – Dollar Tree $1.25
- Burlap Ribbon – had on hand, but suggestions for this at the end of the post
- 5.5″ Green Burlap Ribbon – Walmart $4.47
- Scissors
- Patience 😉
Cut Your Burlap Ribbon to Tie on Shamrock Form
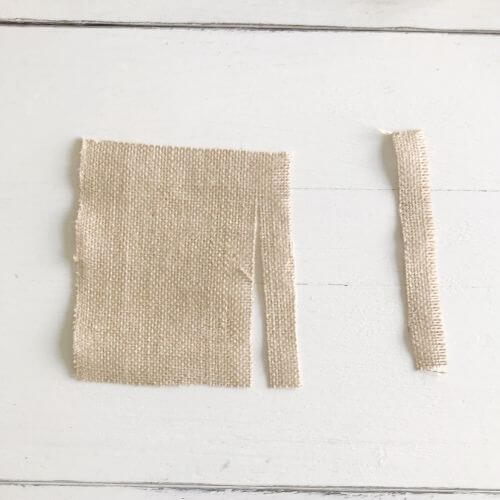
First, take your burlap ribbon (mine was about 6 inches in width) and cut it to about 6 inches in length. Then cut it into small sections, each section was 1/2 to 3/4 inch in width. I was able to make 7 sections out of the 6″ width burlap. It took me roughly 16 feet to make the entire wreath. So patience is a good thing to have here!
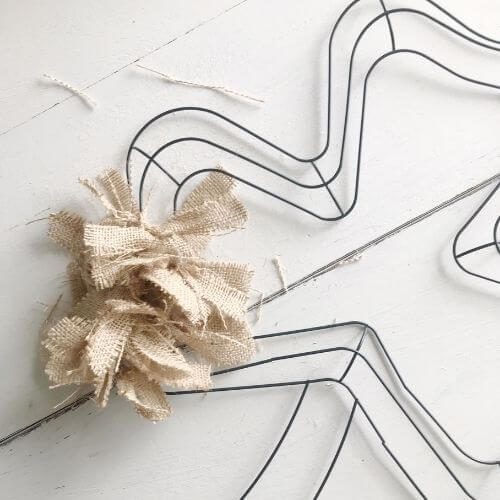
Tie Your Burlap Pieces To Your Shamrock Wreath Form
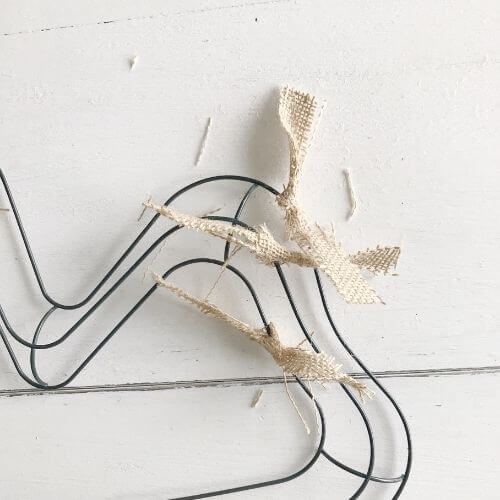
Next, take your sections and start tying them onto your wreath form. One tie worked out just fine for me, I didn’t double knot them. I just kept tying the burlap onto the shamrock wreath form.
And tying…
And tying…
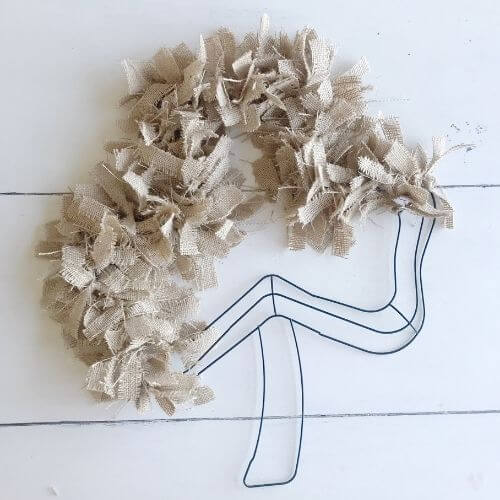
I pushed the burlap pieces together as I went along. You’ll be tying them to all 3 sections around the shamrock leaves, and then the 2 sections on the stem.
Keep pushing them together and work your way around.
Finish Up Brown Burlap Pieces for St. Patty’s Day Wreath
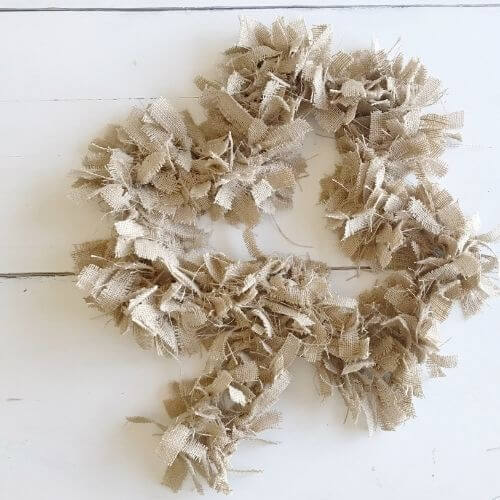
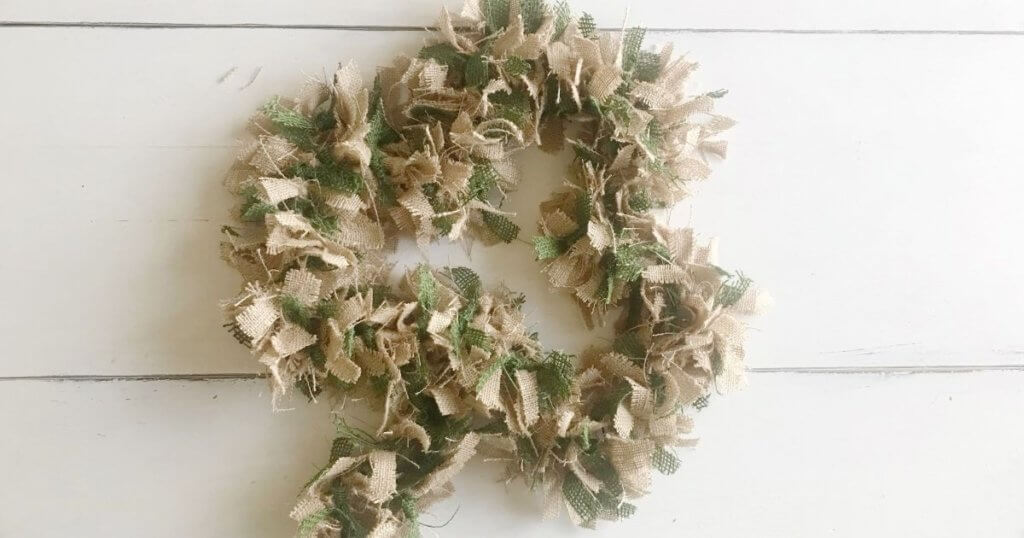
Whew…Ok finally done! So this was supposed to be my finished product. And it would have only cost me $1.00 since I had the burlap on hand! However, my kids looked at this and said “Shamrocks aren’t brown!” I had to admit that it didn’t look much like a shamrock.
Brown and Green Burlap Used for Shamrock Wreath
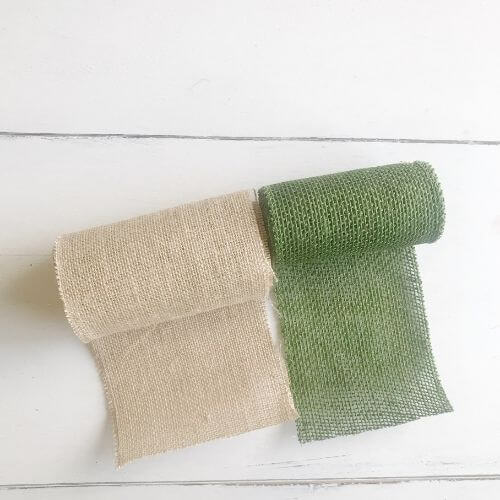
So I headed to my local Walmart and found this green burlap for about $4.50 in the store. I followed the same process in cutting up the pieces as noted above. It wasn’t as tight a weave as the brown (as you can see in the picture), so it did shred a bit easier while I was trying to tie it on. But it worked out perfectly!
Add the Green Burlap and Finish Up Your Shamrock Burlap Wreath!

I randomly tied the green strips of burlap (about 60 pieces) on until I liked the look. This is the finished wreath! I think it speaks “Farmhouse-Style St. Patrick’s Day” diy home decor don’t you?
A Bit About Burlap
This post contains affiliate links. As an Amazon Associate, I earn from qualifying purchases. This means when you click a link, I may earn a small commission with no cost to you. This helps me to run this website. Thanks in advance for your support!
Where I found the green burlap in the section at Walmart near the floral, I also found 5.5″ brown burlap that was 30 feet for $4.47. This would work if you needed to buy brown burlap for this project. The weave is a bit wider than the burlap that I used. Which lends itself to shredding a bit when tying it on. But I did make it work for me with the green. I also found this tighter weave (similar to the kind I used) 6″ wide burlap on Amazon for just a bit more. I figure though, you wouldn’t use it all, and burlap is always good to have on hand for future DIY projects!
Any questions, just leave me a comment down below! And please consider subscribing to my email newsletter sign-up located at the end of this post, so you’ll never miss a budget-friendly DIY!
Extra Burlap? Here’s another farmhouse DIY decor idea to put it to use!
No-Sew Burlap Shamrock Garland DIY
And for more St. Patrick’s Day farmhouse-style decor ideas check out…
St. Patrick’s Day Free Printables for Farmhouse-Style Shelf Decor
Neutral Farmhouse Wood Shamrock Garland
I got 2 shamrock wreaths a couple of weeks after Dollar tree initially put out there St Pat’s decor. ( I do not know how to add a pick of the finished wreath. )
Hi there! Thanks so much for letting me know! And so glad you liked the wreath project! Hmmmm I’m not sure how to add a picture to a comment section either, but I will look into it! Thanks again 😊
Hi. Some Dollar Trees still carry the shamrock wreath forms because I got mine at a local store in NJ.
Hi there! Thanks so much for taking the time to respond and let me know!😊 I’m glad some Dollar Trees are carrying them! I’ve seen them on other sites, but they are more money…sure can’t beat $1.25! Thank you again!
I’ve been looking for the perfect farmhouse shamrock wreath and I think this is it! I’m going to try it in green though so I hope it looks as good as yours. I love the simplicity of your instructions. Thank you for your awesome inspiration! 🙂❤️
Thanks so much for your kind comment! ❤ I’m so glad the post was helpful! I think it will look great in all green!
Great idea!! Going to try it !!
Awesome! So glad you found the post helpful! Thank you 🙂