
Today let’s explore springtime bunny garland DIYs using inexpensive cotton fabric and felt!
And what’s more fun about spring and Easter time than seeing little rabbits hopping everywhere! Am I right?
Right now we are seeing baby bunnies all over our yard. My kids love seeing them and as long as they don’t run in front of my car, I love them too! 😉
So let’s incorporate the bunny/rabbit design into springtime and Easter garland.
Garland is so easy to change out for every season. It’s multi-functional in that it can be used on the fireplace mantle, around windows, and on hooks or shelving within your home. The possibilities are endless!
A little bit of sewing makes this bunny garland look a bit more home-made and crafty. It’s so super simple to do!
But if you don’t like sewing, don’t worry I’ve got you covered. Check out my final notes at the very end of the post!
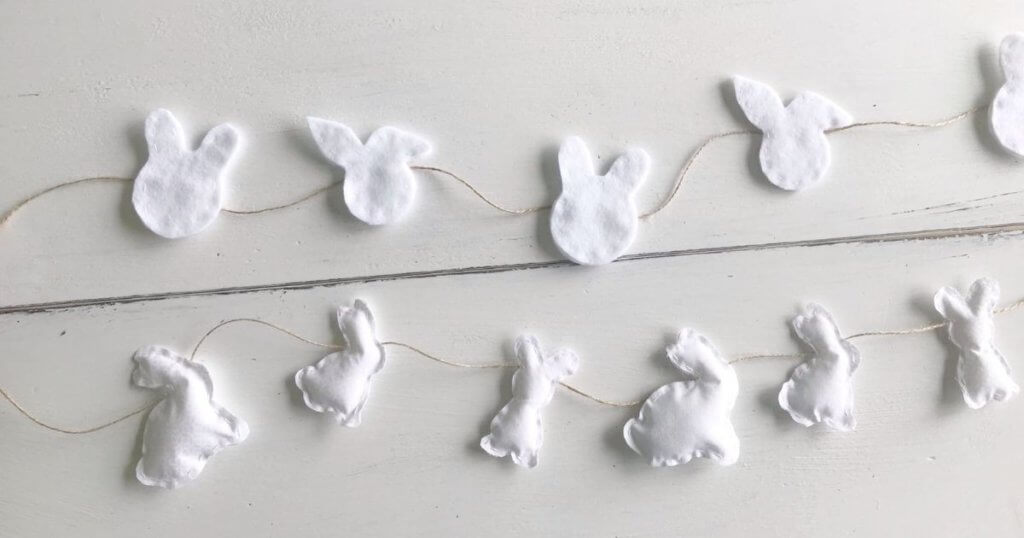
I wanted to try out two different types of garland, both cotton fabric with stuffing, and felt. That way you have two options to choose from.
Of course I’m giving you an idea for the template too. And the best part is that this rabbit template has multiple uses!
Read on for the how-to for creating these DIY bunny garlands using fabric and felt!
Cotton Fabric Tutorial for Bunny Garland DIY
I always hit up the craft section at Walmart containing fat quarters of fabric. It’s nice because there are lots of different patterns to choose from and it’s inexpensive.
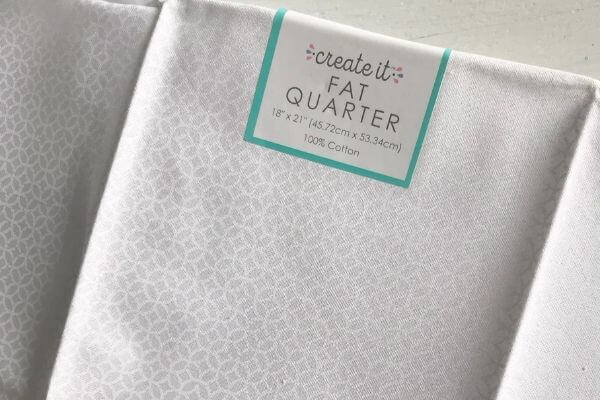
I found this white cotton fabric with a very subtle pattern on it and felt it would be perfect for springtime decor. Check your local Walmart to see if they have it or choose one you like best!
This post contains affiliate links. As an Amazon Associate, I earn from qualifying purchases. This means when you click a link, I may earn a small commission at no cost to you. This helps me to run this website. Thanks in advance for your support!
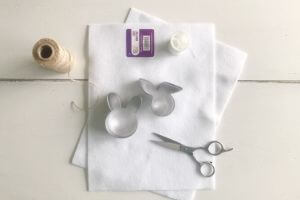
Besides the cotton fabric, the remaining materials needed are…
Product List:
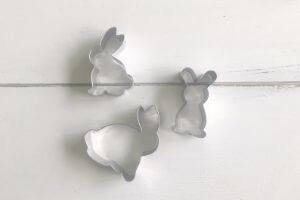
- Bunny Cookie Cutter Template (Amazon)
- Not completely the same designs, but similar Bunny Cookie Cutters if mine are OOS
- Jute Twine (Amazon)
- Fiberfill Stuffing – Brand Poly-Fil (Walmart)
- Needle and thread
- Good Scissors

Cut Out Cotton Fabric Using Bunny Template
I used the 3 full bunny body templates for this cotton garland. I love that with this template, you can use it for both of the garlands, plus keep it for future cookie making fun. Total bonus!
My mantle is about 6 feet long, so I decided to make 12 bunnies which would be spaced about 5 inches apart. So for each pattern I made 4 bunnies.
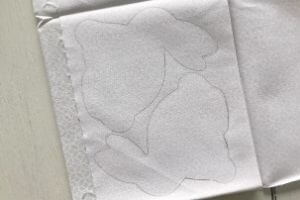
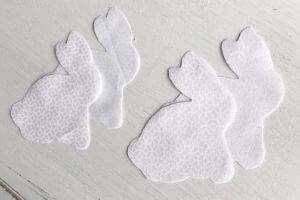
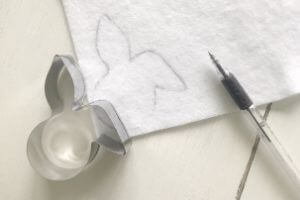
First using a pencil, take one of your bunny templates and trace it twice on the back of the fabric. The fabric folds out into squares so I used one square to trace the two bunnies.
Next use your scissors to cut through two-ply of the fabric as shown. This makes the job easier because it ensures that the design will be on the outside for each bunny.
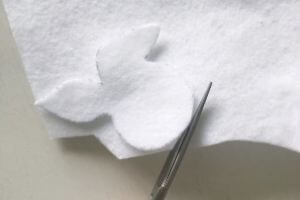
When this is completed you will have 4 pieces of fabric with your bunny pattern, which is used to make 2 bunnies. If you choose to make 4 bunnies a piece out of the 3 bunny body templates, then use another square and repeat.
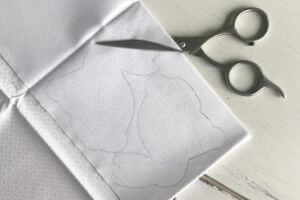
Then use the same process to cut out the other two templates. I made 12 bunnies from one fat quarter of fabric, but I think you could easily make 16. See some pics with steps below.
Sew Your Fabric Bunny Patterns Together
I used all three rabbit body templates, however, the easiest to work with was the largest one. So if you’re thinking about using just one template that would be the one I would choose!
I went about sewing the two similar ones much the same way.
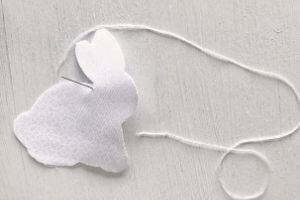
First I measured out enough string to go the whole way around my fabric rabbit. I made a double knot at the end and began sewing using a running stitch, which is just an in-and-out stitch.
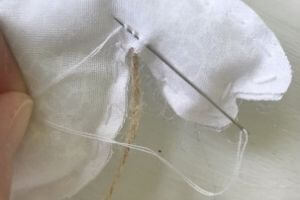
I started at one side of the neck and sewed all the way around to the other side at the neck. Then I stuffed my polyfill into the body. I continued sewing part way up on the head and stuffed some polyfill in.
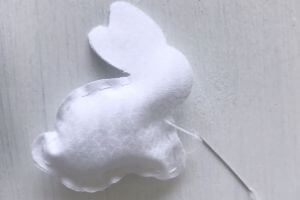
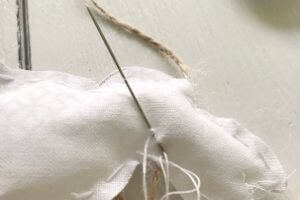
Then I placed it onto my jute twine, placing the twine in between the 2 layers of fabric. And then continued to sew up along the side of the ear. This holds the jute twine in place.
After sewing half the ears, I placed some stuffing in the ears and then completed my stitching to where I had begun. You want to make sure the jute twine is secure with the stitching but still able to slide so that you can position the bunnies when hanging.


Knot your string in the back by pushing the needle through the fabric. Wrap your thread around the needle three times. Then hold the thrice wrapped 😉 thread down toward the fabric and pull the needle through making a knot. I repeated this twice. Shown below in pics.
This was the process I used for both the large and small versions of the same rabbit template.
The front facing bunny was the most difficult to sew and stuff because it was the smallest. Start sewing up by the base of the ears and use the running stitch to the other side.
Stuff your bunny with poly fill, I had to use my little finger to get the stuffing down in there. You could use a pencil to do this too since it’s small.
Place jute twine between the layers of fabric. Continue sewing up around the ears part-way and fill with stuffing. Finish stitching around the to the other side. Then make your knot in the back.
I sewed 3 of each bunny template, but create as many as you like that will fit nicely on your window or mantle.

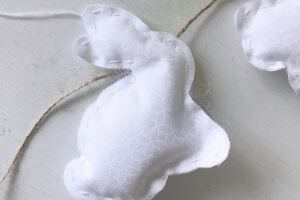
Once you have all your fabric rabbits stuffed and sewn they are ready for hanging. Space them out as desired on your jute twine and enjoy a bit of rabbity springtime diy home decor!
But that’s not all, read on for the next tutorial using felt!
Felt Tutorial for Bunny Garland DIY
We’re going to use the other two patterns to create this next garland!
This is a super easy and fun project to try and it’s low cost too! First, I bought 2 pieces of rectangular white felt from the craft section at Walmart. They were only .29 cents each.
The only other supplies that you need are scissors and a needle and thread which I had on hand, jute twine, and the bunny cookie-cutter template. I listed the products below as well as the sources.
This post contains affiliate links. As an Amazon Associate, I earn from qualifying purchases. This means when you click a link, I may earn a small commission at no cost to you. This helps me to run this website. Thanks in advance for your support!
Product List:
- White Felt Fabric (Walmart)
- Needle & White Thread
- Bunny Cookie Cutter Template (Amazon)
- Jute Twine (Amazon)
- Good Pair of Scissors
Cut Out Felt Using Bunny Template
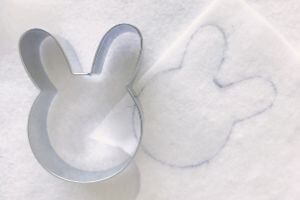
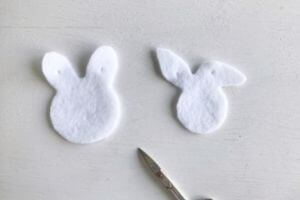
First use a pen to trace the first bunny head pattern on the felt, and cut it out with scissors.
Then after this first one is cut out, use it as a template to make the rest. This way you don’t have to deal with making sure the pen is not noticeable.
I carefully snipped the ink off of that first one, and then used it as the back layer for one of my bunny heads.
I decided to cut out ten, which would be used to make 5 rabbit heads for my garland (2 layer).
Repeat the process with the other rabbit head template, and cut out 10. See pictures below.

Template One
Template two

Make Holes in the Felt for Jute Twine
Take 5 of each rabbit head pattern you cut out from the felt and make 2 small holes using scissors. I found that cuticle scissors were the easiest to use for this. This allows you to run the jute twine through them for hanging.
For the first bunny with both ears standing up, I made the holes at about the middle of the ears.
For the floppy eared bunny, I made the hole near the top of the one floppy ear, but left enough room for my stitches. I then made the second hole on the same plane as the first hole, so the rabbit wouldn’t tilt.

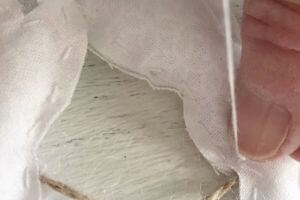
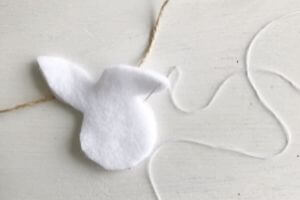
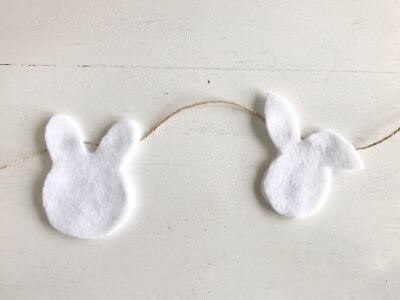
Place Felt Rabbit Heads on Jute Twine
Next line your felt bunny heads up on a table, alternating your pattern. I folded my twine over at the end so that it wouldn’t fray when I pushed it through the holes.
From the back run the twine up through the first hole, and then down through the next one. Repeat this until all the felt rabbit heads are on the jute twine.
Don’t worry about spacing at this point. You’ll be able to arrange them later when you hang them.
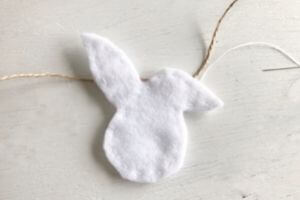
Place the rest of the bunny heads (without the holes) on top of the ones that have the jute twine through them.
Sew Your Felt Bunny Heads Together
Our last step is to sew the 2 layers together. Using a running stitch (like in the first tutorial), start at the back and stitch your way around.
Remember this is supposed to look handmade, so the stitches don’t have to be perfect at all!
After stitching all the way around your bunny head, knot the string in the back (just like we did in the fabric bunny tutorial).
Repeat with each felt bunny head pattern until all 10 bunnies are completed. Or more if you like! 😉
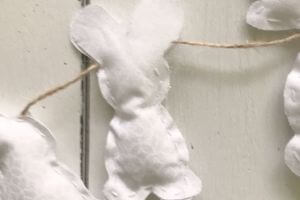
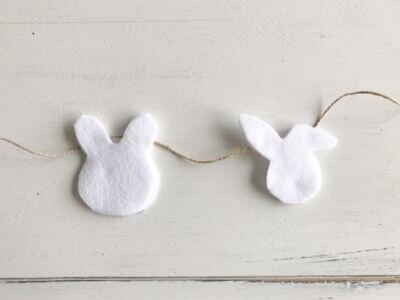
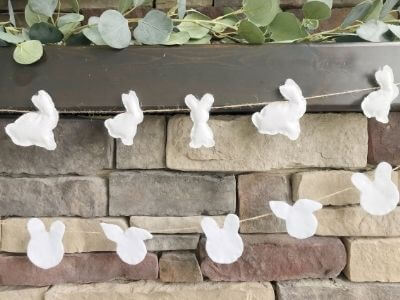
When finished, hang your DIY felt bunny garland up on your mantle or maybe around a window.
Space the felt bunnies out as desired. What’s nice is the felt and twine allow you to do this without them sliding. Admire your handmade, felt springtime home decor!
Final Thoughts on DIY Bunny Garland Fabric and Felt
This is my “things I learned” section on my post. So definitely read through this section! DIYs don’t always go as planned but it’s the figuring things out that sometimes is the fun part!
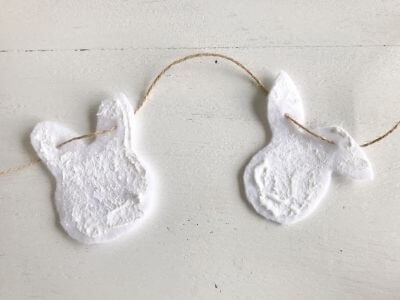
First things first though, if you’re not the sewing type you can easily use mod podge to glue the felt together. If you want them to be able to slide though, just make sure to avoid putting mod podge on the jute twine!
Pictured below is how I placed my mod podge on.
Overall, the felt bunny garland was easier to create. However, the fabric bunny garland was easier to hang. This was only because I made the mistake of putting the holes too low initially on the felt (about where the bunny’s eyes would be), causing them to tilt when hanging! Live and learn!
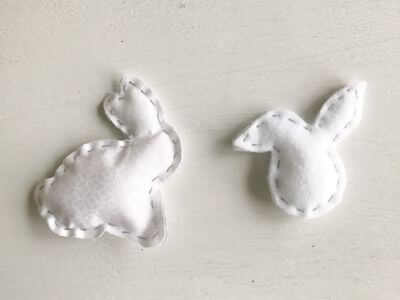
If I would have done this project again, I may have used a colored thread instead of white. The stitching would have been more visible. I made a few examples of this afterwards using a light gray stitching, and I do like how they turned out. I also added a little stuffing in the felt rabbit which gave it a little more depth.
It’s nice to have 5 different rabbit templates to choose from when making your garland. And with a few inexpensive materials you can make either fabric or felt bunny garland! Or both!
Since they’re cookie cutters you can use them in the future for some cookie making fun as well. 🙂
In the end, I do love the hand-made look that fabric, felt and a little bit of sewing can give you!
Which one was your favorite? Leave me a message down in the comment section and let me know! Hope you enjoyed this tutorial and maybe gave it a try! Thanks so much for reading!
Related Posts for DIY Springtime Home Decor
Faux Concrete Easter Egg DIY Using 2 Finishes