

Today let’s craft two easy wood bead wreaths with floral supplies from Hobby Lobby. Perfect for your front door or to hang in your home!
Hey there friends! It’s approaching the summer season right now, and I’m awaiting the arrival of my hydrangea blooms from my limelight hydrangeas.
I’m also thinking about pretty front porch decor, and my front porch is in dire need of sprucing up.
I’ve got an old bench out there waiting to be waxed, some bubble containers and a few hockey sticks, and a good bit of gravel and grass clippings that the kids and dogs have drug up on there. And who knows what else!
So, when I was walking through Hobby Lobby the other day, I found a few beautiful hydrangea picks that I thought would look great on a wood bead wreath. I added eucalyptus stems and some thistles, and I was all set!
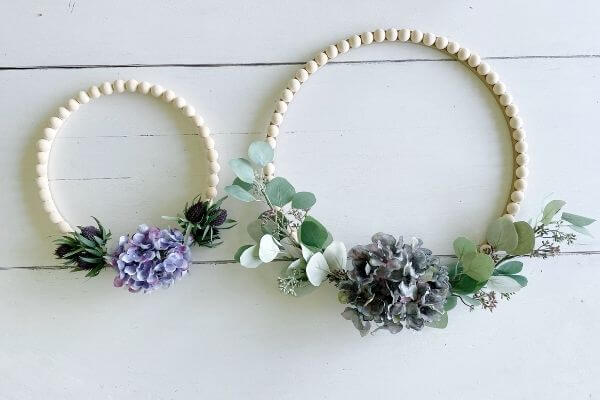
Let’s look at the simple steps to make two fun and easy wood bead wreaths that may help to usher in summer a little sooner! 😉
These are the wreaths we’ll be creating in this post!
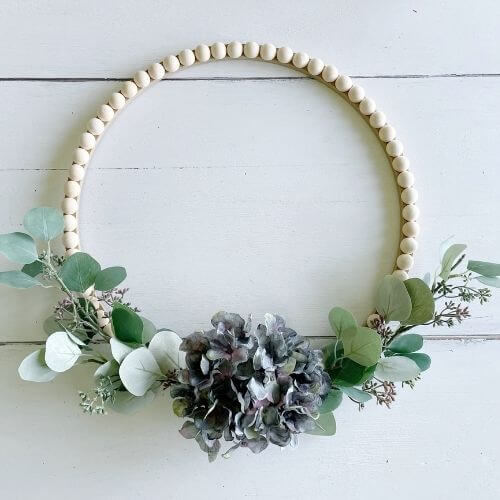
(#1) Hydrangea and Eucalyptus 16-inch Wood Bead Wreath
Supplies for 16-inch Wood Bead Wreath DIY
This post contains affiliate links. As an Amazon Associate, I earn from qualifying purchases. This means when you click a link, I may earn a small commission at no cost to you. This helps me to run this website. Thanks in advance for your support!

- 16-inch wood form (Hobby Lobby)
- Half Wood Beads 20 mm (Amazon)
- Hydrangea pick (Hobby Lobby)
- Seeded Eucalyptus branch (Hobby Lobby)
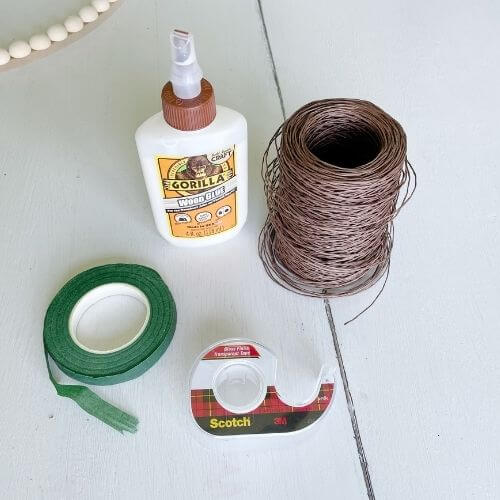
- Gorilla Wood Glue (Amazon)
- Brown Floral Wire (Amazon)
- Scotch tape
- Wire Cutters (Amazon)
- Floral Tape – Optional (Amazon)
Attach Hydrangea Pick to Wreath Form Using Wire
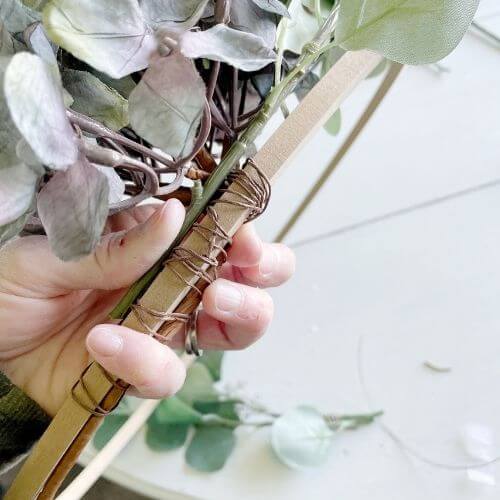
First, I bent the hydrangea stem so that it could be easily attached to the wood wreath form. I used a little tape to hold it on there and then got my wire out.
Then I secured it to the wood wreath form using my wire and removed the tape. As you can see, I wrapped the stem around the back of the wood wreath form.
Also, to note is that I wrapped the wire through the bloom a few times so that it would be more secure.
By the way, I absolutely love this type of floral wire for 2 reasons. First, it’s brown so it blends in more easily and second it bends more easily than some of the green floral wire I have purchased in the past. Highly recommend it!


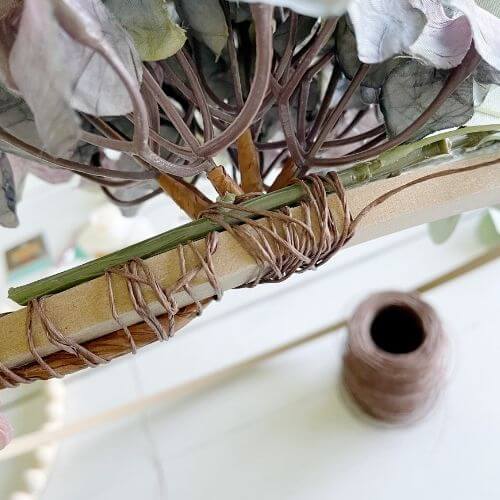
Cut Branches from Eucalyptus Stem and Secure with Floral Wire
Next, I snipped the branches from my seeded eucalyptus stem using the wire cutters. I linked a pair like mine in the supply list above, and they come in handy for so many projects!
I placed one of the larger stems on one side and two of the smaller stems on the other side of the hydrangea pick. Just try to make them look even and full on both sides.
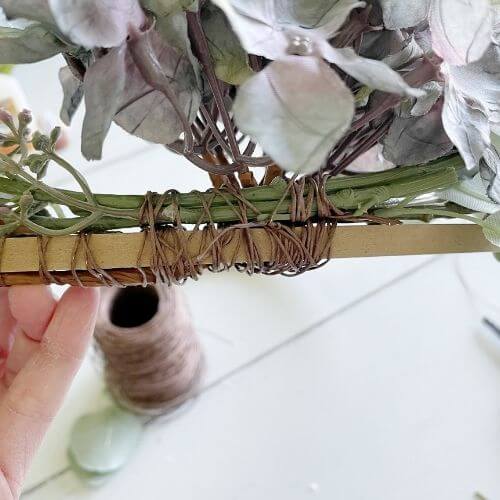
Using my floral wire, I secured them to my wood wreath form on either side of the hydrangea bloom. Below are the pics of the process. 🙂
Wood Glue Half Wood Beads to Wood Wreath Form
The next step was to glue the 20 mm half wood beads to the wreath form. I used Gorilla Wood Glue and worked my way around the wreath.
Just keep gluing wood bead halves all the way around until you get underneath your floral stems. Easy peasy!

All finished front door wood bead wreath DIY!
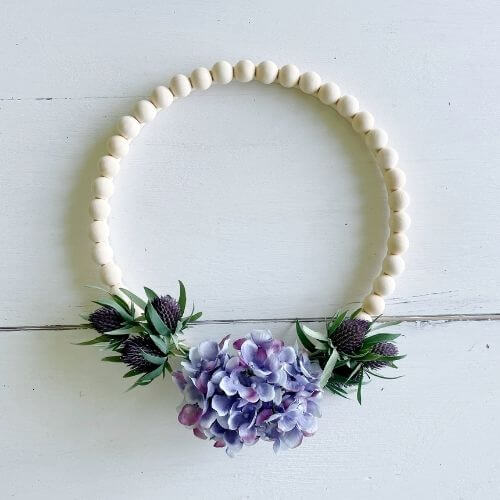
(#2) Hydrangea and Thistle 10-inch Hoop Wreath DIY
Next up is a smaller wreath using a 10-inch embroidery hoop and different floral, but a similar process to the above larger wood bead wreath.
Supplies for 10-Inch Wood Bead Wreath DIY
This post contains affiliate links. As an Amazon Associate, I earn from qualifying purchases. This means when you click a link, I may earn a small commission at no cost to you. This helps me to run this website. Thanks in advance for your support!

- 10-inch Embroidery Hoop (Hobby Lobby)
- Hydrangea Pick (Hobby Lobby)
- 20 mm Wood Beads (Amazon)
- 2 thistle picks (Hobby Lobby)
- Gorilla Wood Glue (Amazon)
- Floral Wire (Amazon)
- Scotch Tape
- Wire Cutters (Amazon)
- Floral Tape – optional (Amazon)
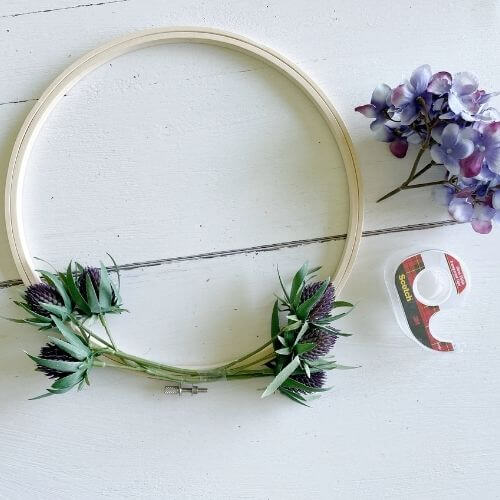
Attach Thistles and Hydrangea Pick to Embroidery Hoop
First, using tape I attached the two thistles to each side of the embroidery hoop. I used the hydrangea bloom as a reference and made sure they were in the correct place on the hoop.
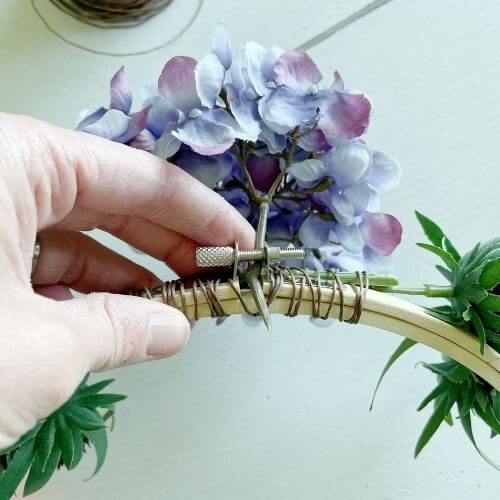
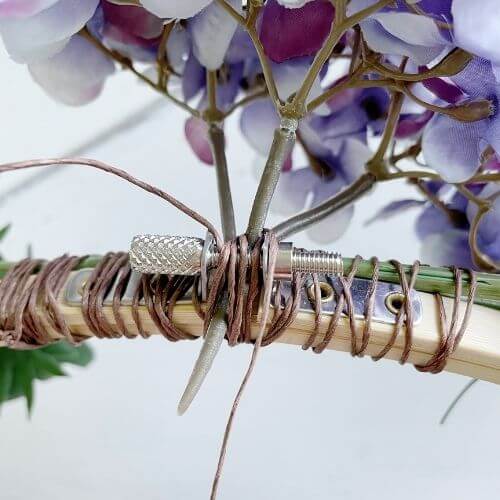
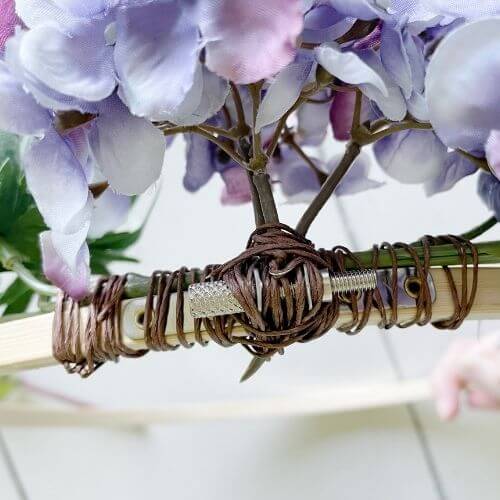
I then used my brown floral wire to secure the thistles to the embroidery hoop. Take note that the metal connector is in the middle between the thistles.
Next up, attach the hydrangea pick to your embroidery hoop. Place the stem through the metal connector on the wooden hoop. Then wrap your wire through the bloom stems and around the embroidery hoop, securing the bloom.
I chose a smaller hydrangea bloom for this wreath because the wreath form was only 10 inches.
Now you can clip off the remaining stem using your wire cutters or a pair of scissors.
Glue Wood Half Beads to Embroidery Hoop
Our last step is to glue our 20 mm wood beads to the embroidery hoop using the Gorilla wood glue. Sometimes I trial putting the wood beads on before gluing as shown in the first pick below.
Then starting on one side below the floral, just simply glue the wood beads around the hoop until they are underneath the flowers on the other side.


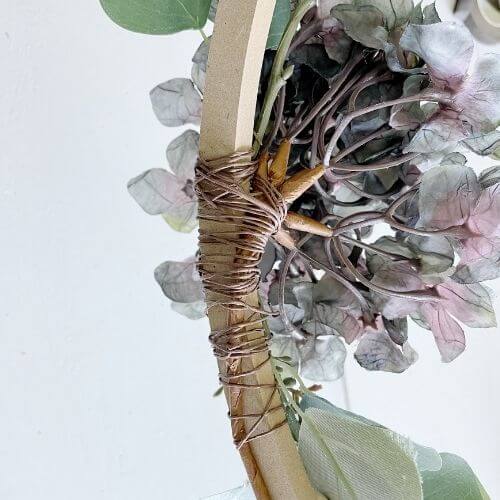
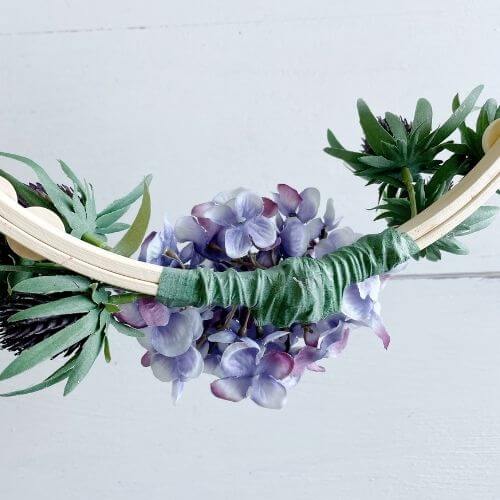
You can pretty up the back of your wreath by wrapping floral tape around the wire. If you do decide to use floral tape, the back of the wood bead wreath will look like this…
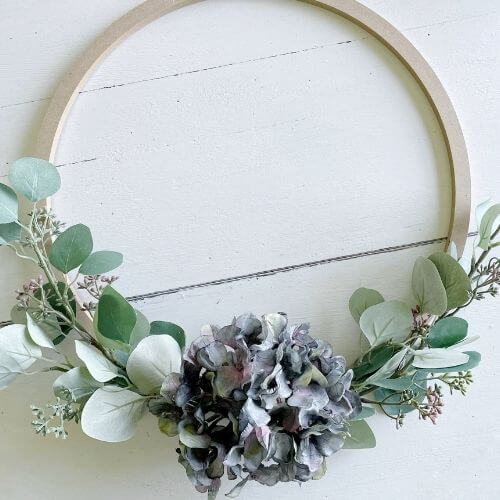
This is the finished 10-inch embroidery hoop wood bead wreath using hydrangea and thistles.
Final Thoughts on Farmhouse Wood Bead Wreath Tutorial
Which wreath do you prefer? The 16-inch wood bead wreath would be a nice addition to front porch decor. And the 10-inch smaller hoop wreath would look sweet inside a frame within your home.
The great thing about these wreaths is that they only cost me between 10 and 12 dollars to make. I always wait until floral and wreath forms are on sale at Hobby Lobby before purchasing.
So, if it’s not on sale the week you go, definitely check back the week after! I haven’t seen the picks go on sale, however, so if you ever see that be sure to let me know down in the comments!
I can’t choose which one I prefer they’re equally beautiful. You’re so creative. I’m gonna use that brown wire on my bonsai jade plant if it’s that easy to work.
Thank you for the kind comment! The brown wire is really bendable and easy to use!