

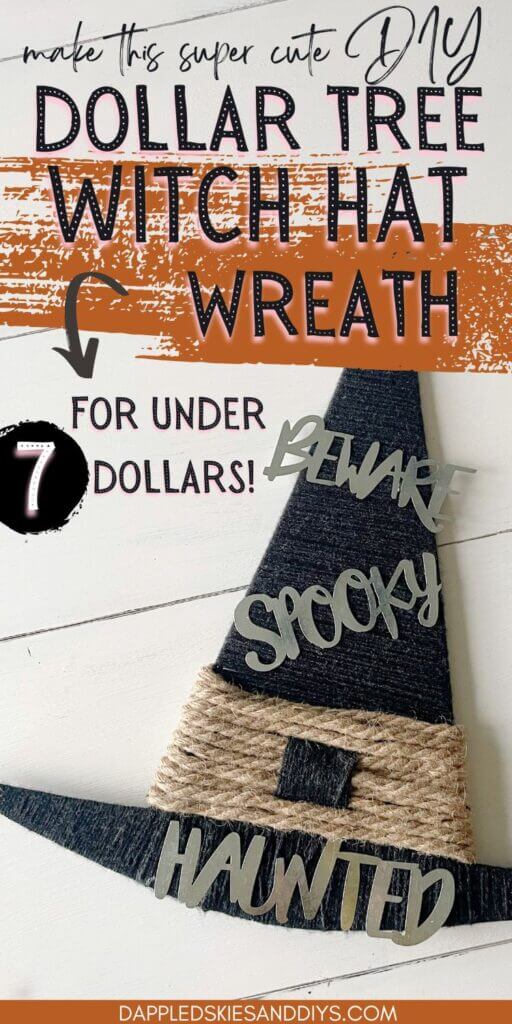
Tutorial on how to make a Dollar Tree witch hat wreath, that comes in under 7 dollars for all your supplies!
It’s spooky season yet again, and I’m totally here for it. The cooler temps, the scary ghost stories, Halloween costumes, corn mazes, and all things pumpkin. And that’s just a small part of the list of things that makes this season one of my favorites!
Whereas other holidays are more sentimental, I feel like the Halloween season is all about fun…such things as candy, costumes and crafts! Although I do get a little teary eyed looking at pictures of my kids in their toddler and baby Halloween costumes.
Now…on to the crafty part of this post!
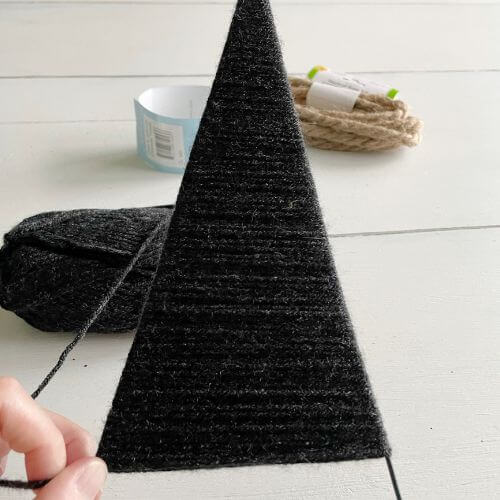
I’ve been having fun creating DIY wreaths with Dollar Tree supplies recently. So, when I found a witch hat wire frame for wreath-making I thought to myself, this could be a cool DIY home decor idea for Halloween.
I wanted it to be a neutral inspired wreath, but still give it a good dose of Halloween fun. Absolutely take a moment to let me know if you think I accomplished that down in the comments! 😉
Best part is the supplies came in under 7 dollars and that’s including tax! And all you’ll need to have on hand at your house is a glue gun and a pair of scissors!
Dollar Tree Witch Hat Tutorial Supplies
This post contains affiliate links. As an Amazon Associate, I earn from qualifying purchases. This means when you click a link, I may earn a small commission at no cost to you. This helps me to run this website. Thanks in advance for your support!
All supplies are from Dollar Tree except the glue gun and scissors!

- Witch Hat Wire Wreath Form
- Black Tweed Yarn
- Nautical Rope (2 strands)
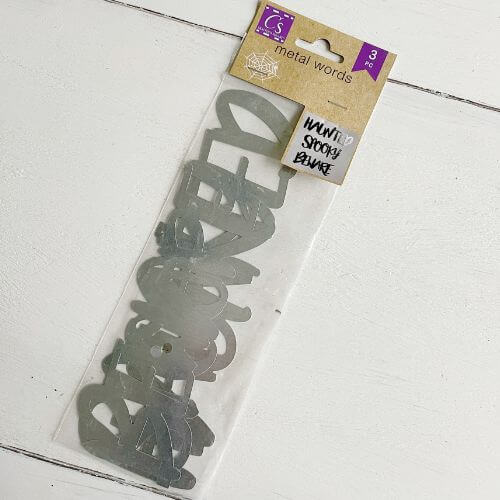
- Metal Letters
- Glue Gun (Amazon)
- Scissors (Had on hand)
Update: In case you can’t find this wire form at your local Dollar Tree or online, I found these witch hat wreath forms on Amazon if you want to check them out. 🙂
Be aware that this wreath form measures about 22.5 inches x 21 inches, as there are other versions online that are smaller (which would still totally be cute to make)!
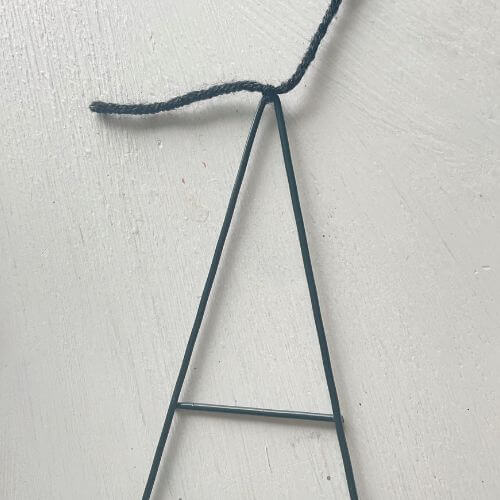
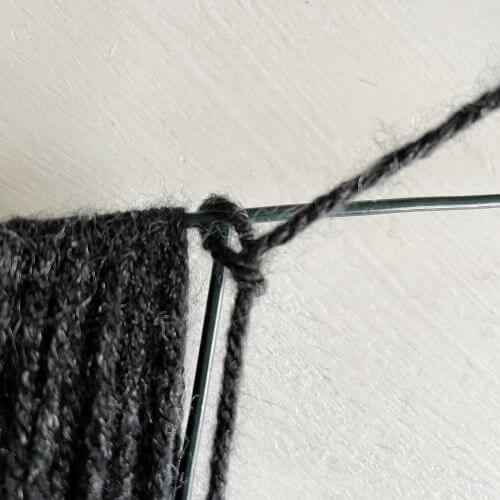
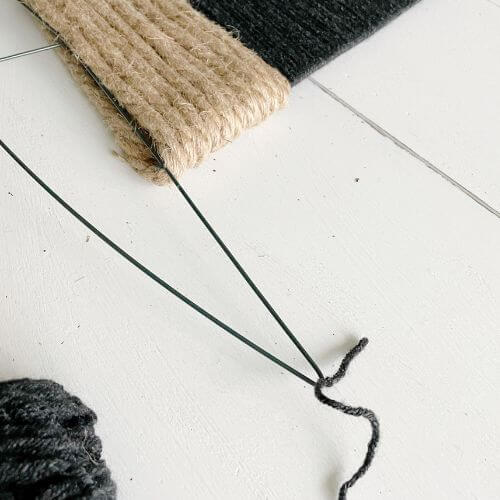
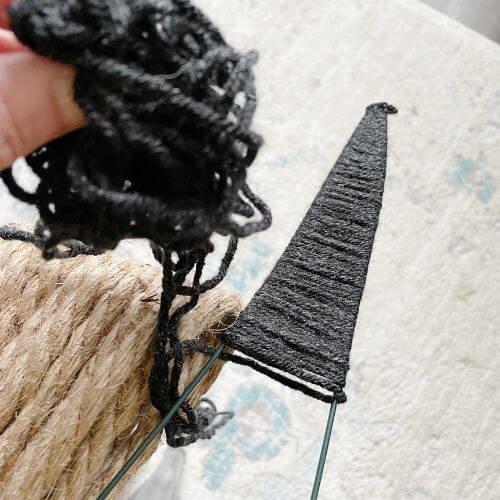
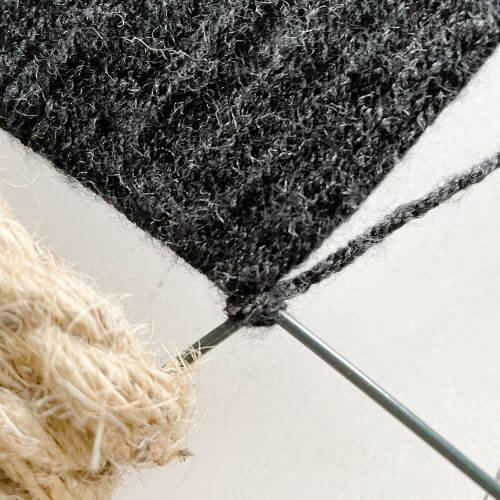
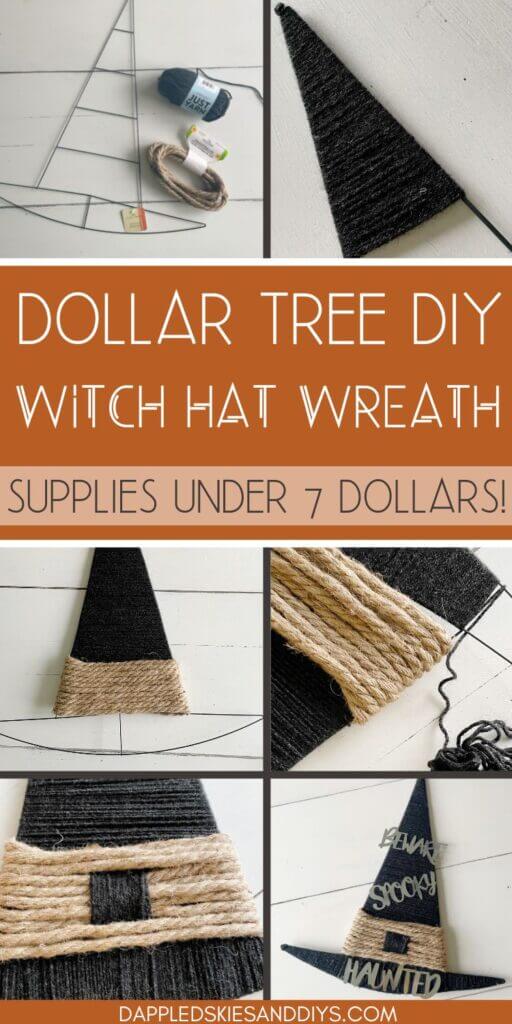
Tie Black Yarn to Top Peak of Witch Hat Wire Form
First, tie your black yarn to the top point of your witch hat wreath form with a knot. Then begin wrapping the yarn around and around, moving down toward the base of the hat. Keep your yarn taut as you wrap.
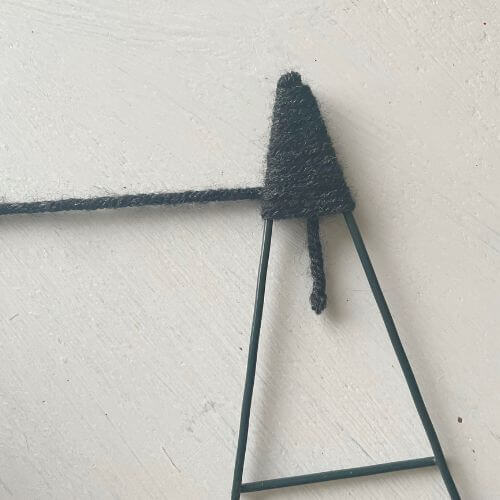
Continue Wrapping Yarn Until You Reach 5th Section
Continue to wrap your black tweed yarn around and around until you reach the top of the 5th section, the horizonal metal piece above the witch hat brim. This is where the witch hat belt/buckle will go.
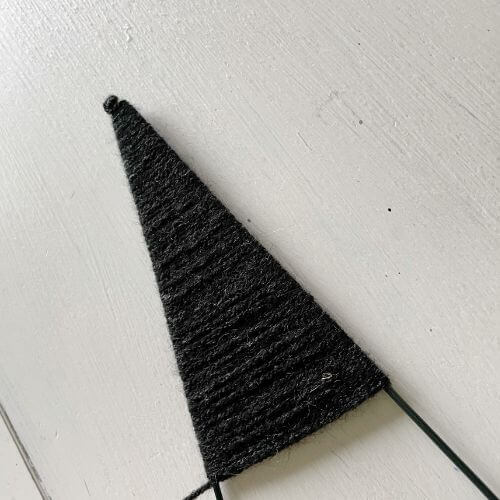
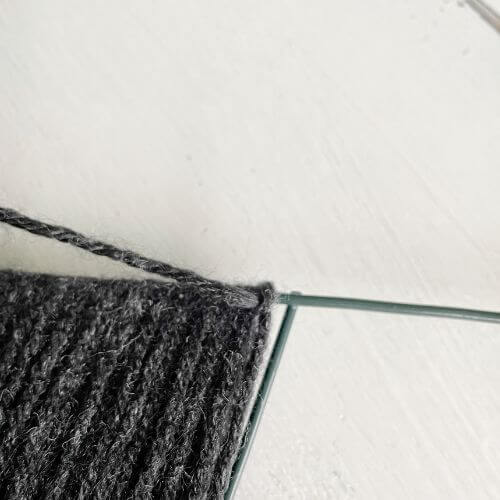
Tie Off Yarn and Cut with Scissors
Once you reach the section above the brim, tie your yarn in a knot to secure it as shown below.
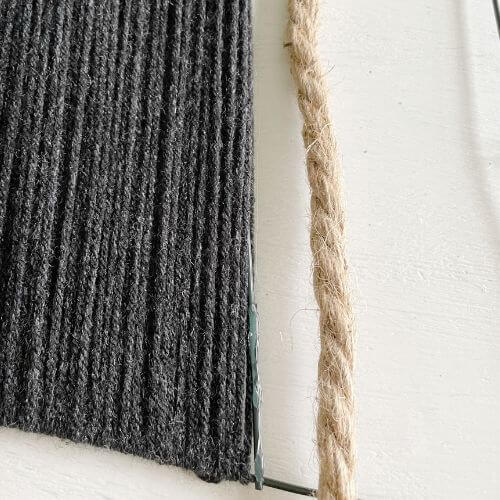
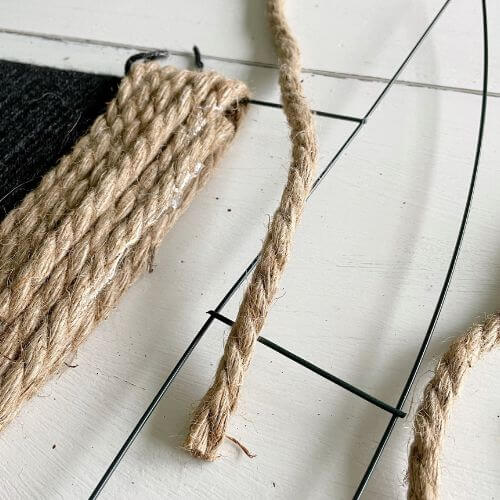
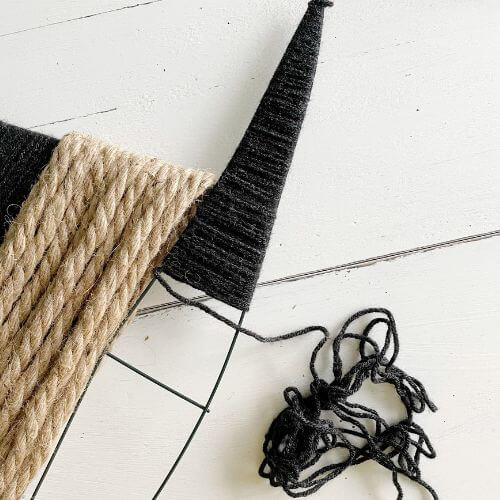
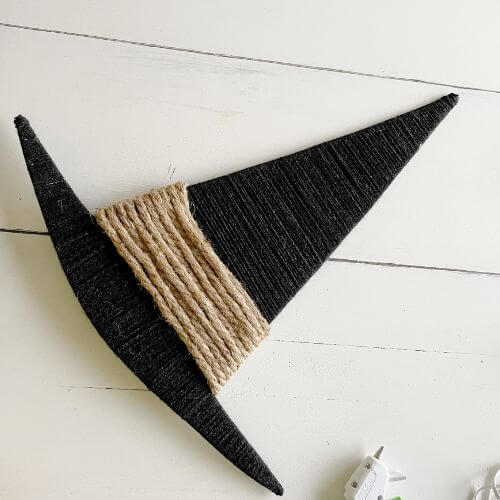
Use Rope to Create the Belt of Your Witch Hat
Next, gather your first strand of rope. I put a little bit of hot glue on the wire part at the front of the witch hat. Then I wrapped the rope around the back of the witch hat form and secured it as shown.
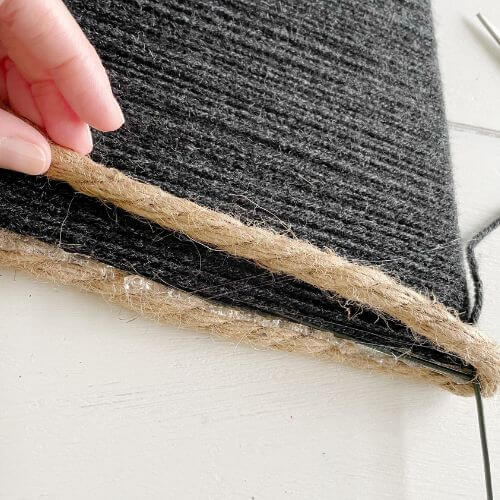
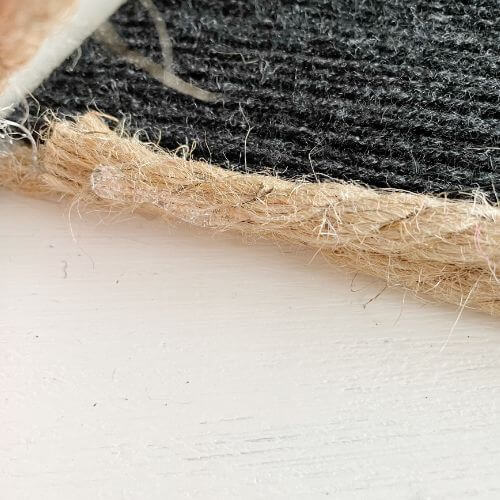
Next, I wrapped the rope around and around until I reached the end of the first strand. Hot glue the end of the first strand to the previous loop.

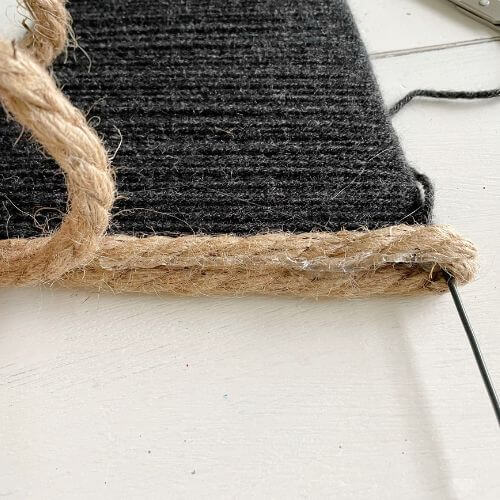
Then begin with the next rope strand by securing it to the first one with hot glue. Wrap the second rope around and around, and then secure the end of the rope with hot glue. Two nautical rope strands were the perfect fit for the witch hat belt.

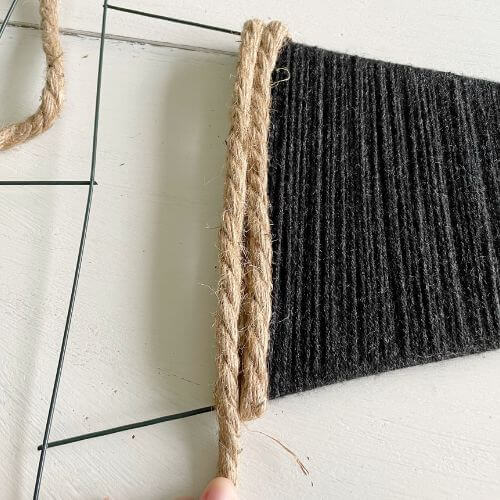
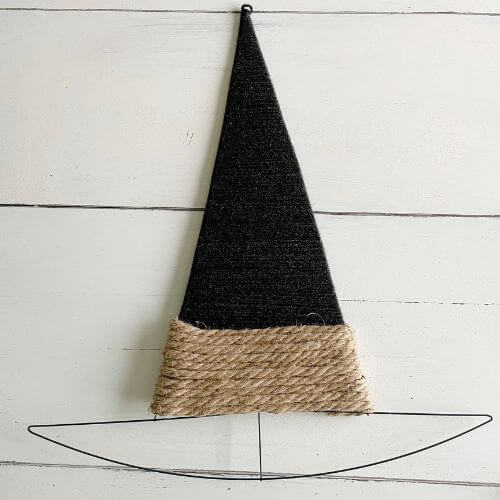
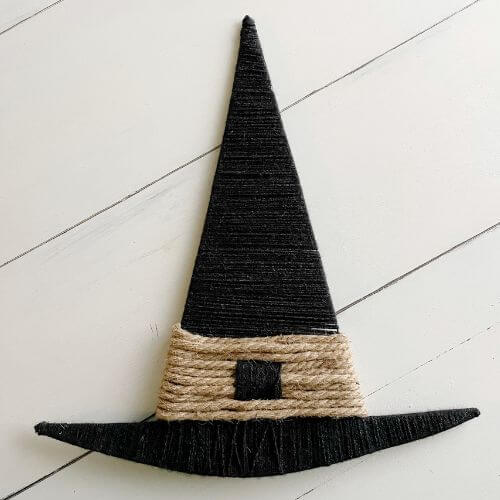
Your witch hat belt is now completed! This is how the Dollar Tree witch hat is shaping up so far!
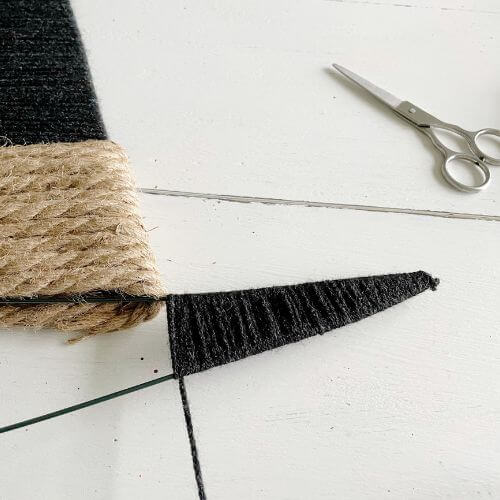
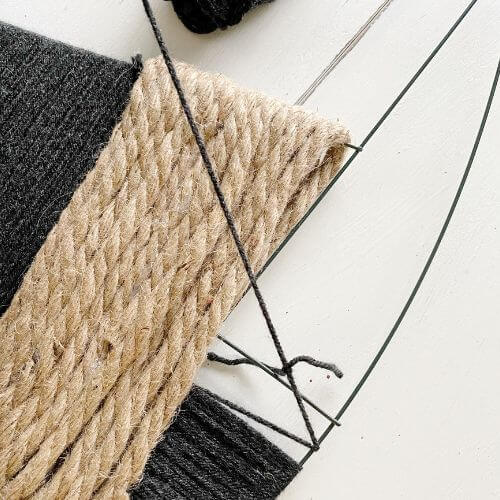
Now Complete the Brim of the Witch Hat Using Yarn
Now you’ll need to complete the brim of your witch hat using yarn. First tie your remaining yarn to one point of your hat brim making a knot. Then begin wrapping your black yarn around and around as shown below.
It’s a lot of wrapping but hang in there!
Below is where I hit a snag. After wrapping to the belt section of the hat, I had to cut a smaller ball of yarn from my yarn ball. This was to make it easier to wrap it around, because I had to go between the rope belt and the wire.
Hindsight is 20/20, and it probably would have made it easier to complete both yarn sections of the witch hat before the rope hat belt. But I pushed on since that hot glue wasn’t coming off that rope anytime soon!
When you run out of yarn, simply tie the next strand onto the first bit. Try to tie it at the back of the wreath so you can’t see it. Once you get to where the belt stops (second pic below), it definitely gets easier to wrap!
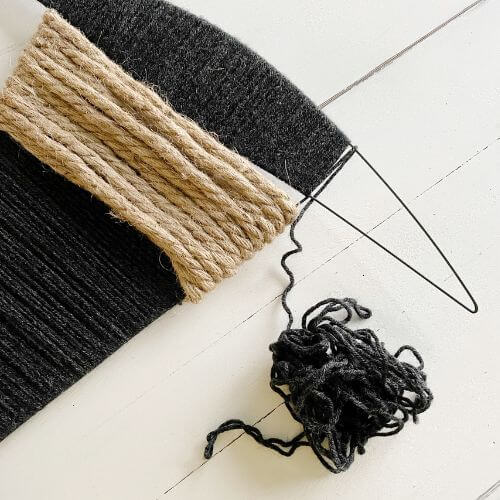
When I got to the corner at the end of the rope belt, I wrapped the yarn in a figure 8 around the corner. Then I continued on wrapping to the opposite tip of the hat brim.
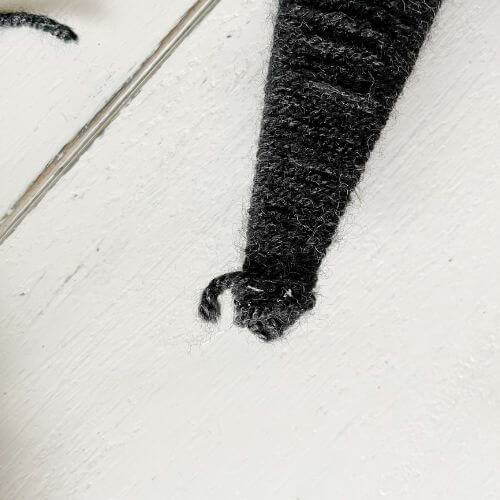
Once there, then make a knot at the tip as best you can to secure the yarn.
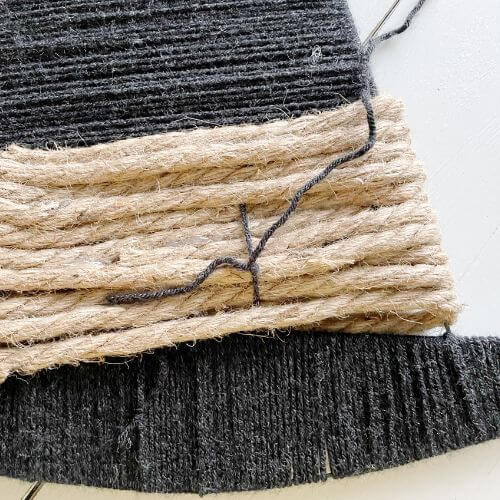
Create Witch Hat Belt Buckle Using Remaining Yarn
Take the remaining strand of black yarn and push it through rope and tie it in the back. Then wrap it around and around through the rope. Once it looks like a buckle then tie it securely in the back.
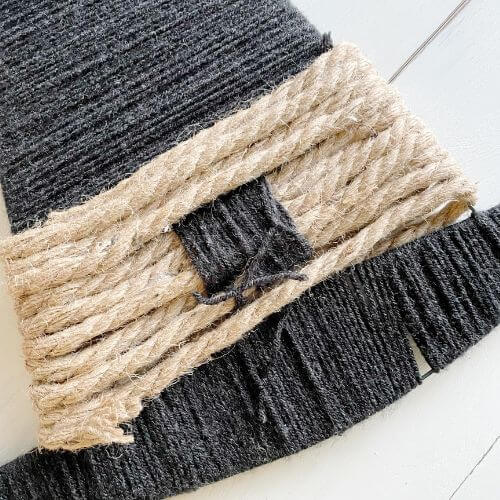
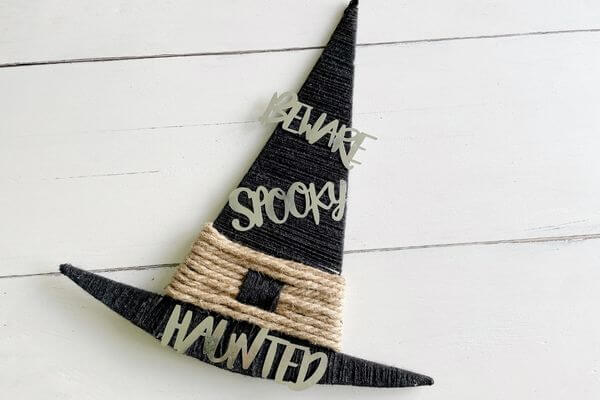
This is what the witch hat wreath is looking like so far!
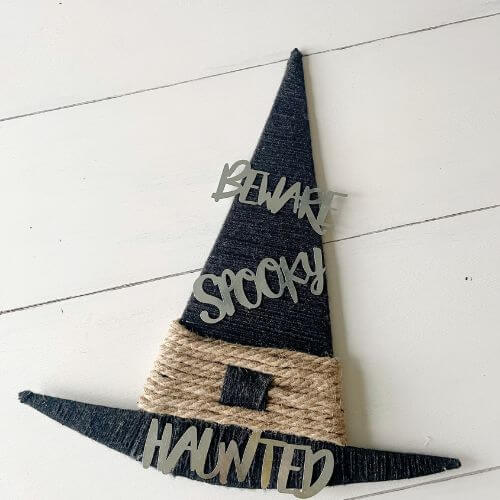
Glue Metal Halloween Words to Witch Hat Wreath
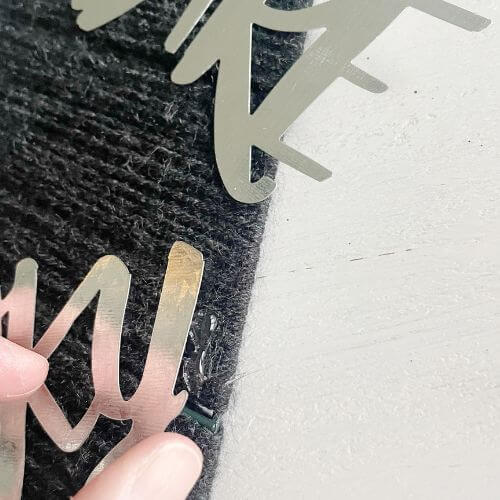
So, now I figured it was time to dress this old neutral looking witch hat up just a bit! I found these metal words at Dollar Tree, and they were perfect!
First, I laid them on the wreath and arranged them in an eye pleasing pattern. 🙂 Beware, spooky and haunted…love the stuff I find at the Dollar Tree!
Then I lifted up the metal letters slightly and placed glue underneath the right and left sides to secure in place.

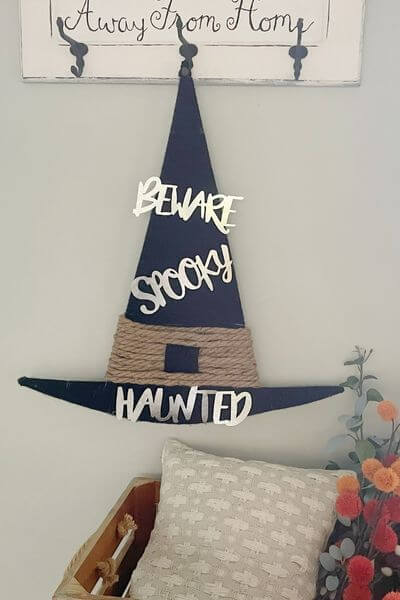
And this Dollar Tree witch hat wreath DIY was finished!

Secure Corners of DIY Witch Hat with Hot Glue as Needed
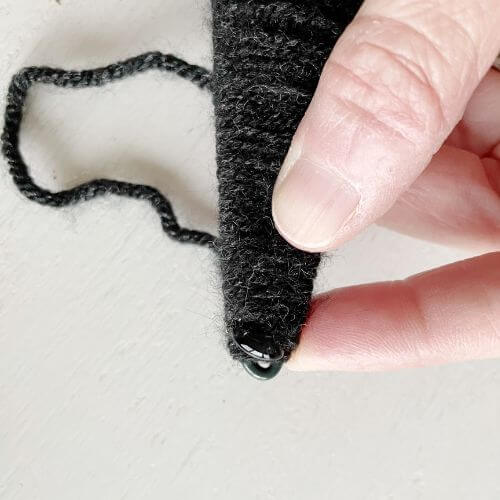
After I was finished, the yarn at the tips began to unwind just a bit….urgghhhh. However, nothing a little hot glue can’t fix right up! If this happens, just put a dab of hot glue at the back part of the wreath.
Then wrap the yarn around and hold in place until the hot glue dries…easy peasy!
Hang and Display the Finished Witch Hat Wreath
This DIY Dollar Tree witch hat was the perfect neutral-inspired wreath to add to my Halloween decor. And the metal words lended just the right amount of pizzaz to this yarn and rope wreath.
Amazing the things you can find when you visit the Dollar Tree!
And the supplies came in under 7 dollars including tax! Just can’t beat it!
To hang the wreath, I just gently pushed my hook through the yarn, and then smoothed the yarn out around it.
Alternatively, you could use a piece of jute twine and make a loop to hang your newly crafted witch hat wreath!
So, now are you ready to create a bit of neutral Halloween decor? If so, then this budget-friendly Dollar Tree witch hat DIY should be the next project on your list!
Sign up below for my email list and you’ll get budget-friendly DIYs delivered right to your inbox!
Can’t find wire frame we’re did you find yours?
Hi there! I saw these wire forms in my local Dollar Tree store this year, but didn’t see them online. They sell them on Amazon and Walmart sites too, but they are more money. I’m going to link the ones I saw on Amazon up near the product list in the post, in case you want to check them out. Thanks for your comment, and happy crafting 🙂