

Here’s how to make command hooks look better! Up for an interesting way to give those white command hooks a vintage look? Well then, here’s my easy tutorial to dress up those plain old hooks!
I have a slim wall by my patio door which I wanted to hang a few trailing plants on. This space gets a lot of natural light and I have many of my plants in this area anyway.
I had purchased a few inexpensive hanging baskets from Amazon and a few trailing plants from Walmart. Now all I needed were a few command hooks to hang them.
There were command hooks that held 5 pounds and those were the ones that I was searching for. However, the “metal look” command hooks were pretty pricey, and I’m always on the hunt for budget-friendly options.
I grabbed two of the plain white command hooks that were able to hold 5 pounds and figured I could use a few items I already had on hand at my home to dress them up a bit.
So, here’s the tutorial on how to make your own unique command hooks and give them a vintage-inspired look. Read on my friends!
Supplies for Command Hook Ideas DIY
This post contains affiliate links. As an Amazon Associate, I earn from qualifying purchases. This means when you click a link, I may earn a small commission at no cost to you. This helps me to run this website. Thanks in advance for your support!


- Glue Gun (Walmart or Amazon)
- Two Command Hooks 5 lbs. (Walmart or Amazon)
- Black Multi-Surface Paint (Amazon or Walmart)
- Cheap Make-Up Brush (Walmart)
- Rub ‘n Buff European Gold (Amazon)
Use the Glue Gun to Make Designs on the Hooks
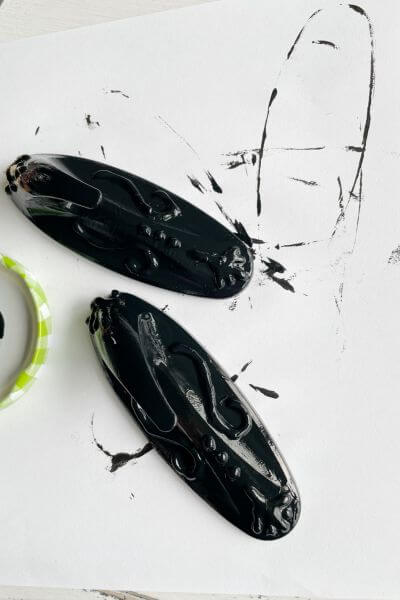
First, heat up the glue gun and begin making the designs on your command hooks.
I just looked up some vintage-inspired designs and free-handed them onto the hooks.
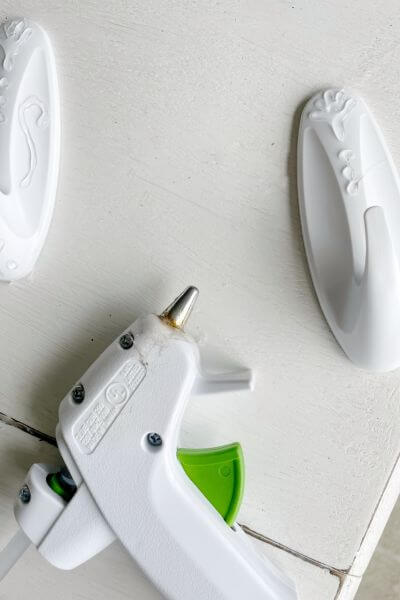

It’s very easy to peel the glue off the plastic hooks and try again if it’s not looking quite the way you want it to.
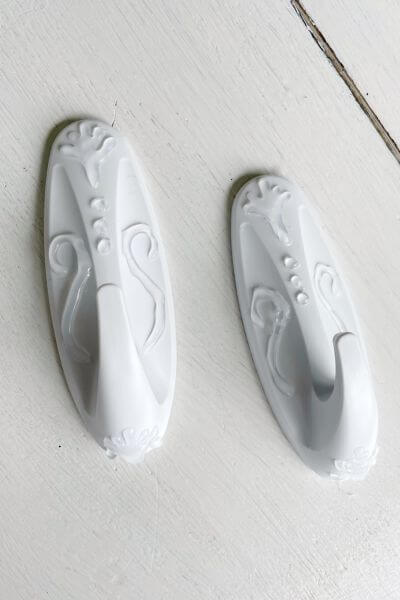
Then I took the second hook and copied my design onto it. You’ll have to use your fingernail to pick off the glue wisps that are attached to the design.
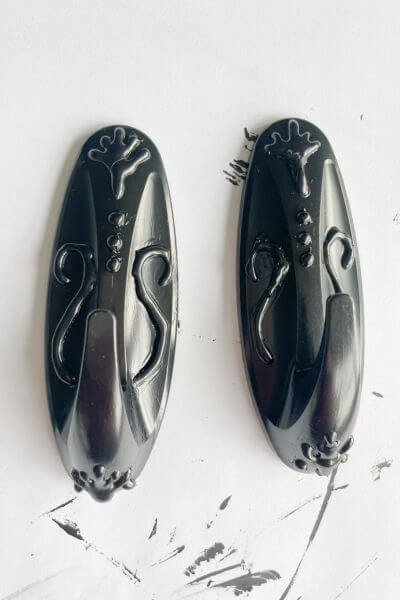
You can vary this and create any look you like! Here are a few views of the designs that I made using the hot glue.
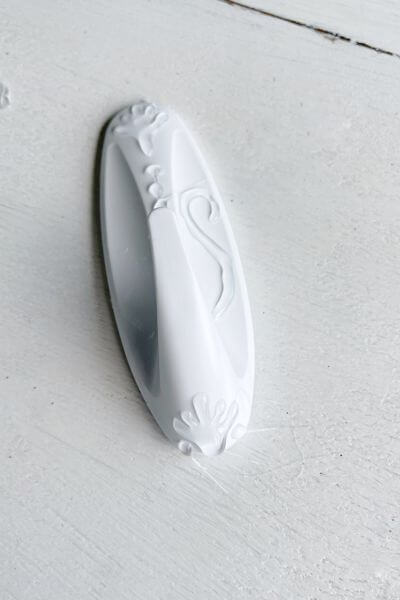
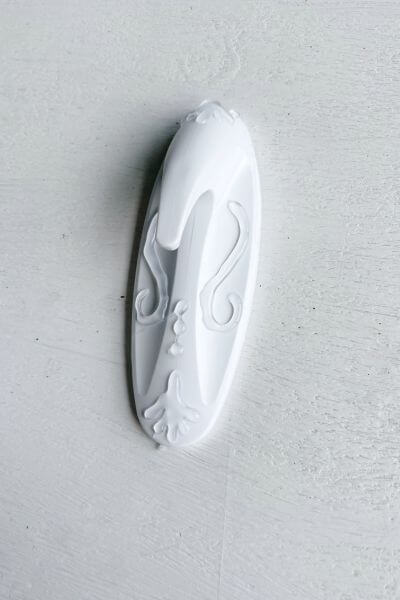
And here are the two command strip hooks with the vintage inspired designs.
Once the Hot Glue is Dry then Paint Over the Glue and Hooks
Okay, so once the hot glue has dried, it’s time to get out the black multi-surface paint.
I used a craft brush to paint over the hooks and the hot glue and allowed them to dry.
As an afterthought, I think these same 5 lb. command hooks come in black. So, I probably could have purchased them and skipped this step.
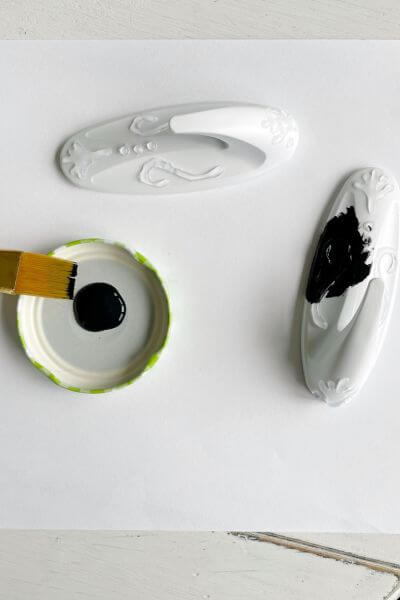
Here’s how they look after applying the black paint!
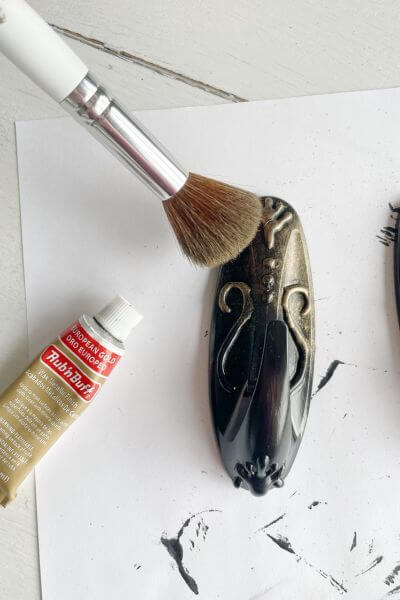
Brush with European Gold Rub ‘n Buff
Once the paint is dry, it’s time to get out the rub ‘n buff. This stuff is the coolest and so easy to use on different decor projects.
I purchased a cheap makeup brush at Walmart to apply the European Gold Rub ‘n Buff.
Just place a tiny bit on a dish or plastic container and dip the brush into it. Then dab it onto the command hooks.
You can use your finger to apply this too, however, it will give you a more solid gold finish, whereas this way shows the brush strokes.
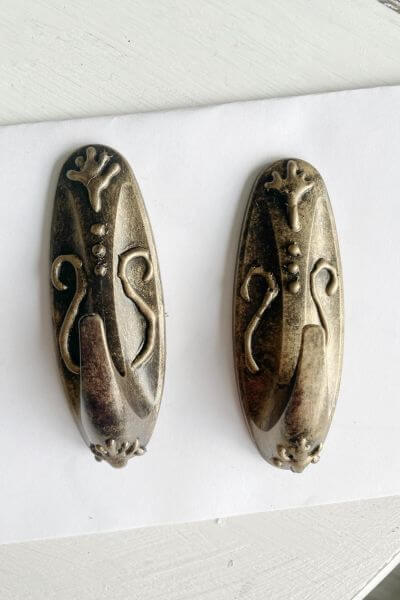
Here’s how they look all finished and ready for hanging!
Hang Your DIY Vintage-Inspired Command Hooks
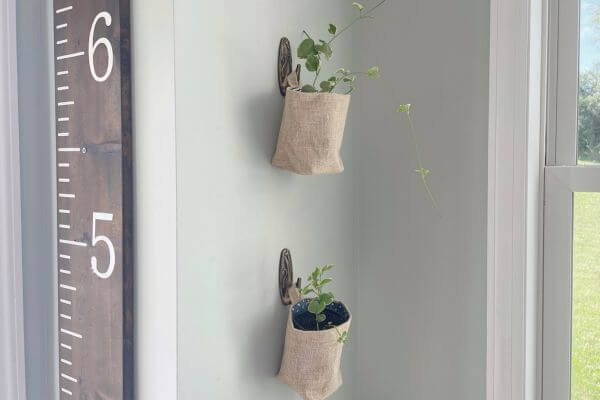
Now it’s time to grab a wall basket or hanging planter and display these newly DIYed hooks!

I found these cute and budget friendly burlap hanging baskets on Amazon which are linked HERE and come four in a pack.
They come with a little tag, but I simply removed the stitching with a pair of fingernail scissors. It was super easy to remove the tag!

Place Plants in Your Hanging Planters
Up next is buying a few trailing plants to fill your baskets. These two plants were an inexpensive purchase from Walmart; however, I think Pothos plants are my favorite trailing houseplant.
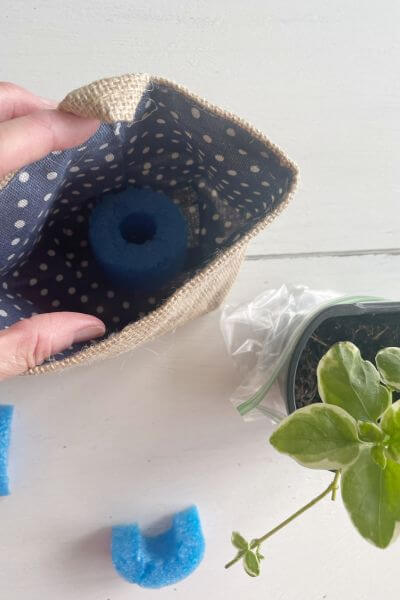
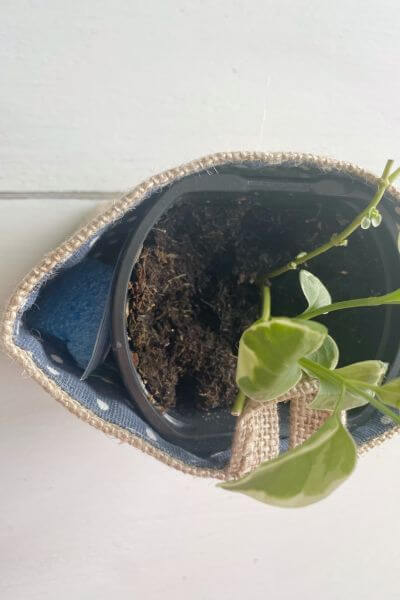
I placed a baggie around the bottom of the plant container to protect my baskets. Then I used cut-up pool noodles I had on hand (from Dollar Tree) to raise them up a bit and stabilize the sides.

Hang Your Wall Planters on the DIY Vintage Command Hooks
Next up, it’s time to hang your plants on the wall using the vintage-inspired command hooks you created.
I kind of eyeballed how much space to put between the two planters.
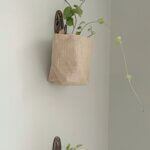
Here’s how these planters are looking now that they are up on the wall!

Touch Up Command Hooks If Needed
So, I do have to say that the scratchy burlap rubbed a bit of paint off the side of the hook as I placed them on.
Nothing a bit of rub ‘n buff can’t fix though, as you can see in the pictures. I just placed a small amount on my finger and rubbed it on the white area.


And that’s a wrap on this tutorial for creating a vintage inspired look on plain old white command strip hooks!

Wrapping Up this Command Hook Hack Tutorial
What are your thoughts on this command hook hack? I like that these hooks can be unique to your space and give a pretty vintage look to an otherwise plain old command hook.
These hooks have been holding up really well so far with these little trailing plants in them. I simply take them out to water them, allow them to drain, and then place them back into the bag.
The burlap wall baskets are budget-friendly and cute, and come four in a pack. There are different designs inside each one.
I actually had my Rub ‘n Buff on hand as I was working on a metal shelf tutorial at the time (coming soon). A little bottle goes a long way and can be used for many different home decor projects.
Is this something that you’d like to try in your home? Tell me down in the comments!
And, as always, thanks so much for reading!
Go out and grab a few command hooks, paint, and a bit of rub ‘n buff and pretty up those hooks which are perfect for hanging planters!
Pin me on Pinterest! ⬇️

Please consider subscribing to my email newsletter for DIYs delivered right to your inbox…sign up is below! 👇
Such a great idea!! Thank you!
Hi there! So glad you liked this command hook hack. Thanks for the kind comment!😊