
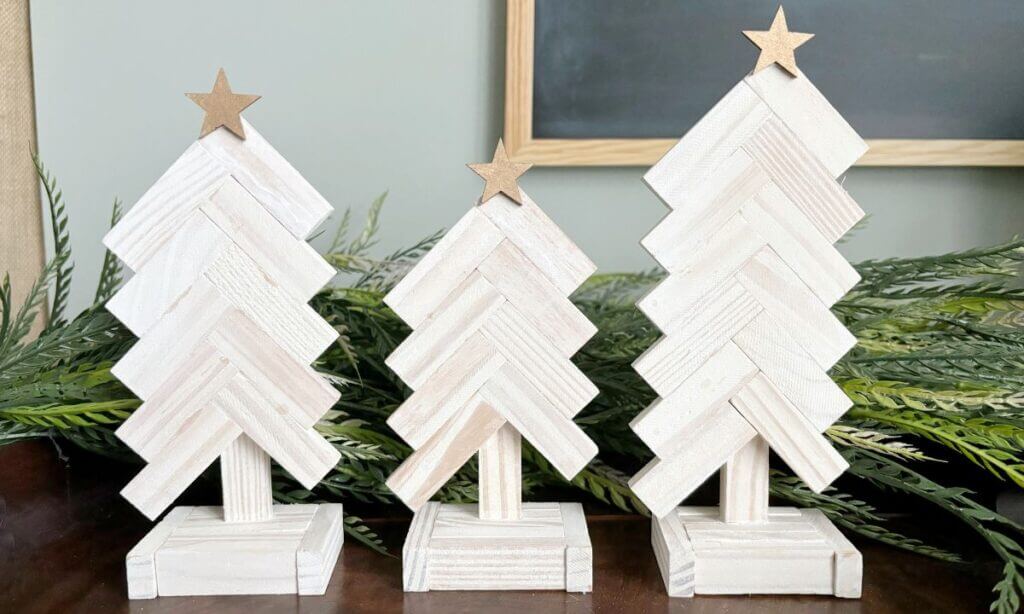
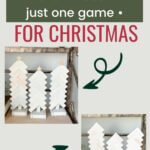
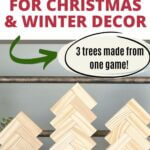
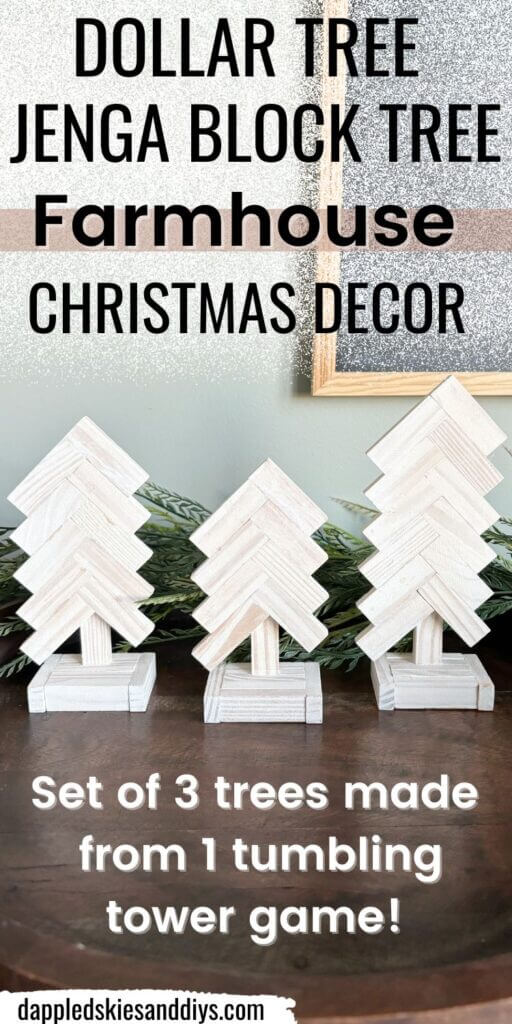
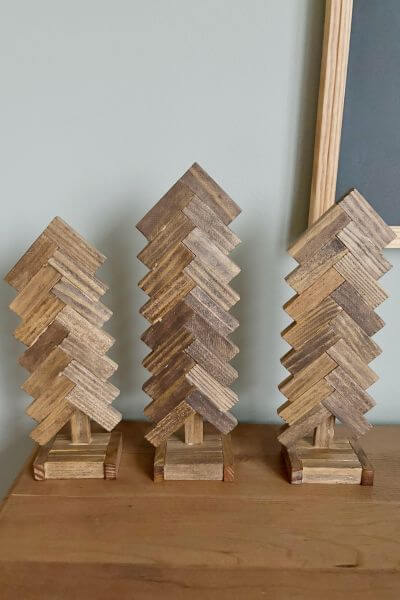
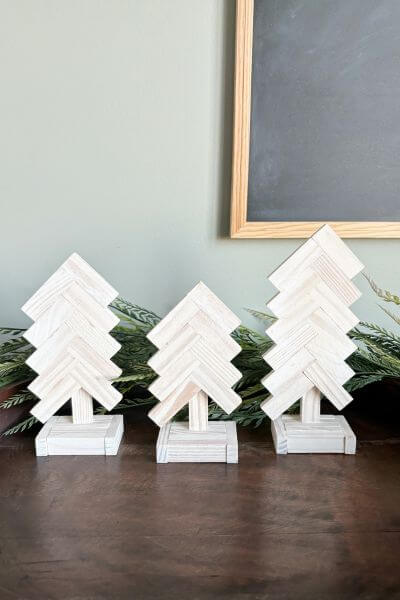
This Dollar Tree tumbling tower craft is a simple and rustic DIY for the holiday season. And you can make 3 trees of varying heights from just one set of Jenga blocks!
Can you believe Christmas time is upon us again? The season seems to sneak up on me every year. One second, I’m enjoying pretty fall leaves and pumpkin spice, and the next second I’m seeing peppermint mochas and evergreen trees all around.
But each season brings with it something special and magical, don’t you think? Along with different things to look forward to.
One of my favorite activities during these seasons is trying out different crafts. And this Christmas DIY uses wood which is one of my favorite things to work with.
And can you believe it? I got this wood at the Dollar Tree for $1.25 and in the form of a tumbling tower game in the toy section.
So. Much. Fun. Am I right?
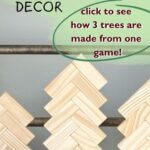
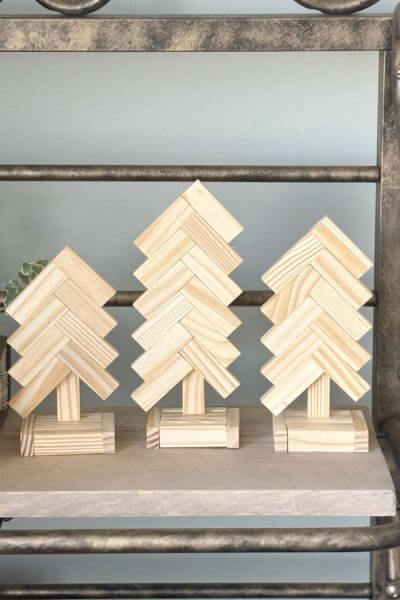
The absolute best part about this craft is you can create 3 trees of varying heights with only one set of Dollar Tree jenga blocks.
You can even customize them any way you want to, and I’ll give you a few ideas at the end of the post.
So read on, fellow Christmas crafters, this dollar store tumbling tower tree craft has to be one of my all-time favorites. And, as a bonus, so cost effective too!
Just FYI, the trees pictured below are made the same way. I just have a trio of taller and shorter versions in this tutorial. Read on!

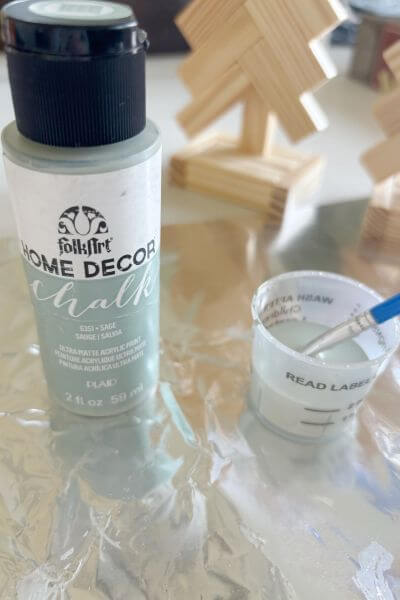
Dollar Store Tumbling Tower Tree Supplies
Only 4 supplies are used to make this Dollar Tree Christmas tree craft, and at least one of them you most likely have on hand already.
This post contains affiliate links. As an Amazon Associate, I earn from qualifying purchases. This means when you click a link, I may earn a small commission at no cost to you. This helps me to run this website. Thanks in advance for your support!
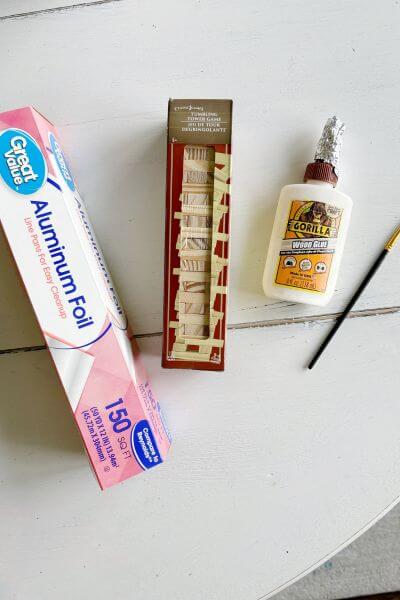
- Dollar Tree Tumbling Tower Game
- Tin Foil
- Gorilla Wood Glue
- Craft Paintbrush
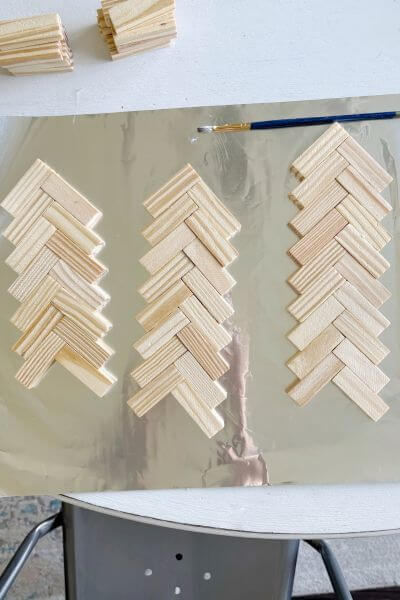
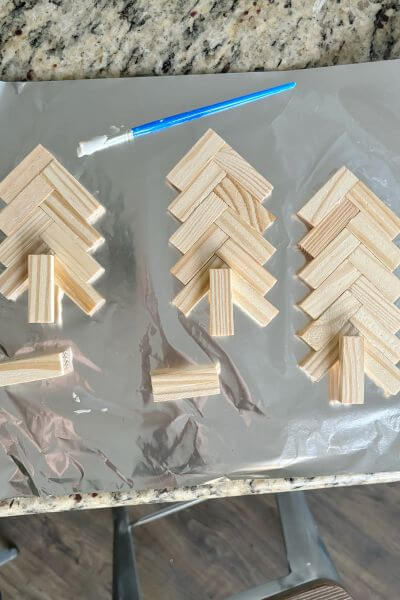
First, Assemble the 3 (Taller Version) Trees on the Tin Foil
These are the instructions for the taller version… the shorter version is listed next. However, the shorter and taller versions are made the exact same way, except for a different number of “branches”.
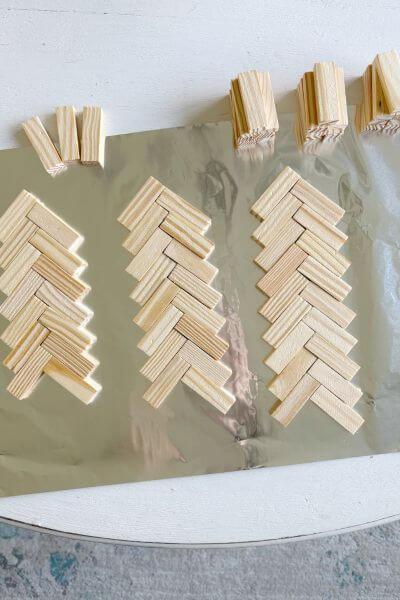
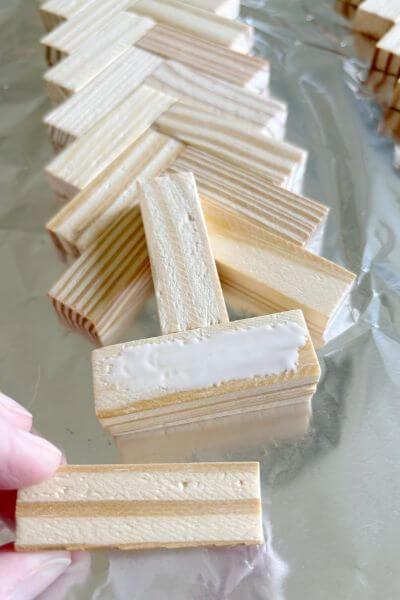
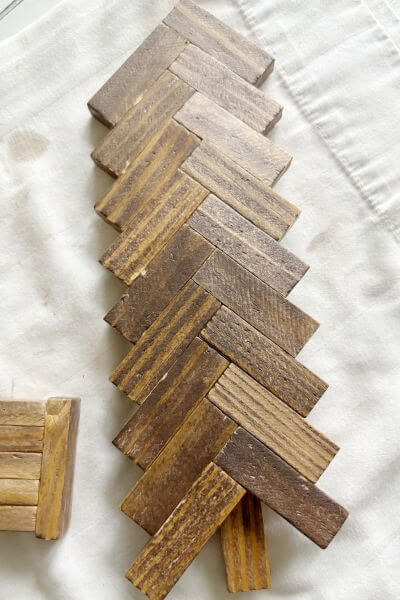
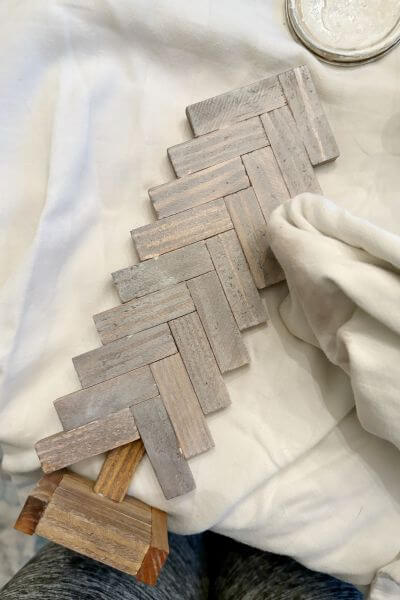
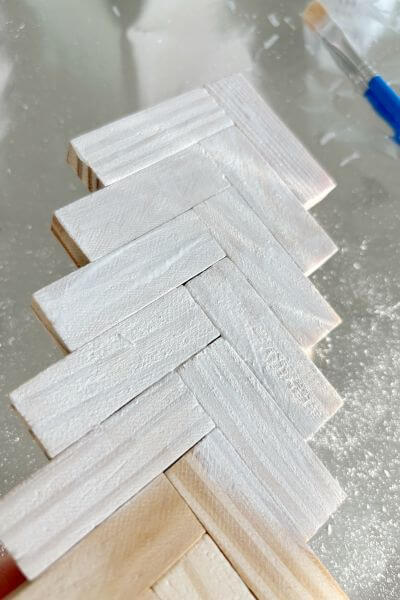
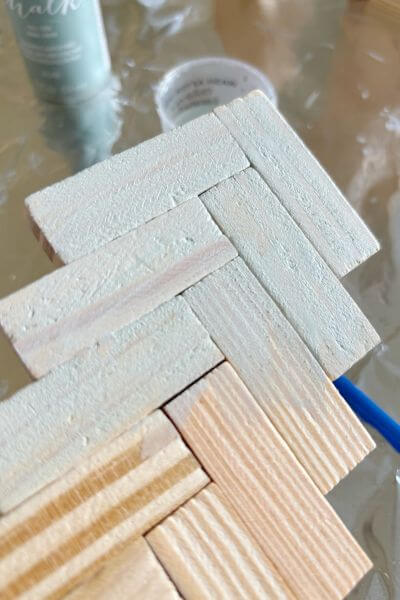
First things first, simply assemble the three trees on the tin foil. We’re doing this in a herringbone pattern.
The trunk assembly comes next, so don’t worry about that yet.
The first tree will have 9 limbs on each side, the second tree should have 8 limbs and the third tree should have 7 limbs.
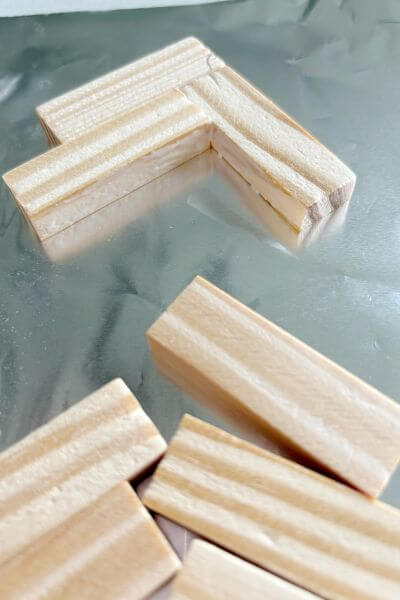
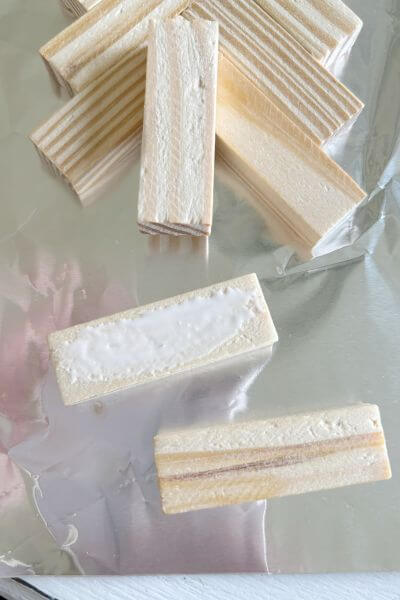
Arrange the three tumbling tower block trees as shown in the picture below.
There is also a pile of 3 blocks that will be used to make each trunk. The other piles contain 7 blocks each and will be used to make the bases for each tree.
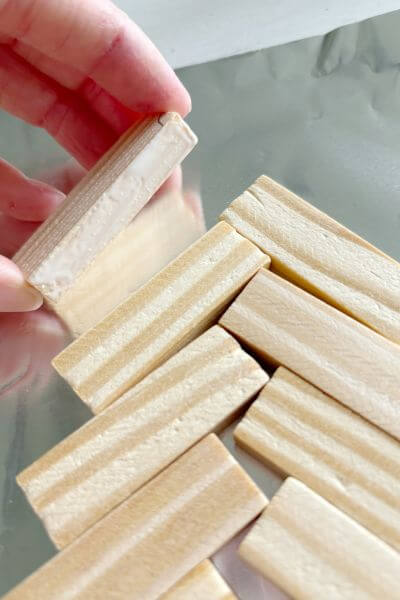
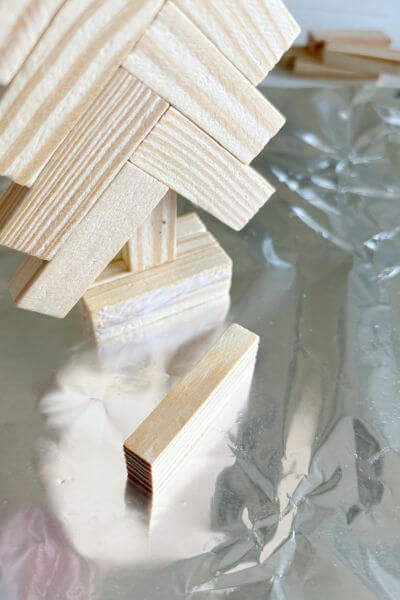
Glue the Jenga Pieces Together to Make Tree Branches
You’ll be using tin foil to make sure the blocks don’t stick to the work surface.
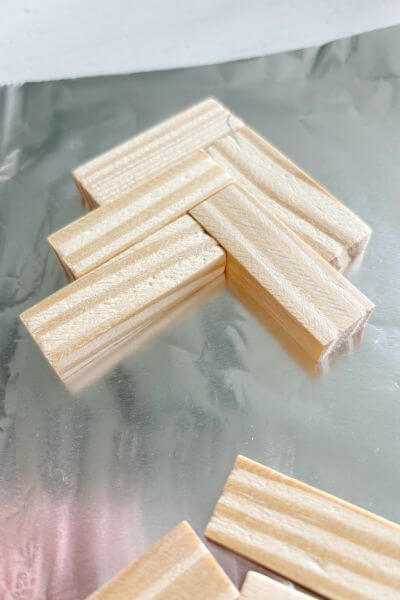
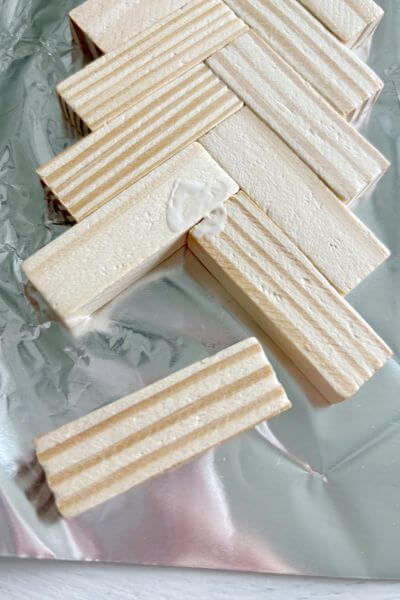
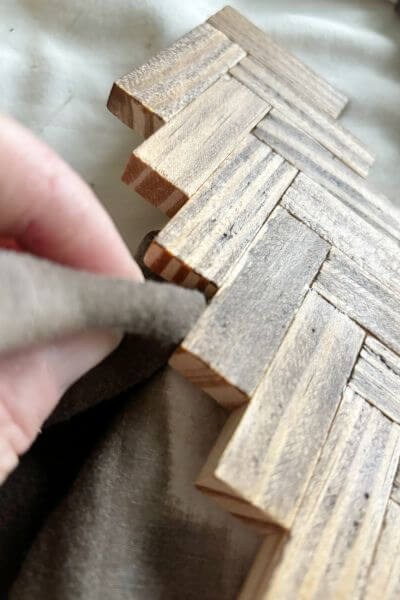
Begin by applying a small amount of glue to the edge of the first block using your craft paintbrush. Paint the glue on the block the whole way across.
This is shown in the picture below.
Adhere the second block (from the other side) to that first one, then place a small amount of glue onto the edge of the third block in line.
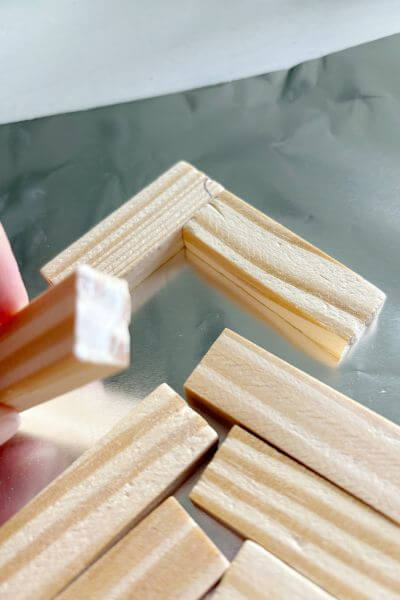
Now place the third block up against the first two. Continue to follow the herringbone pattern to form the branches of the tree.
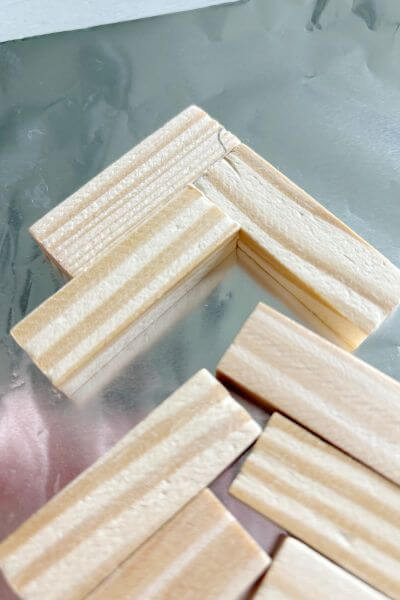
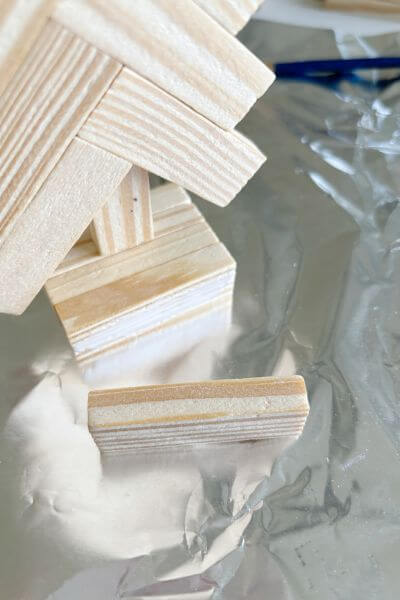
Now that the first three blocks are in place, I found that the easiest way to complete the rest of the branches was to place glue across the bottom edge of the blocks while they were resting on the tin foil.
This way you’re not picking up the blocks and moving them around, disrupting your glued pieces.
Butt the next two Jenga block pieces up against the previous ones that have glue on them. Continue to follow the herringbone pattern.
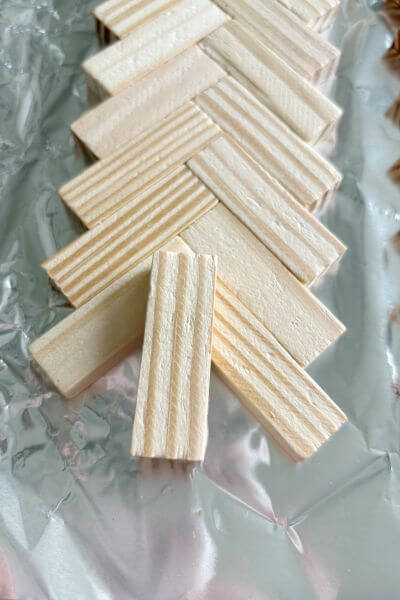
Continue adding blocks and working down toward the base of the tree, keeping with the same pattern.
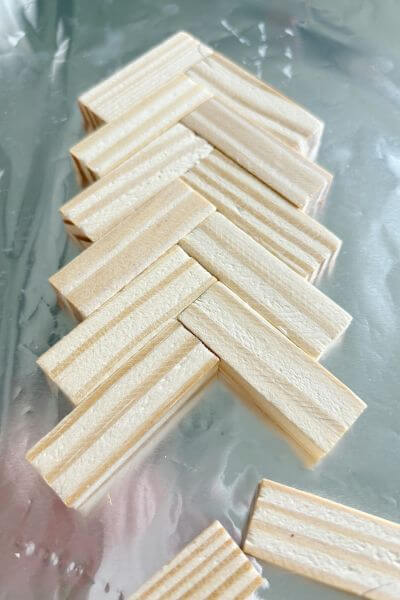
Glue on the final Jenga block piece to complete the branches. You can put a little glue on the end of it before adding it to the right side.
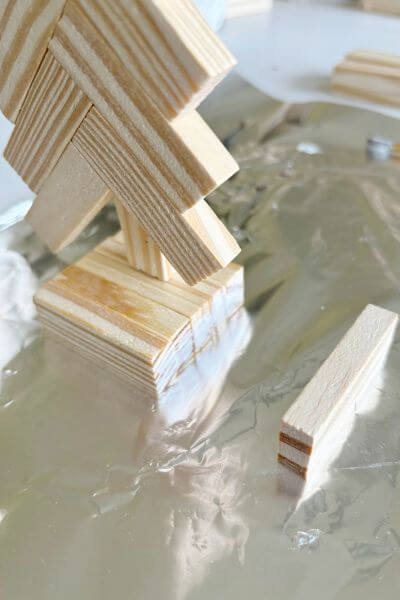
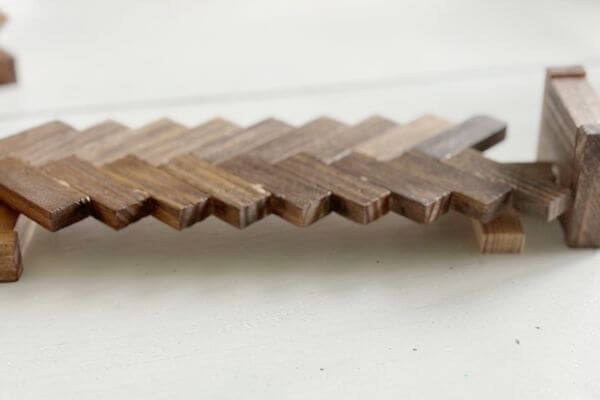
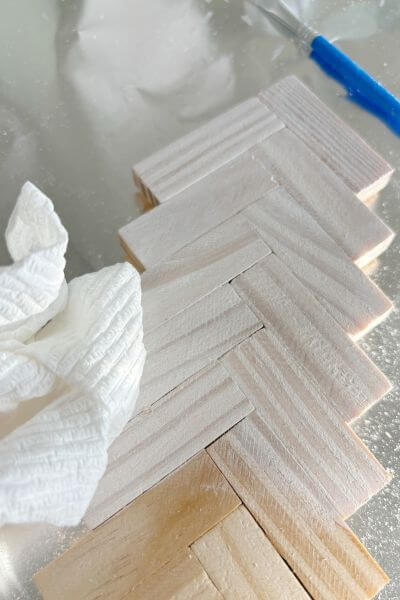
The tree pictured below has 7 branches on each side.
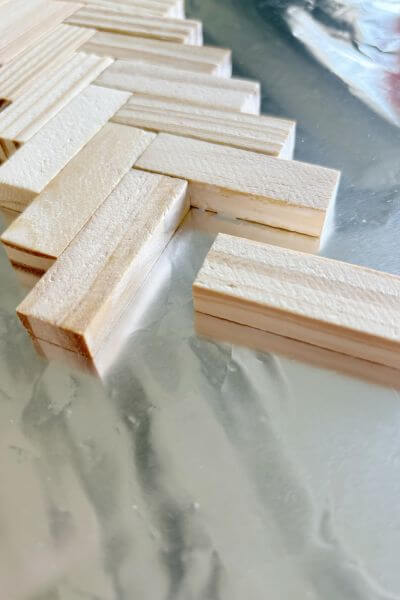
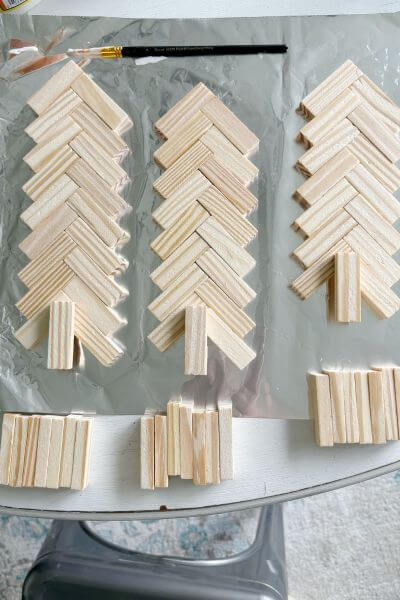
Now the branches for this tree are finished. You’ll do two more trees, but one will have 8 branches (or blocks) on each side and the other will have 9 branches.
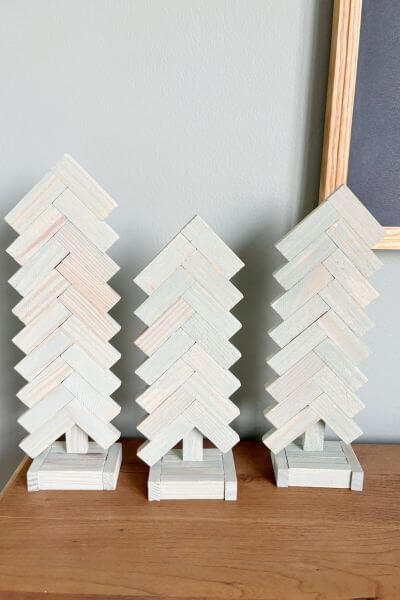
This is how all three trees look so far…
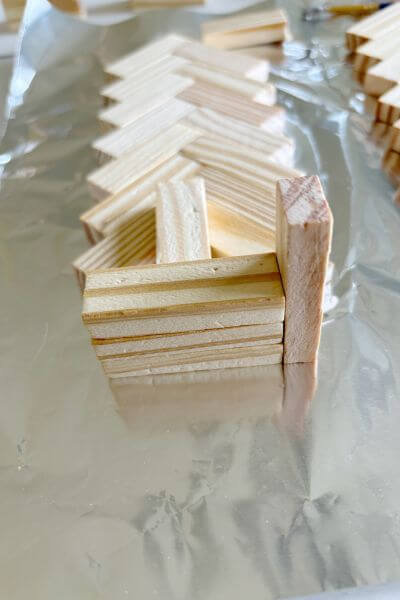
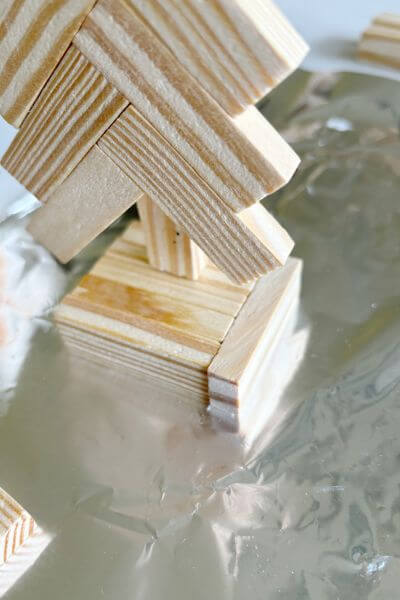
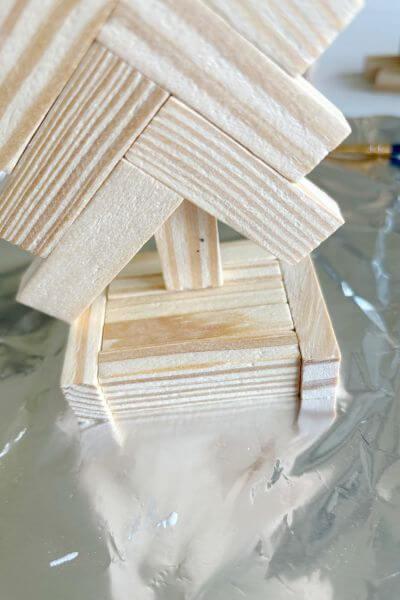
Glue the Trunk to the Jenga Block Tree
Now it’s time to create the trunk. It’s super easy!
Place a bit of glue on the middle of the lower branches.
Then place the Jenga block onto the glue to create the tree trunk. I didn’t wait for the glue to dry totally, just moved on to creating the first part of the base, which is in the next step.
Make sure that the bottom of the trunk is just a bit below that lower branch or the base will hit the branch. You’ll see what I mean in the next step.
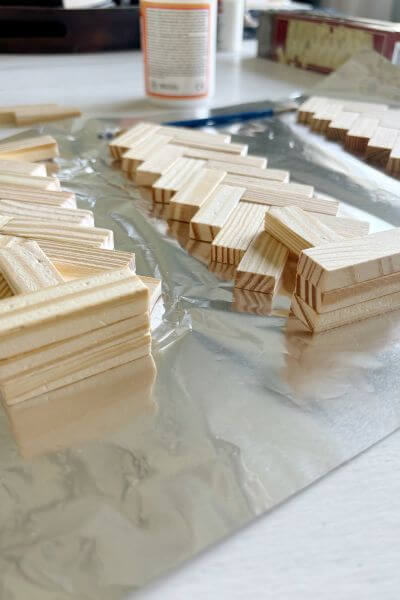
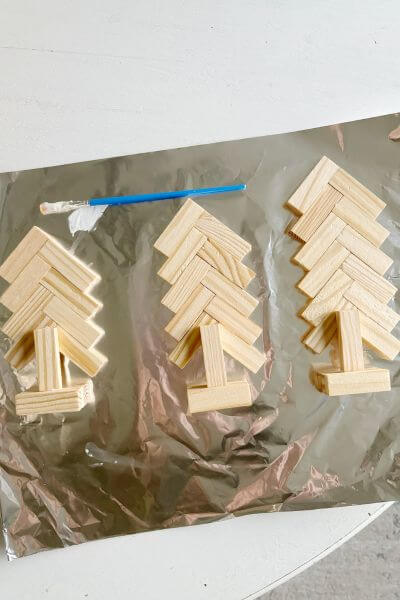
This is how the three trees look so far with their trunks glued on. The remaining blocks will be used to make the bases for each tree.
Create the Base for Your Tumbling Tower Tree
First, take two of the blocks and glue them together.
Place some glue on the bottom of the tree trunk block.
Then take the two stacked and glued base blocks and butt them up against it.

Put glue on the top of the base block and add another Jenga block to the base. You’ll have three stacked blocks now.
I used another loose Jenga block to make sure that all three base blocks were lined up and flush with each other as shown below.
However, do not glue this one on.
This is how they look so far with the 3 base blocks added to the bottom and glued to the trunk. Allow these to dry so they are sturdy before moving to the next step.
Stand the tree up and glue another block to the front of the base.
And another. You may have to hold the blocks there for a bit to make sure they are secure and flat against the work surface.
This helps ensure that the tree is not wobbly.
So far, we have 5 blocks for the base, more blocks toward the front, because the tree will topple forward if we don’t do it this way. 😉
Put some of the wood glue on the side of the base.
And then add another tumbling tower block to the side of the base.
Then add another block to the other side of the base.

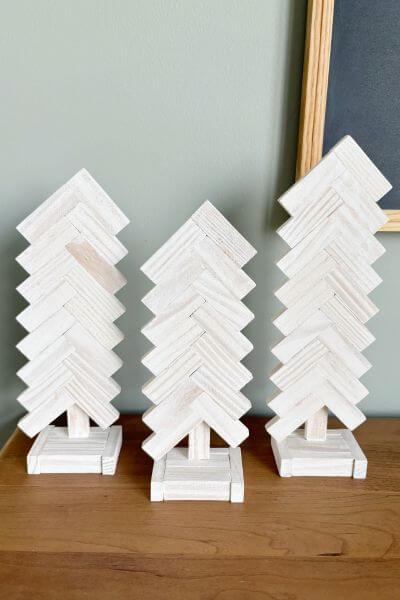
Now the base of the tree is finished!
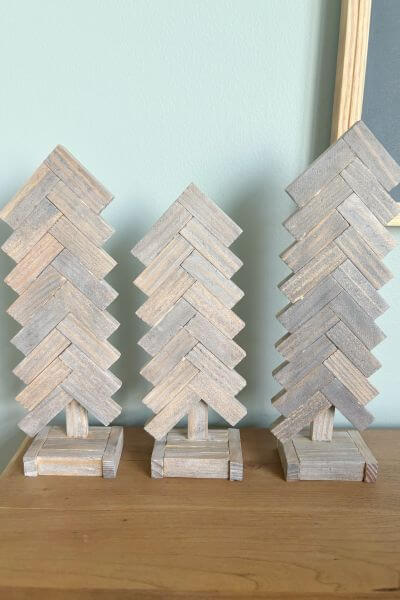
Here is how the three little Christmas trees all look so far.
And now for the shorter version of these wood trees.
Shorter Version Tumbling Tower Trees
Ok, so after I had made the taller trees, I thought how about try some shorter versions.
These three trees are made the same exact way as the taller ones; however, they have a different number of branches. This makes them a bit shorter.
I started by arranging them and then gluing them while on the tin foil. One tree has 4 branches on each side, one has 5 branches, and the other has 6.
Just as in the above tutorial, I glued the trunks and bases to these shorter trees.
And here they are! So cute…I may like these shorter trees even better!
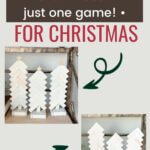
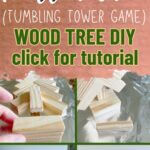
Give me a pin on Pinterest to save this idea! ⬇️
And now you can customize either the taller or shorter version of these trees any way you would like! Here are a few ideas I tried out with stain and paint for these cute and rustic Jenga block Christmas trees.
A Few Ideas to Consider for Decorating the Jenga Block Trees
First, I tried out staining the trees, and then I tried paint washing. Here’s how the tumbling tower blocks took the stain and paint.
Staining the Jenga Block Trees
I tried out staining the three trees and this is how they turned out.
First, I used a cotton cloth to apply Special Walnut stain to the trees. Then, I immediately wiped off the stain.
On one of the trees, the trunk popped off the base and this is how I re-glued it. I had no difficulty with the other 8 that I coated with different paint and stain finishes. However, just in case this happens…
I simply propped one end on the base of the other tree, and then placed a Jenga block underneath the other end. Applied the glue again to the bottom of the trunk and butted the base up against it. Then allowed the glue to dry. Here’s the pic.
Here are the three trees after Special Walnut stain was applied. It came out darker than when I used the same stain for my wire shelf makeover, so I assume that’s because the wood may be a different type.
Next, I applied the Simply White stain over the Special Walnut stain. I immediately wiped the stain off after application.
These Dollar Tree large craft sticks are great stir sticks for these little cans of stain!
Here are the trees after Simply White stain had been applied, on top of the Special Walnut stain.
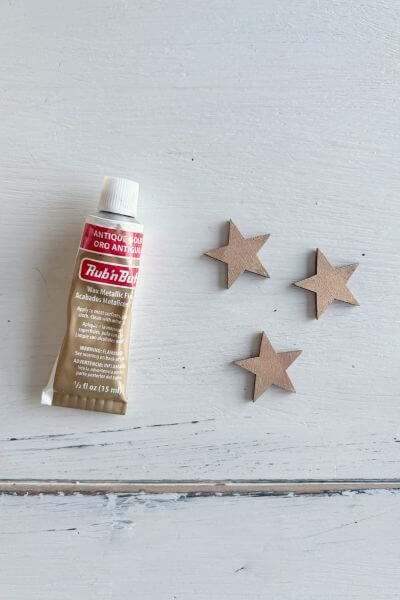
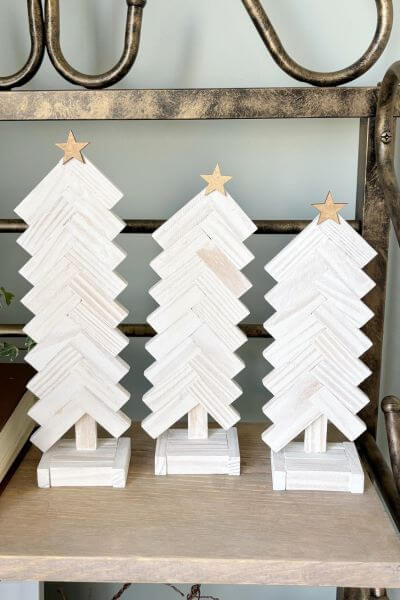
I had a package of wooden stars that I had saved from another Christmas decor project, here’s a link to that post…How to Make Cozy Yarn Christmas Trees.
So, I figured I would put them to use. I used a little antique gold Rub n’ Buff to give them some shine. Just rubbed it on the front and back of the star with my finger.
I didn’t bother getting the Rub n’ Buff on the sides, since they were a darker shade of wood anyway and blended in.
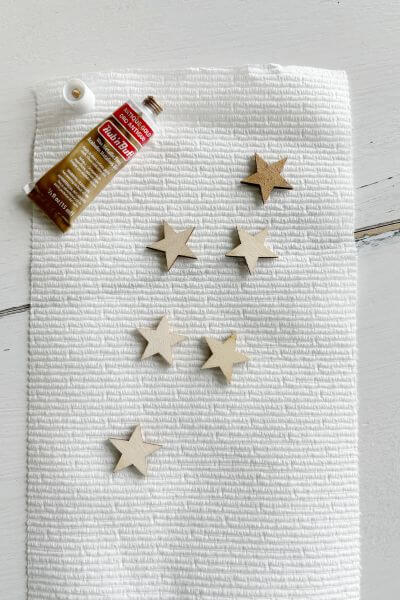
Then I used a little bit of wood glue to adhere the stars to the trees.
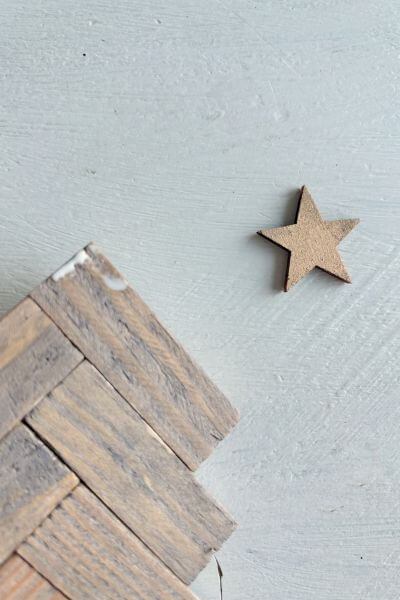
And they are all finished!
Paint Washing the Tumbling Tower Game Trees
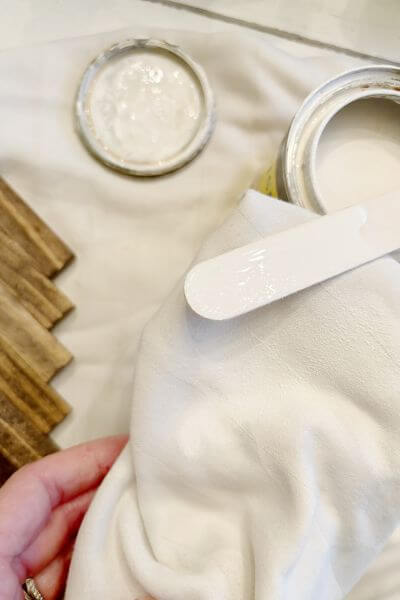
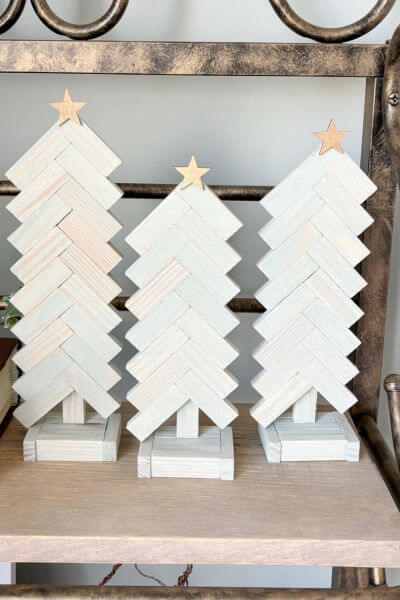
Next, I tried paint washing the trees. I used white on one set and green on the other set. I wanted to do a wash instead of just apply the paint by itself, because I wanted to see the wood grain through the paint.
A little measuring cup that came with some medicine came in handy, because you don’t need a large amount. Mix acrylic white paint and water at a 1:1 ratio.
The measuring cup makes it easy! One teaspoon of paint and one teaspoon of water! 😉
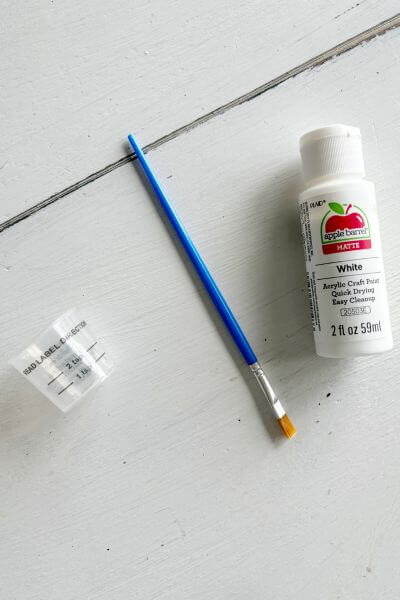
Mix it up with your paintbrush. Then apply it to the tree in small sections. After applying the mixture to a small section then immediately wipe it off with a paper towel.
As you work in small sections and continue to wipe it off, just be sure (especially when you are doing the sides) that it doesn’t streak the front of the tree.
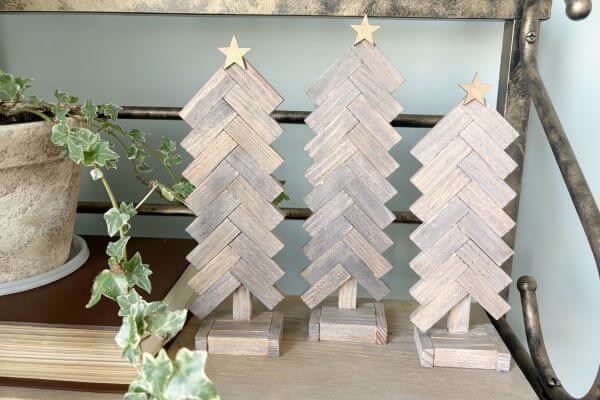
Here’s how they look with and without the gold stars applied to the top.
And here’s a pic of the shorter trees with the same white paint wash.
Just one more idea…
On the next set of trees, I followed the same process but used a sage green chalk paint instead.
Mix the paint and water at a 1:1 ration in the small measuring cup. Then apply the paint wash with a craft paintbrush and wipe off with a paper towel, completing small sections at a time.
This is how they looked after completing the paint wash, with and without the gold stars on top.
Finishing Up this Dollar Tree Tumbling Tower Tree Craft
So, what do you think of this Jenga block Christmas tree craft?
My favorite part is that a whole set of trees can be made from one set of the tumbling tower Dollar Tree game. That’s only $1.25 for three trees of different heights!
You will use every last block in the game for this DIY (if you are making the three taller trees), so be sure to follow the tutorial carefully! 😉
If you are making the trio of shorter trees, then you will have some blocks left over.
And all you really need to have on hand is Gorilla wood glue and a little paintbrush! Oh, and some tin foil.
These would be perfect presents for the upcoming Christmas season for friends and family.
And you can customize them however you like with paint or stain in a color of your choosing.
These trees can be made with or without the star on top, so you could keep them up as decorations through the winter months as well.
If you love this DIY, please share it on Pinterest below! And any questions for me, just pop them down in the comments!
Happy Christmas crafting, everyone!
Next time you’re out and about at Dollar Tree, grab a tumbling tower game and create this Jenga block Christmas tree DIY that allows you to use one set of wood blocks to create 3 trees!
Pin me on Pinterest! ⬇️

Please consider subscribing to my email newsletter below, for unique DIY and crafts delivered right to your inbox! 👇