


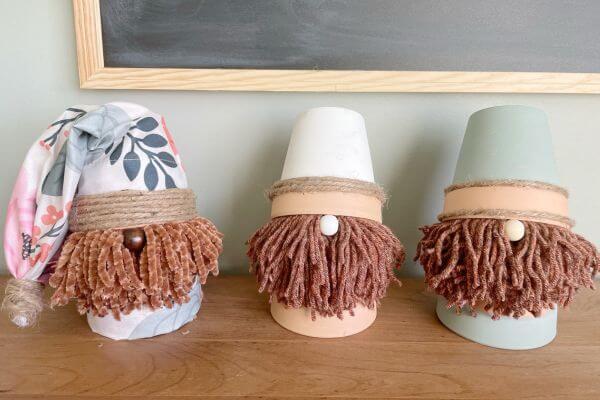
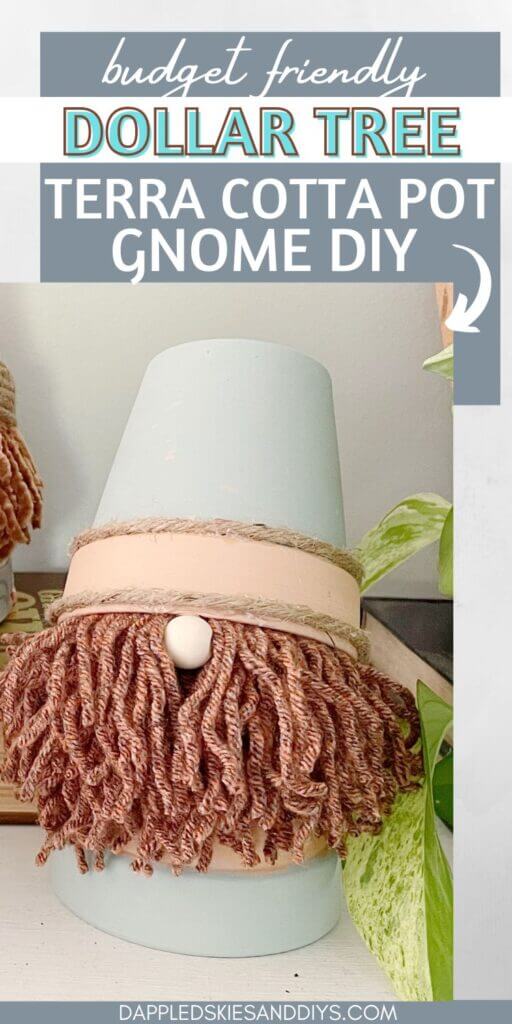
Found a 2-pack of cute little clay pots at Dollar Tree and just knew they could grow up to be springtime gnomes! Added a few other Dollar Tree items including jute wire, fabric, paint, and yarn, and here they are!
Spring makes me want to buy…All. The. Plants. And of course, all the planters too, as I browse different department stores and greenhouses.
One type of planter I love is the terra cotta pot, and I’ve used clay pots in many DIY projects.
So, when I found these cute little “two for a dollar” (well, now a 1.25) clay pots at Dollar Tree in the gardening section, I knew I’d have to find a fun way to put them to use.
Add some brown fuzzy yarn, wood beads, a pillowcase, and jute wire, and a springtime floral gnome was born.
After I had created the first gnome, I wanted to try out a few other options that look similar but have a few subtle variations.
So, now there are three different versions of terra cotta pot gnomes in this post. Choose the one you like best and let me know down in the comments section!
Enough with the intro, let’s get to it before summer hits. On to the tutorial for these Dollar Tree gnome DIYs using terra cotta pots!
Version #1 Flowerpot Gnome DIY
There are three springtime gnomes made with Dollar Tree supplies in this post. So here is the first!
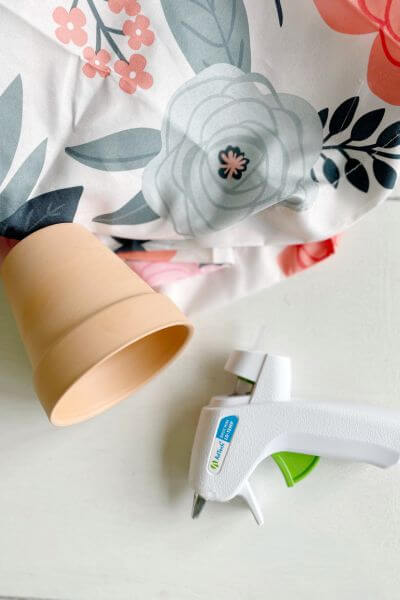
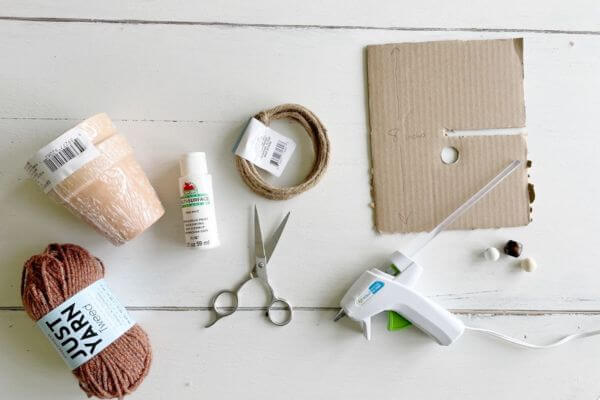
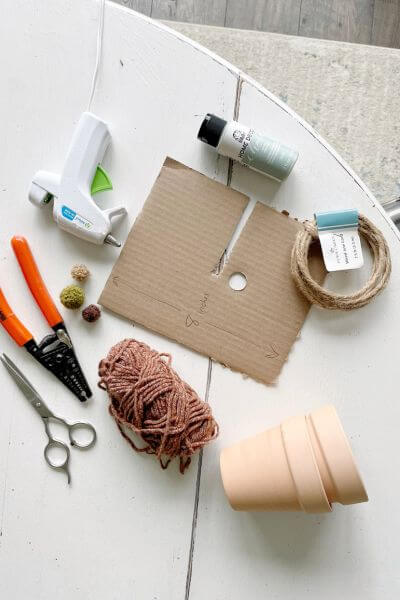
All supplies are from Dollar Tree except the scissors, glue gun, cardboard, and wire cutters.
This post contains affiliate links. As an Amazon Associate, I earn from qualifying purchases. This means when you click a link, I may earn a small commission at no cost to you. This helps me to run this website. Thanks in advance for your support!
Supplies for Floral Fabric Clay Pot Gnome Craft
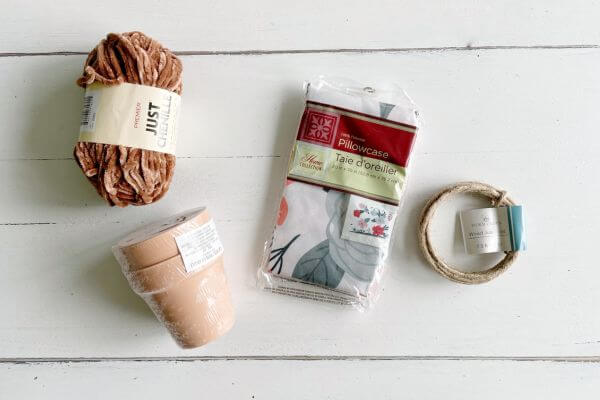
- Clay Pots (2 in a pack)
- Floral Pillowcase
- Brown Chenille Yarn
- Jute Wire
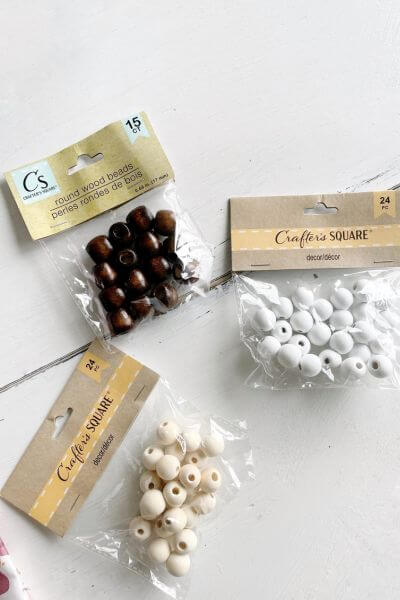
- Wood Beads (shown below)
- Scissors
- Glue Gun (Amazon)
- Cardboard (8-inch)
- Wire Cutters (On Amazon – like mine)
All of these wood beads can be found at Dollar Tree, but for this flowerpot gnome, I chose the dark brown beads.
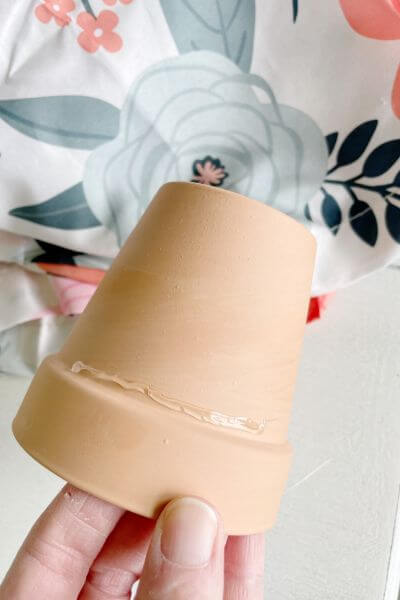
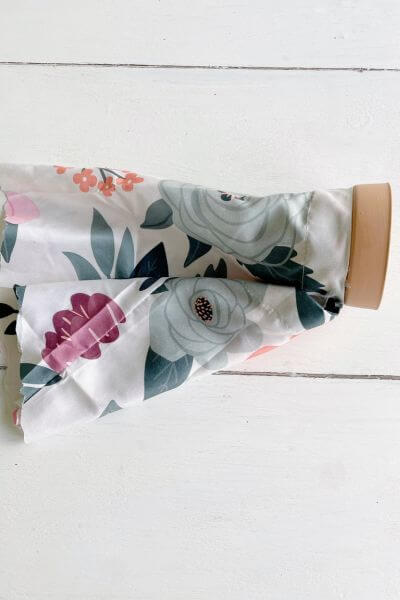
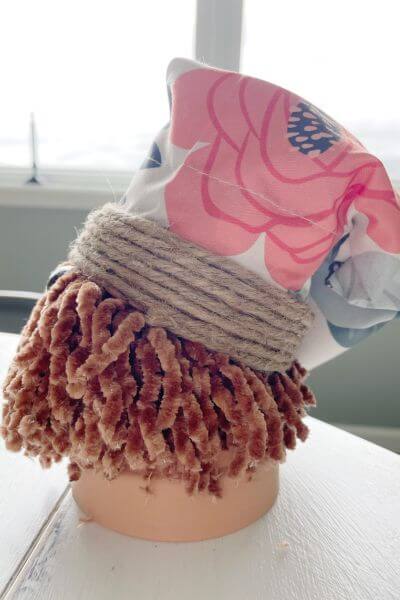
Hot Glue the Floral Pillowcase to One Clay Pot
First, gather up one pot, and your floral pillowcase, and heat up your glue gun.
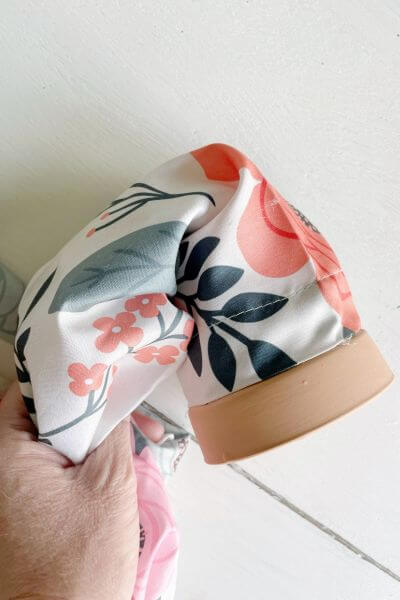
Decide which portion of the design you want to see on the front part of the clay pot gnome hat.
Then using the glue gun, place a line of hot glue on the lip of the clay pot, as shown below. Place the pillowcase on the hot glue securing it to your clay pot.
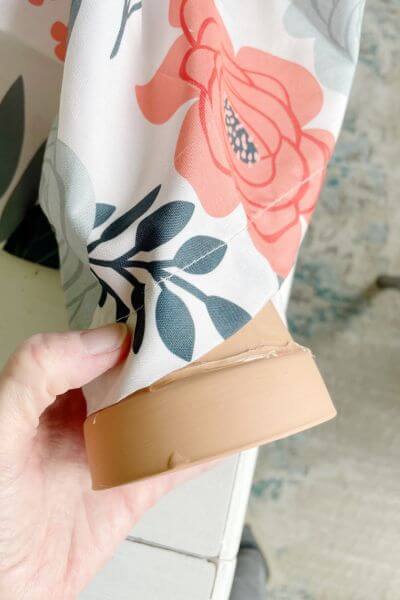
Next, continue making lines of hot glue on the pot, until the pillowcase is wrapped the whole way around.
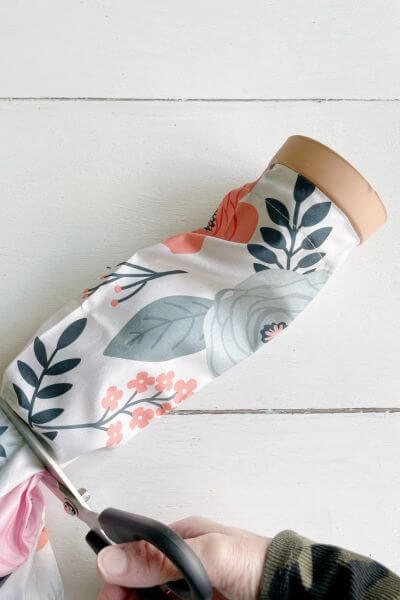
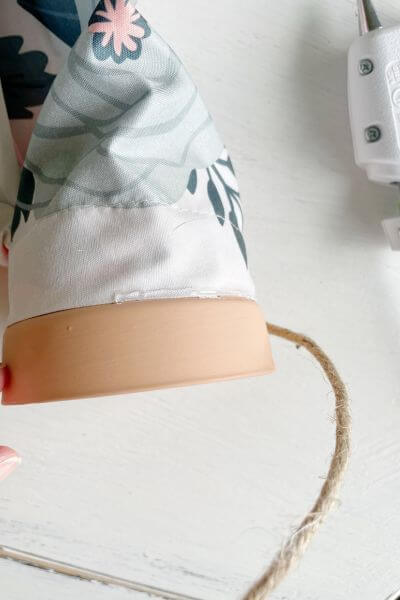
Once this is complete and the pillowcase is securely on the terra cotta pot, determine how much of the pillowcase you’ll need for the gnome hat. I did this by holding the fabric and folding it over so that I would have enough to make a floppy gnome hat.
When I determined the length that I would need, I cut the floral fabric with scissors.
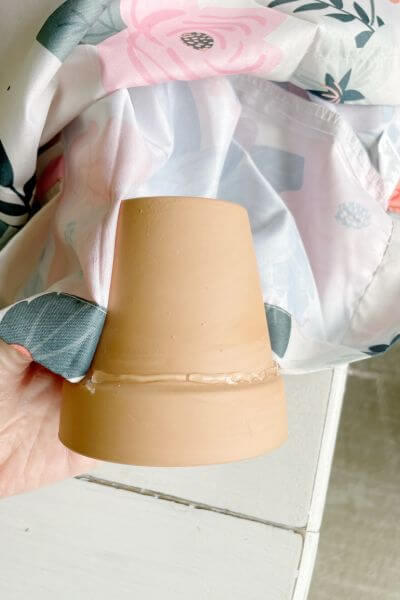
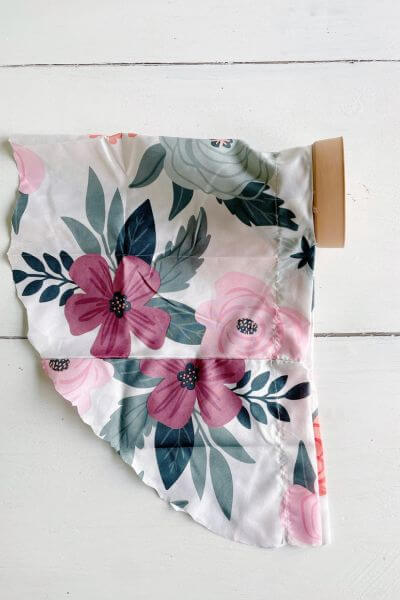
The next step is to fold the fabric over a few times so that the hat is more cylindrical or tube-like. Then glue the bottom portion of the fabric that’s near the clay pot. I didn’t glue all the way to the end, and it worked out fine!
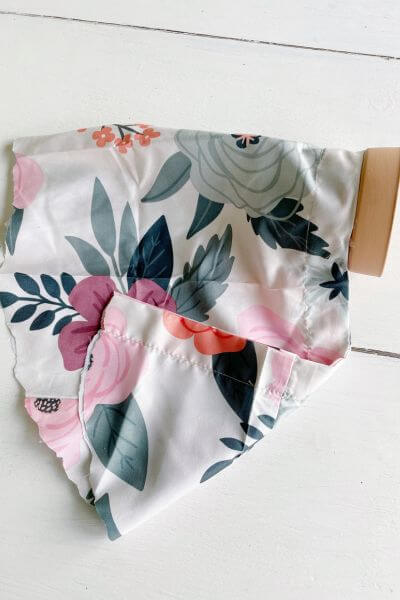
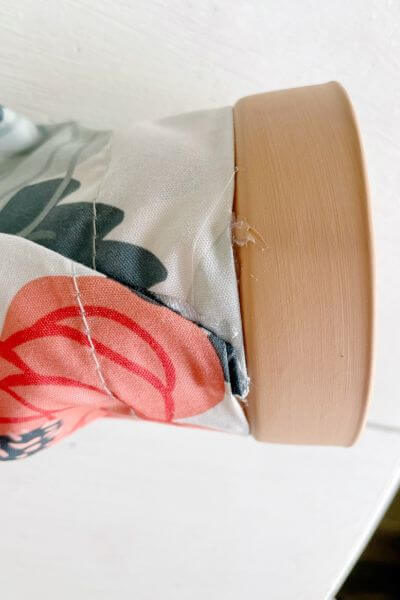
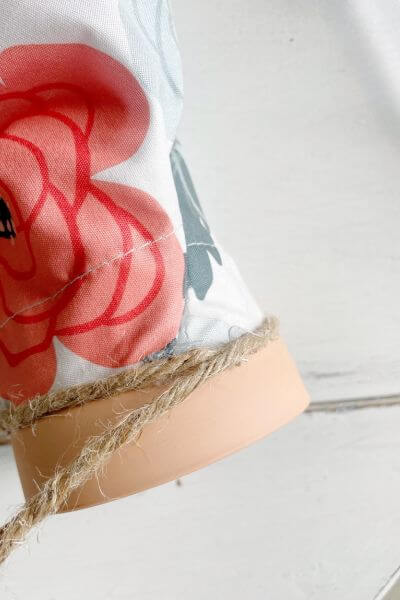
This is how the gnome hat looks so far. 🙂
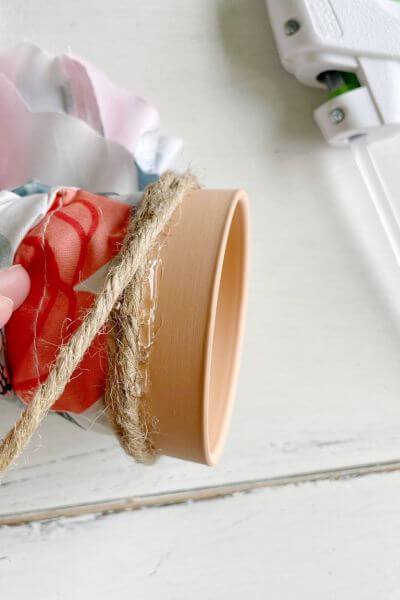
Hot Glue the Jute Wire to the Gnome Hat Brim
Now it’s time to hot glue the jute wire to the terra cotta pot to make the gnome’s hat brim.
Start hot gluing at the back portion of the springtime gnome’s hat. Then, continue securing the jute wire using strips of hot glue.
Continue wrapping and gluing the jute wire around and around. Don’t worry if you get a little glue on the outer portion, it’s easy to pick off later. 🙂
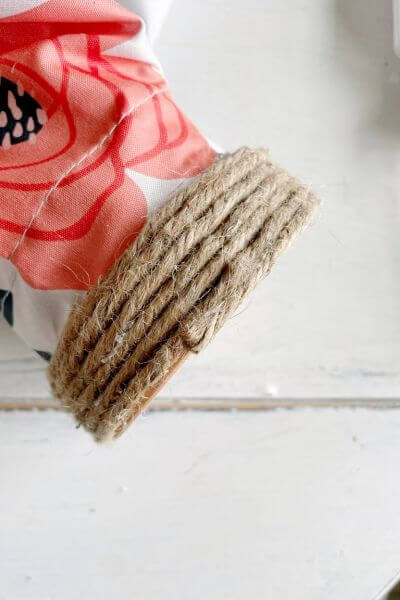
Phew, okay, the gnome hat brim is finally done! Just save the remaining portion of the jute wire for the final step!
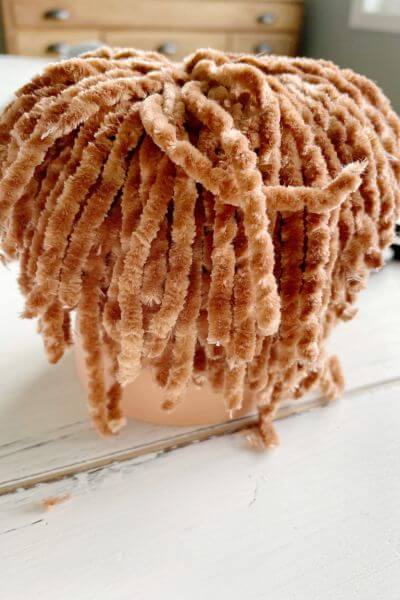
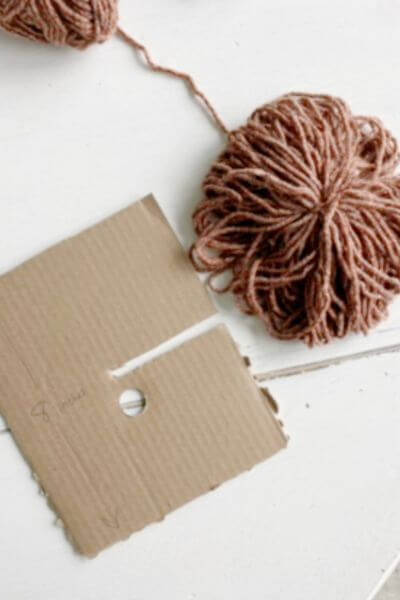
Create Your Gnome Yarn Beard
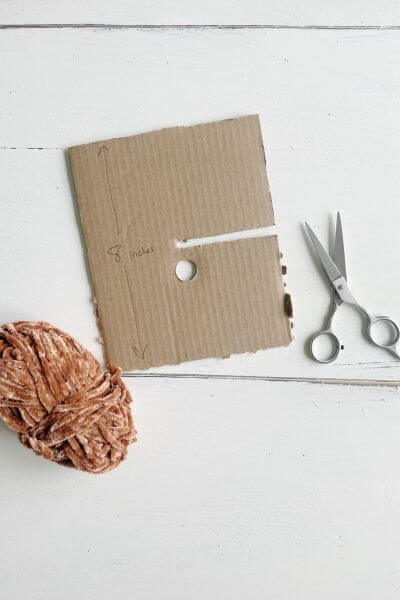
Gather your supplies for the beard including cardboard that is 8 inches in length, scissors, and yarn. I cut a slit out in the middle of the cardboard (ignore the hole).
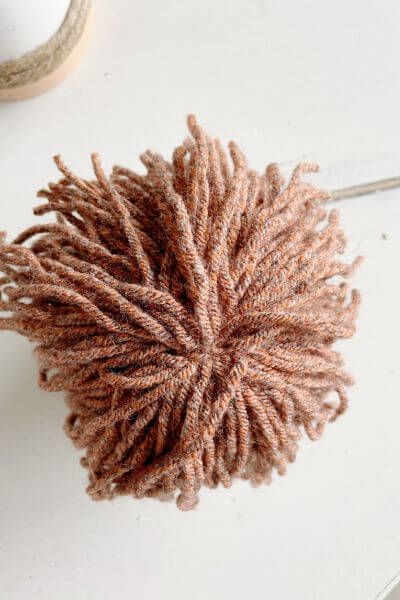
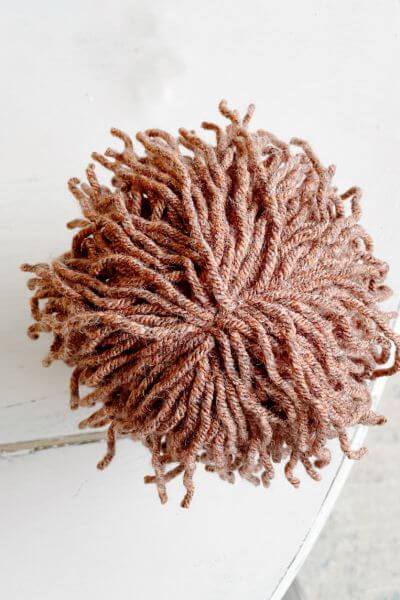
Then wrap the brown chenille yarn about 60 times around the cardboard.
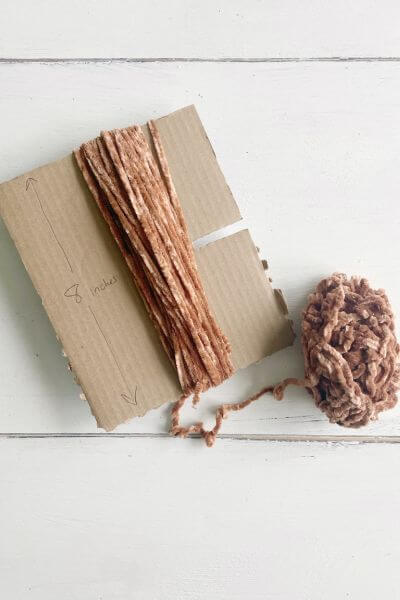
Take another piece of yarn and tie it in the middle, using the slit in the cardboard. Then slide the yarn off the cardboard, tighten the yarn, and make a knot.

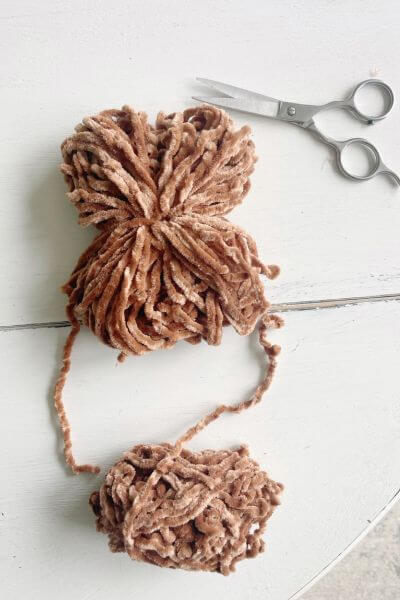
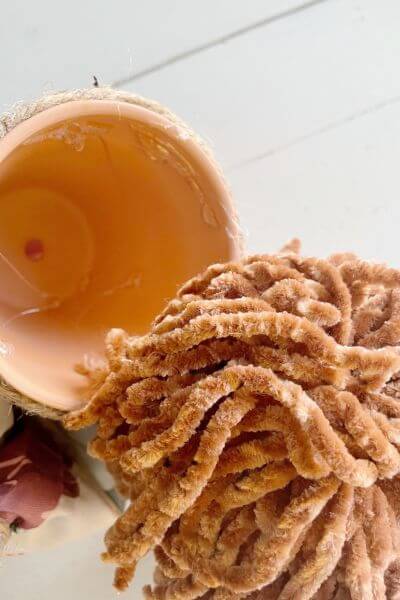
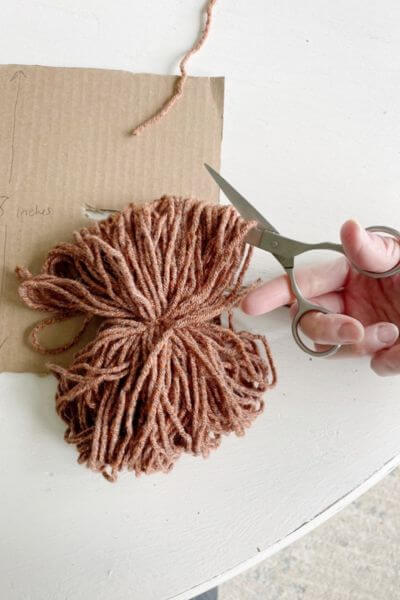
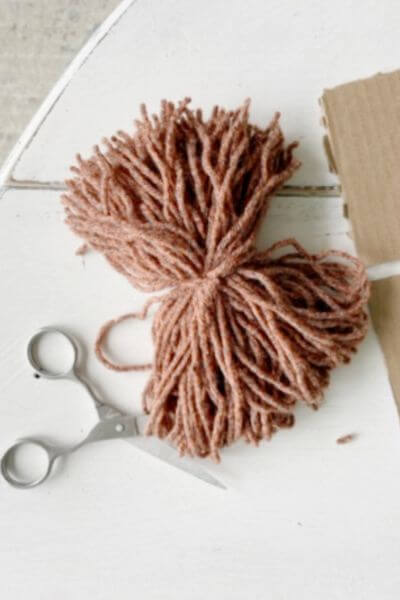
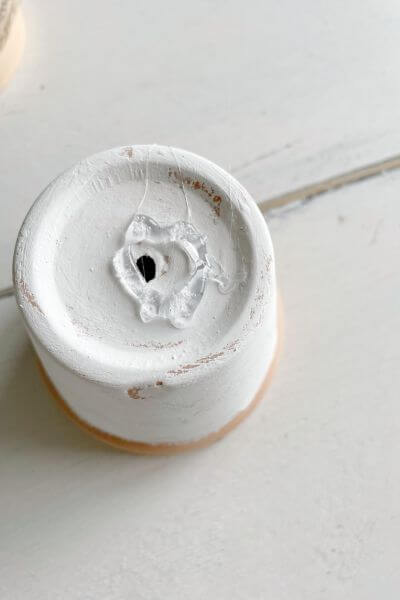
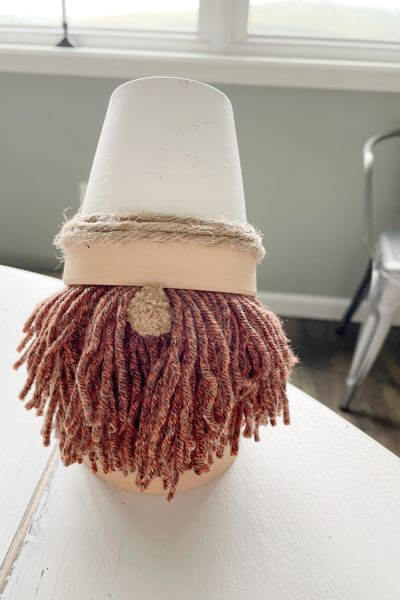
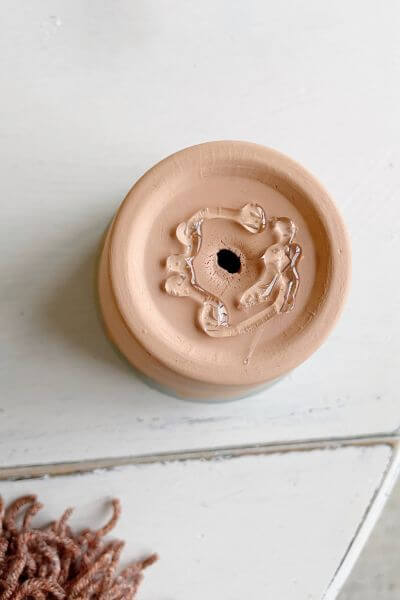
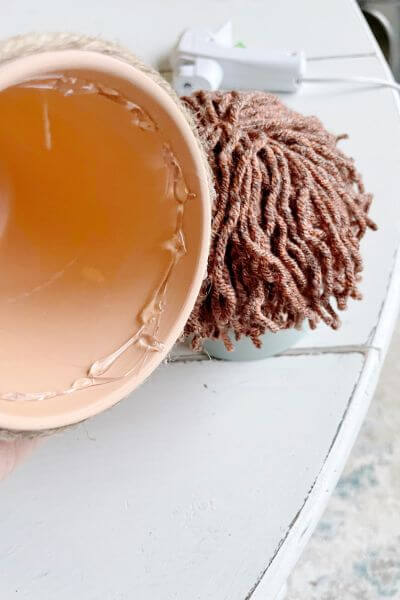
Cut the ends of the yarn on both sides. Then grab the other clay pot, and place hot glue on the bottom as shown.
Place the yarn onto the glue, keeping a bit more of the yarn toward the front part of the clay pot gnome. Now tilt the hat a little and place it on top of the yarn.
The hat will be angled slightly toward the back.
Place a little hot glue on the inside of the clay pot hat and then secure the hat onto the yarn beard.
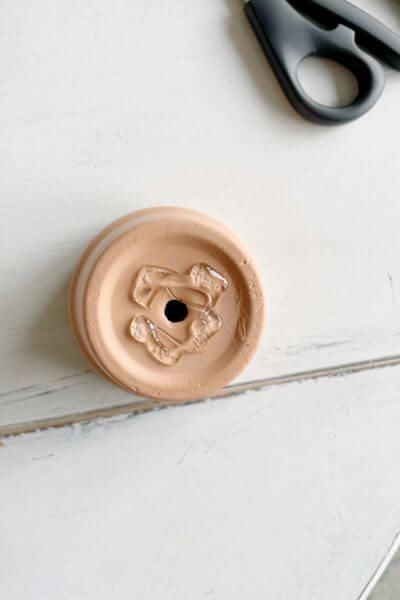
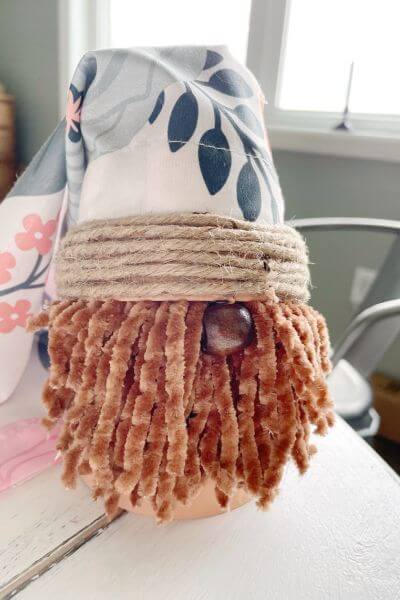
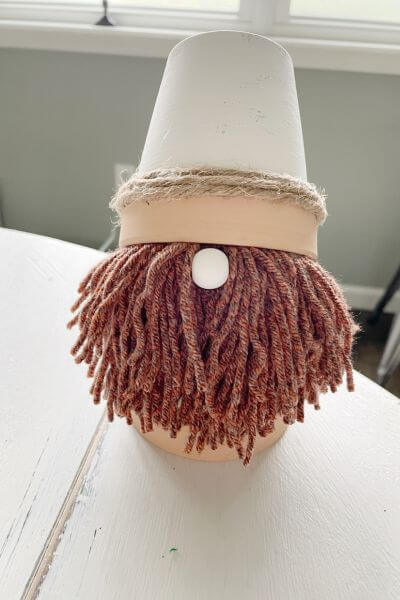
Hot Glue a Wood Bead to Make the Gnome Nose
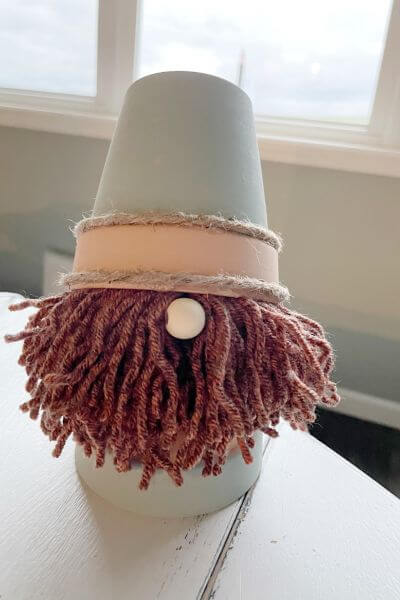
Separate the yarn a bit underneath the brim of the hat. Place a dab of hot glue onto the yarn. Now grab the wood bead and place it onto the hot glue. I made sure the holes were on the sides.
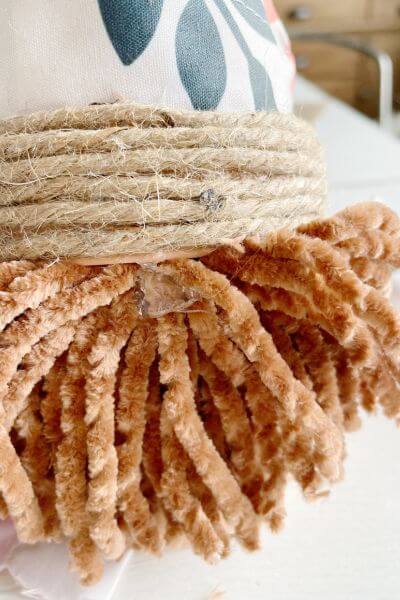
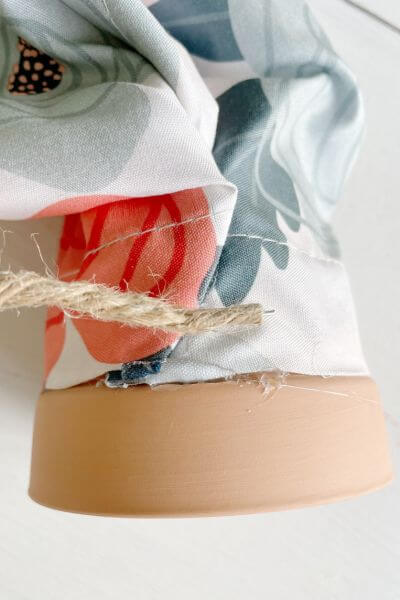
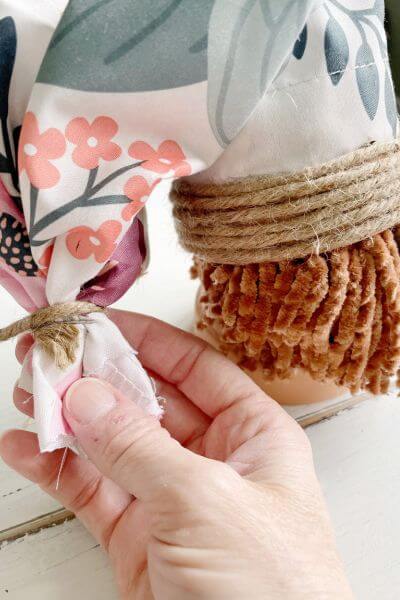
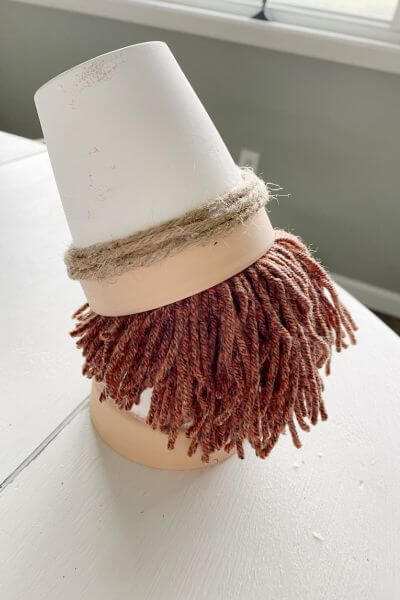
Finish End of Floral Hat with Remaining Jute Twine
We’re going to secure the end of the hat using the rest of the jute wire left over from the hat brim.
Wrap the jute wire around the end of the hat as shown in the picture. This ties off the end and creates a little jute twine ball.
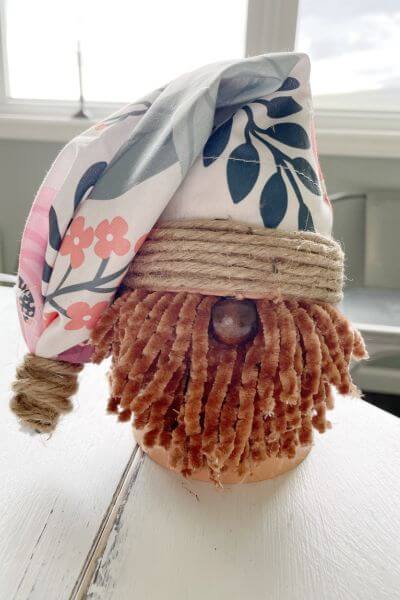
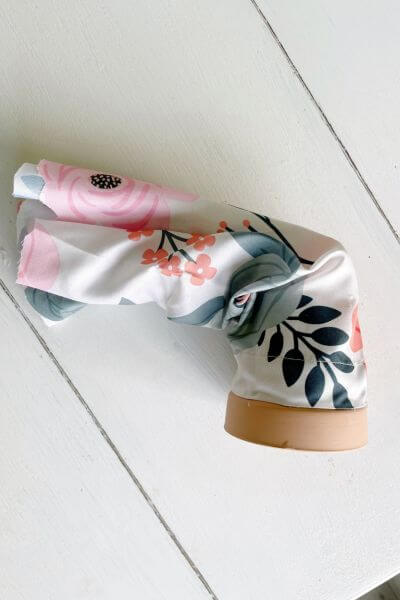
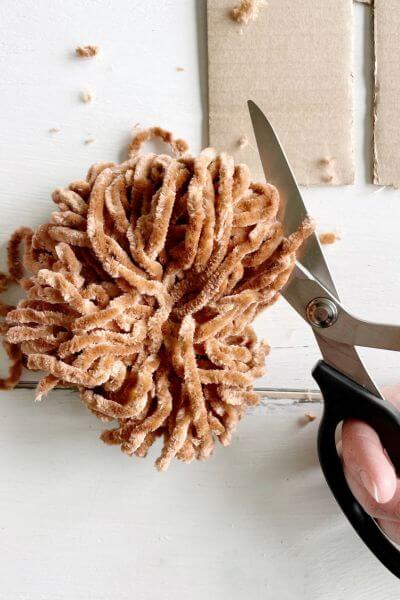
Give the yarn beard a little trim with the scissors as needed. And that’s a wrap for the first Dollar Tree clay pot gnome!
Does he look like a pirate? Because I think he sort of looks like a pirate?! 😉
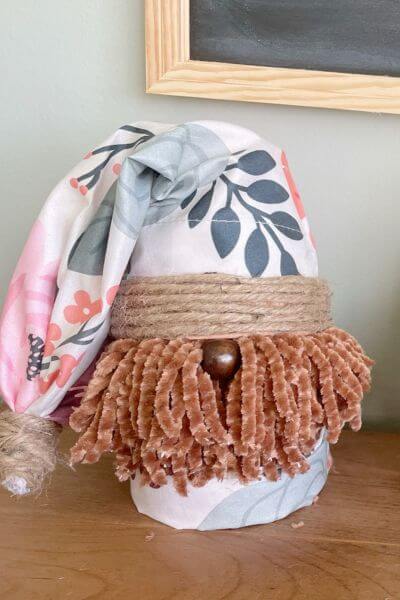
I ended up adding a bit of floral pillowcase to the bottom of the pot using my hot glue gun, to give him a little more decoration. So now he looks like this…
Version #2 Clay Pot Dollar Tree Gnome
The next two gnomes are sorta similar and you can make both these little guys for about 8 dollars (not including the paint).
All the supplies for this gnome are from Dollar Tree except the white paint which is from Walmart, scissors, cardboard, and glue gun.
Supplies for Painted Clay Pot Gnome
- Clay Pots (2-pack)
- Brown Tweed Yarn
- Jute Wire
- Wood Beads
- White Acrylic Paint
- Wire Cutters (like mine)
- Cardboard (8-inch wide)
- Glue Gun
- Scissors
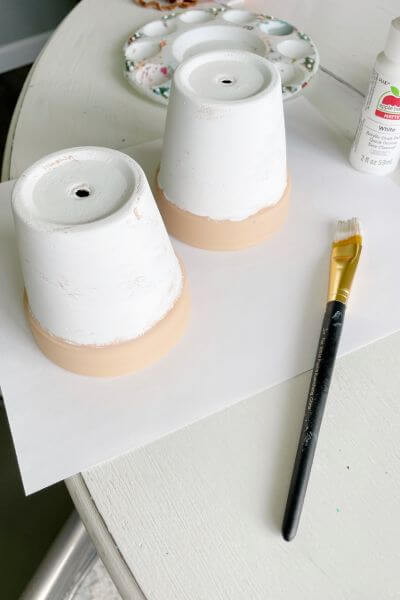
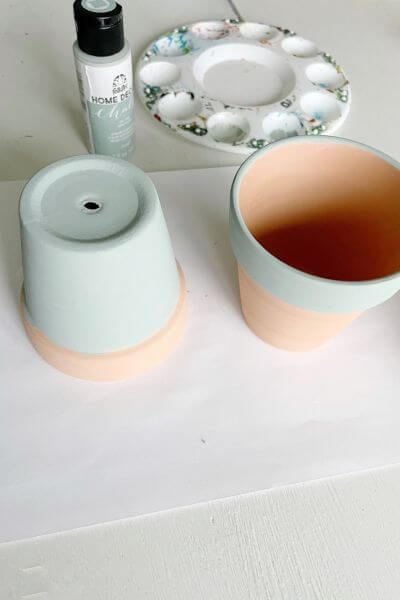
Paint Your Terra Cotta Pots White
First, paint your little flowerpots white as shown in the picture. This is just acrylic white paint that I had purchased at Walmart.
I left some of the terra cotta color showing through to give the pots a distressed look.
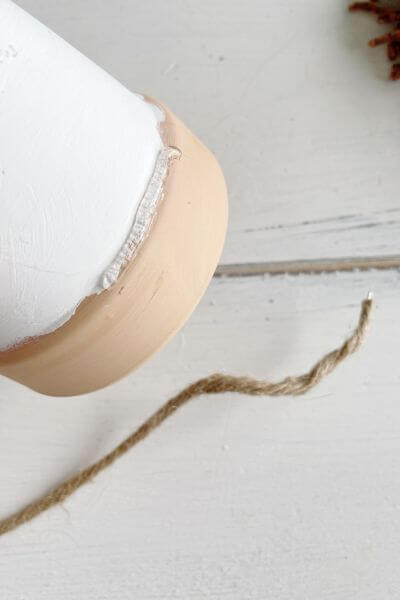
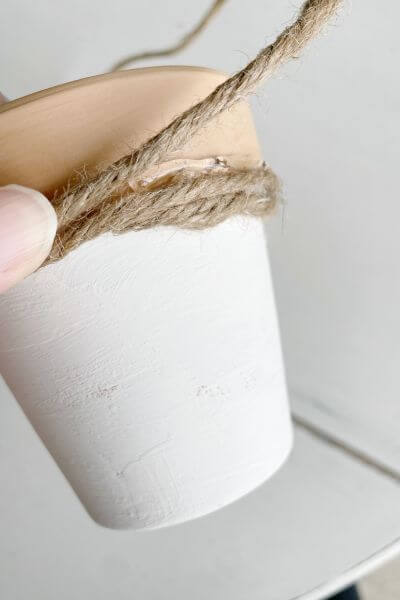
Hot Glue Jute Wire Around the Middle of Clay Pot
Place a line of hot glue around the brim of the clay pot and begin adhering the jute wire.
Continue placing small lines of hot glue and wrapping your jute wire around the pot/hat.
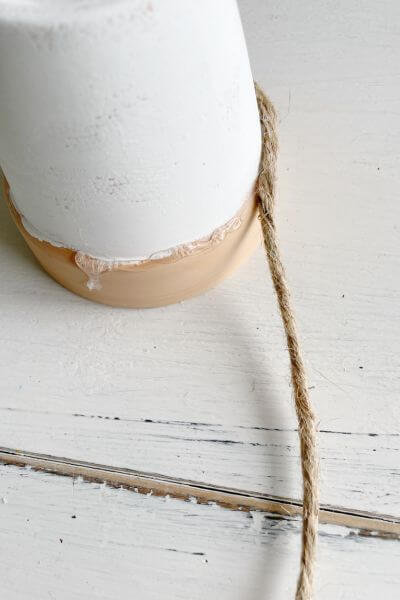
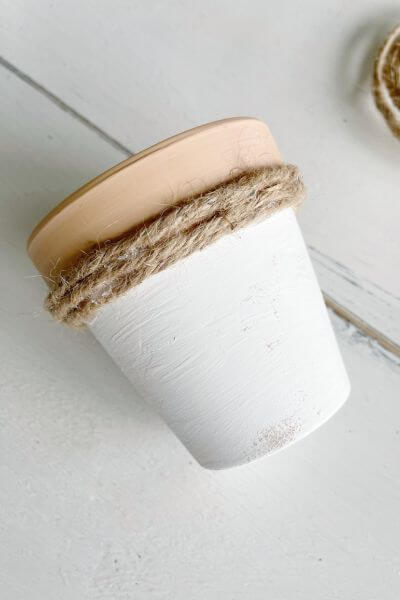
Clip the end with wire cutters, and then glue the end flush with the clay pot. I wrapped my jute wire around about 3 times.
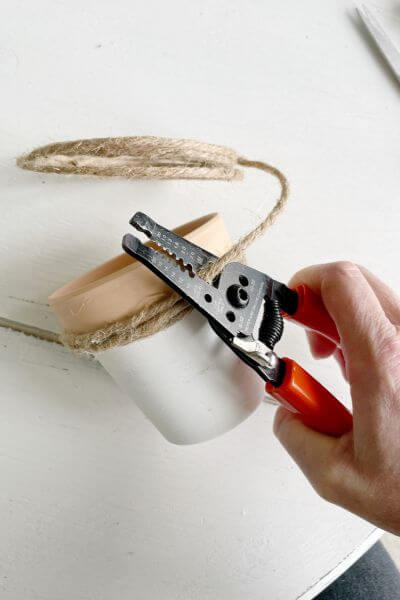
Here’s the painted clay pot gnome hat with jute wire wrapped around it three times…
Create the Yarn Beard Using Cardboard and Scissors
Wrap the brown tweed yarn around the 8-inch cardboard about 80 times. Tie off the middle using the slit in the cardboard.
Then slide the yarn off, tighten the string in the middle, and make a knot.
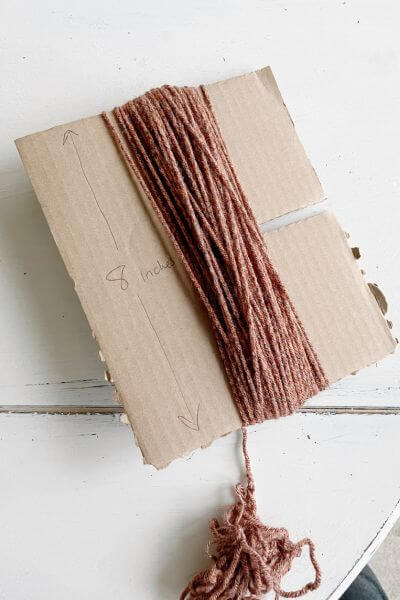
Then cut the ends of the yarn pom-pom with your scissors. Now you have the yarn gnome beard.
Try Out the Beard and Flowerpots Before Gluing
Before getting the hot glue gun out again, do a trial run by placing the yarn on the flowerpot. Then place the other clay pot on top. Notice it’s tilted a bit.
Glue the Yarn Beard onto the Clay Pot
Put hot glue on the bottom of the clay pot that’s the gnome’s body. Then, place your yarn beard on the glue. You may want to leave a little more yarn out where the front of the beard goes.
Try a Few Different Noses on Your Gnomes
Before gluing the hat and nose on, I tried out a few different gnome noses. These pom-poms were both found at Dollar Tree in the same pack.

I ended up choosing this white wood bead for this little gnome’s nose.
Hot Glue the Gnome Hat to the Yarn
Next, put a line of glue around the inside of the clay pot, and then place it on top of the gnome beard. Note that the gnome hat should be tilted a little bit.

Hot Glue the Nose to the Yarn Beard
Spread the yarn a bit underneath the rim of the terra cotta pot. Then place a glob of hot glue onto the yarn. Put the white wood bead onto the glue. You may need to put a bit on the rim of the pot too to secure the bead.
Here’s a quick peek at the back of this cute little flowerpot gnome.
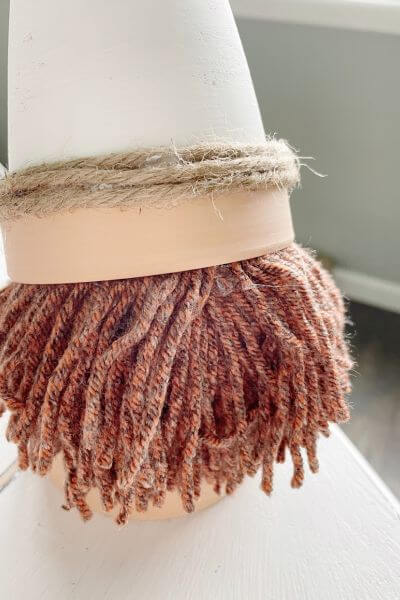
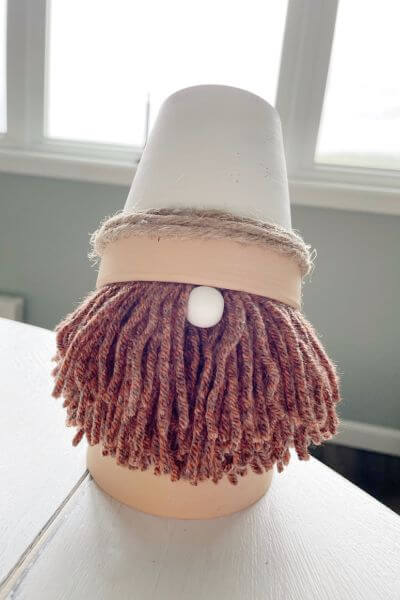
Version #3 Terra Cotta Pot Gnome DIY
This next guy is similar to the last gnome, however, has slight differences. The great thing is you can vary them however you want, to create your own one-of-a-kind gnome.
These two are neutral colors and I really liked the brown tweed colored yarn I found to use for their beards.
Supplies for Springtime Terra Cotta Gnome
- Brown Tweed Yarn
- Terra Cotta Pots (2-pack)
- Jute Wire
- Pom Poms or Wood Beads
- Sage Green Paint (Amazon)
- Cardboard
- Glue Gun (Amazon)
- Scissors
- Wire Cutters (On Amazon – like mine)
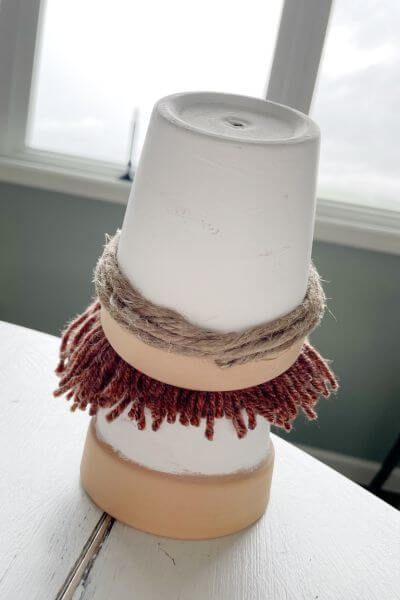
Paint the Terra Cotta Pots Sage Green
The first step is to paint your little terra cotta pots sage green. I just love the color of this chalk paint and also used it on my wood shamrock garland DIY post.
I figured I would mix it up a little, so I painted the bottom of one pot, and the top of the other.
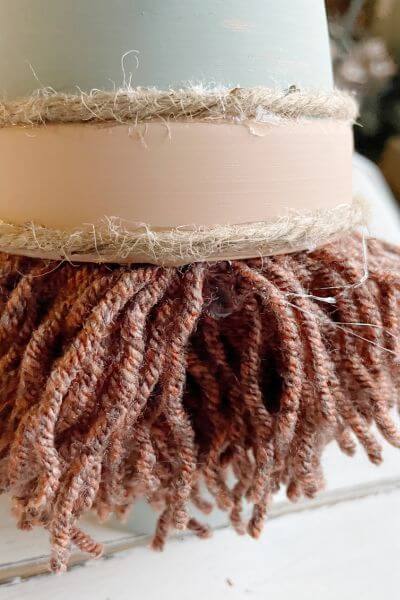
Hot Glue Jute Wire Around the Clay Pot Gnome Hat
Next, just like for the last gnome, I placed a line of hot glue around the indented portion of the pot and adhered the jute wire.
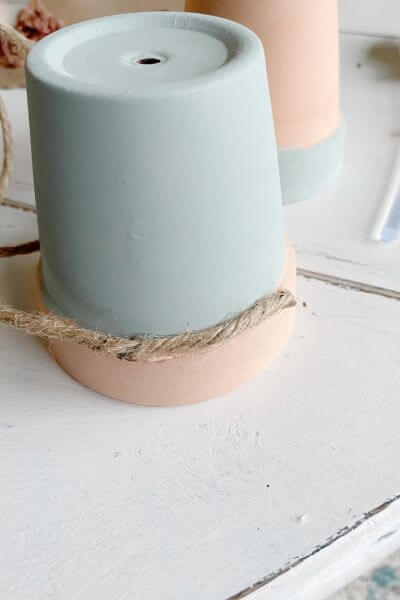
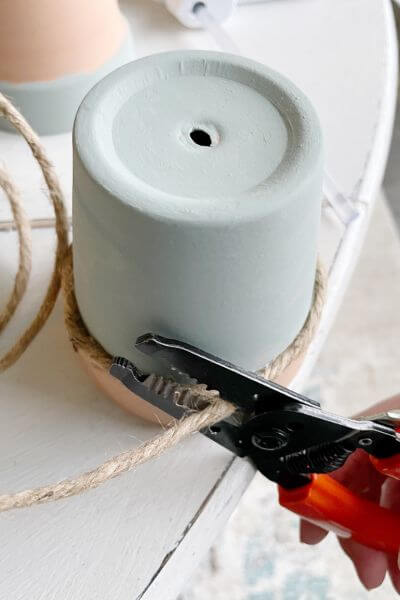
Apply two lines of jute wire around the brim of the clay pot hat using hot glue. Then snip the ends and push the wire flush with the pot. Now the gnome hat is finished.

Create the Gnome Yarn Beard
Just like with the previous gnome, I used the tweed brown yarn to make the yarn beard. I wrapped the yarn about 80 times around the 8-inch cardboard.
Here are the steps to make the gnome beard in pictures.
Trial Putting the Hat and Yarn Beard on the Clay Pot Body
Try out placing the yarn beard and clay pot hat on the gnome’s body, before gluing everything together!
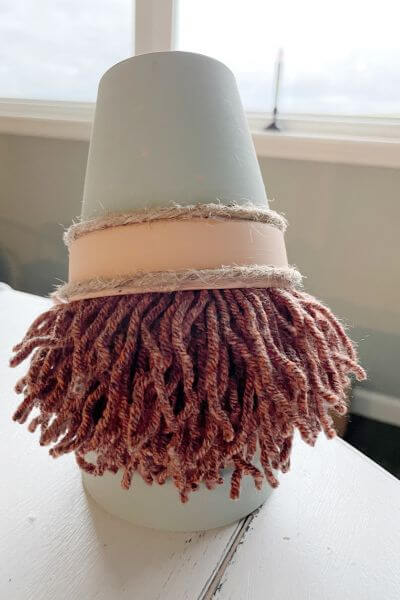
Glue the Gnome Yarn Beard to the Clay Pot Gnome Body
Place hot glue on the bottom of the clay pot you’ll be using for the gnome body. Then place your yarn beard onto the glue. You may need to place the yarn so that a little more is in the front where the beard will go.
Hot Glue the Gnome Hat to the Beard
Put hot glue around the inside of the clay pot hat and place it on the yarn, securing it to the beard.
Try Out a Few Different Gnome Noses Before Hot Gluing
Try out a few gnome noses! I tried out these two but ended up going with the natural wood bead gnome nose.
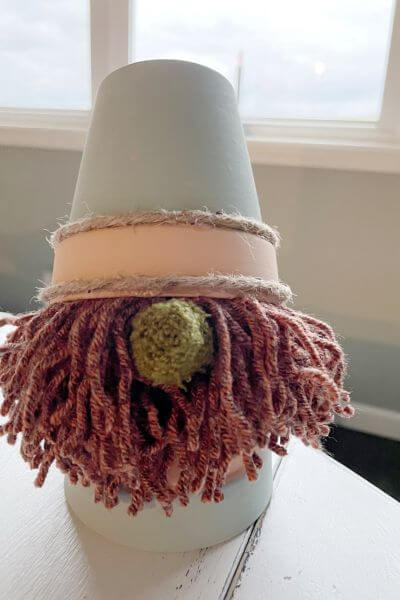
Hot Glue Your Gnome Nose to the Yarn Beard
Spread the yarn a little, and then add a dab of hot glue. Position your wood bead nose underneath the clay pot hat. You may need to add a little glue to the rim of the terra cotta pot to hold the nose in place.
And these terra cotta pots have officially become cute and neutral gnomes for fun home decor!
Final Thoughts on These Easy Dollar Store Gnomes
And that’s a wrap on these 3 cute Dollar Store gnome DIYs made out of terra cotta pots!
I think my favorite was the last one listed in the post. I like the way the sage green blends with the terra cotta color and brown tweed yarn. Which one was yours?
These cute little guys are also inexpensive in that you can make each one for about 4-5 dollars’ worth of supplies as long as you have some paint and a few tools on hand.
These little gnomes are a fun piece of home decor you can add next to a plant on a shelf. Or keep one at your desk for a little luck and inspiration!
As always, thanks so much for reading! And please consider subscribing below for more gnome DIYs and fun home decor ideas.
Next time you’re out shopping, stop by the Dollar Tree and gather terra cotta pots, yarn, jute rope, and wood beads or pom-poms and create these cute and easy flowerpot gnomes.
Pin me on Pinterest ⬇️
Please consider subscribing to my email newsletter below for more DIY ideas delivered to your inbox!👇