

Ready for a few tips and tricks (and fails) from a DIYer that tried out the furniture stripping method on two pieces of thrift furniture to get that pretty raw wood finish? Well, then read on.
Ok guys, here’s the real story behind all those pretty vintage furniture flips using oven cleaner.
I’ve tried out two pieces of thrift furniture so far using this oven cleaner furniture hack. A small table that I bought for 5 bucks at a yard sale and an old buffet that we got from my husband’s uncle for free when we were newly married.
So, I’m writing up a post on this hack so that you can learn just a few things from my mistakes. I’m in no way a professional oven cleaner stripper, but I’m giving you the best tips and tricks that I’ve learned along the way.
The first thing I’ll tell ya without a doubt is…it ain’t never as easy as it looks!
Now, on to the tutorial! (This post is supposed to be a bit humorous but definitely will give you a few things to think about!)
The Method of How to Strip Furniture with Oven Cleaner
The basic instructions are to spray the piece with a good coating of oven cleaner. Allow this to sit for about 20 minutes.
Then use a scrub brush dipped into a bucket containing a few drops of dawn and water, to scrub it off your furniture.
Spray with a hose to rinse everything off of your piece and then allow it to dry in the sun.
Sounds simple right? Oh, if only it was that easy….
The Piece Needs to be Solid Wood
First off, no veneers or MDF for this furniture stripping hack. Be sure the thrifted piece of furniture is solid wood when using this method of furniture stripping.
Sunny and Dry Weather Needed
Annnnddd, you cannot do this project inside! It is a mess, and you’ll need a well-ventilated area anyway since you’re using oven cleaner.
So, you’ll want a nice, dry, preferably non-windy, sunny day to complete your project. And start early! Because it will take longer than you think depending on the size of the furniture.
We do not live in a desert-type region, so a sunny, dry day is sometimes hard to come by. Just remember to start on a nice day, or maybe wait until there appear to be several nice days in the forecast to start your DIY.
I was not done in one day with either piece of furniture (more on that later)! Even though one table was pretty small!
Work in Small Sections
Don’t think you’re going to spray the whole piece with oven cleaner and then scrub it all off. Especially with a larger piece! I ended up working in sections.
I sprayed a portion of the buffet. Set my timer for 20 minutes and then went out and scrubbed it off.
If not, the breeze would end up drying the oven cleaner (and I think this caused a white residue in some places that had to be sanded off later). So, I’d say it’s best to work in smaller sections!
Do Not Wear Nice Clothes or Shoes
As you’re scrubbing the oven cleaner off the piece, you’ll need old clothes and a junky (or maybe plastic so you can spray them off) pair of shoes. The stain splattered my legs and shoes with brown goo.
And definitely wear a pair of rubber gloves too! Read the back of the oven cleaner can and follow the precautions on there.
Also, plan on refilling that bucket with water and dawn quite a few times (who am I kidding A LOT). The water gets murky pretty quickly!
I started by hauling it in and out of my house so that the water would be warmer. But, I had enough of that after a very short time and just took the dawn out into the yard and used the hose to refill the bucket.
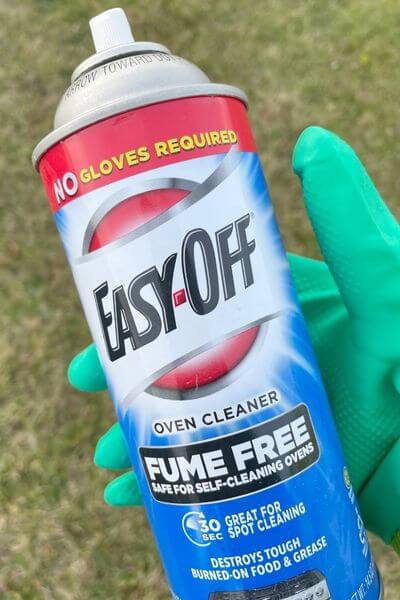
Use the Right Oven Cleaner!
I used the Fume Free Easy-Off Oven Cleaner to complete the piece. In the middle of the project, I ran out of oven cleaner. ARG
My husband ran to Dollar General which is closer to us than Walmart. They only had the Dollar General Oven Cleaner. DO NOT BUY THIS. I tried the Dollar General brand, and it did absolutely nothing.
Sorry DG, it may be great for cleaning ovens, but not for furniture stripping!
Stick with Easy Off. I only tried the Fume Free so I can’t give an opinion on the regular kind.
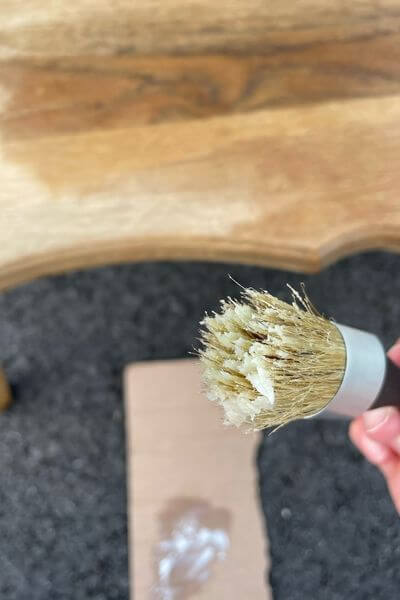
Use the Right Scrub Brush!
I bought a scrub brush at Walmart that only cost about a dollar. The bristles were waaaaay too soft. I did use this brush some, but I think stiffer bristles would have helped a lot! However, you also have to be careful not to scratch the wood, as some varieties of wood are softer than others.
Talk about elbow grease! You definitely have to scrub hard! I also tried one of those plastic scrubbies which seemed to work better, however, I believe I took some of the wood off at the edges when it was soft and saturated by water. UGH.
Natalie from myvintageporch.com (where I first saw this oven cleaner technique) recommends pot scrubbers and she’s done quite a few pieces using it. If I do another oven cleaner strip job, I’m going to try her recommended pot scrubbers!!
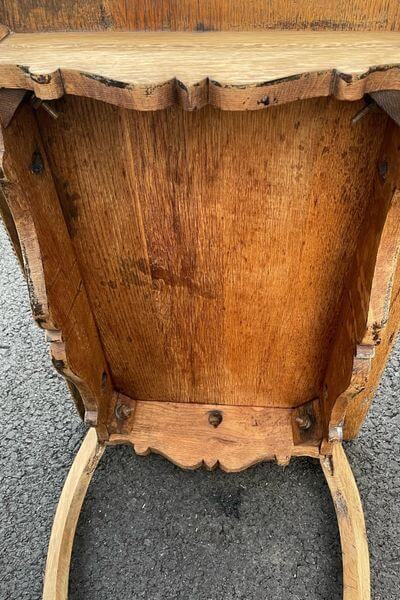
If you Need to Strip the Bottom – DO THAT FIRST
Ask me how I know this?? I didn’t need to worry about this for the big buffet piece. That little table though! ugh.
I did not do the bottom first, so when I sprayed and scrubbed the bottom the stain juices oozed onto the top and sides of the piece. Soooo I had to clean up the top again.
This is the bottom (that I did last). SMH
Be Ready to Spray the Same Section Multiple Times
I’m really wondering at this point if this is just my experience, or if I just had the MOTHER OF ALL STAINS on both my pieces of furniture.
One coat of oven cleaner got some of the finish off. But on some spaces, I had to spray and scrub 3 times!
And I still ended up sanding at the end!!
Be Sure to Have a Clean Garage
Very Important! Make sure that you have a clean garage or shed that has enough room for your thrifted piece!
I did not. My garage is crammed full of kids’ toys, riding toys, lawnmowers, other thrift pieces, tools, and a load of stuff from clearing out my parents’ house.
I did not get the buffet finished in one day. It did not fit in my garage. So, I had my husband haul it back into the house one night. And another night (yes indeed, that means I was at this for more than 2 days), I just left it outside in the yard. I really think this may have caused the crack that I got in one of the doors. It didn’t get rained on, but it was damp since we don’t live in a dry climate.
So be sure to have a place to store it easily just in case you don’t get it all done in one day!
You’re Probably (Nah Definitely) Going to Have to Sand the Wood
I absolutely had to sand both pieces at the end. For tough stain spots that were leftover I used 80-grit sandpaper. Just be careful because you can scratch the wood if the sandpaper is too rough, so try in a small section first.
I hand-sanded; however, I did also use an old electric sander that I had in my garage for some spots too.
After getting all the leftover stain off the piece, then I sanded it with 180 grit sandpaper to give the furniture a smooth finish.
Again, eat your Wheaties! Not. That. Easy.
For more information on sandpaper grit and when to use it check out this article.
Don’t Do This with a Family Heirloom
Well, you can if you want to.
However, it definitely runs the risk of ruining the piece, so I’d say it’s better suited to thrifted pieces you find at yard sales or on FB marketplace.
I got a big ole crack in one of the buffet doors. It did take a beating being hauled in and out and all around. And being left outside in the dampness didn’t help it either. So, I was glad to get away with only a crack. Gives it a bit of character.
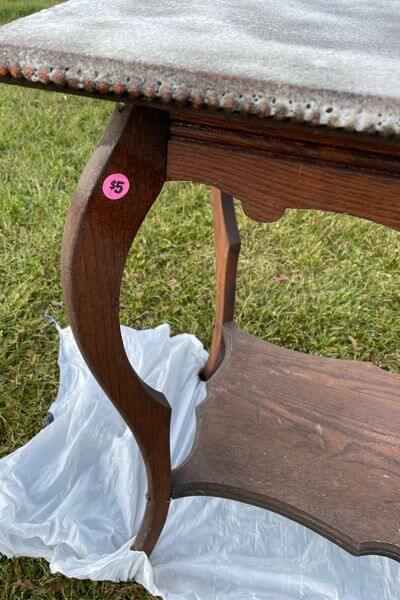
And that little table got a little loose and wobbly from being sprayed and flipped over and sprayed again. So, it would be less annoying if I would reinforce it to eliminate the wobble. We occasionally use it for puzzles and games right now, so no big deal.
This post contains affiliate links. As an Amazon Associate, I earn from qualifying purchases. This means when you click a link, I may earn a small commission at no cost to you. This helps me to run this website. Thanks in advance for your support!
Seal the Newly Stripped Thrift Furniture
Once you’ve completed your project and you have a raw wood finish, then it’s time to seal the piece.
I used Jolie Finishing clear wax on my smaller table. This did change the color a bit from whitish to more of a honey color. I wouldn’t recommend wax if the piece gets a lot of use like a kitchen table.
I also tried out General Finishes Flat Out Flat clear topcoat which did not seem to change the color like the clear wax. However, these pieces were two different shades of wood, so it was somewhat hard to tell.
If I had to pick, I prefer the General Finishes Clear topcoat to the clear wax because, although the clear wax worked well, I think that it causes less of a color change with the wood.
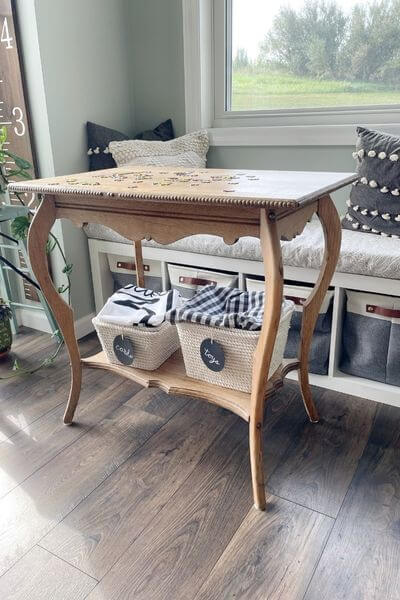
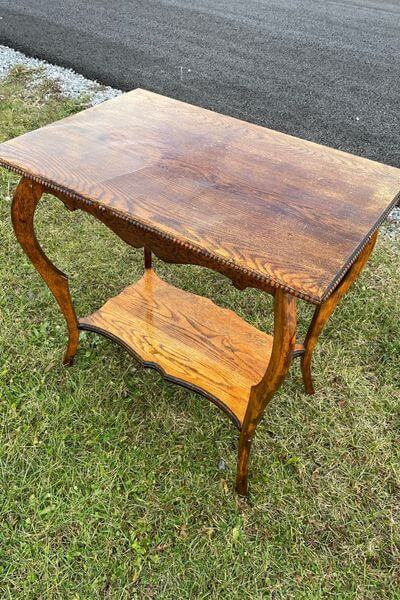
Oven Cleaner Trial One: Small Table
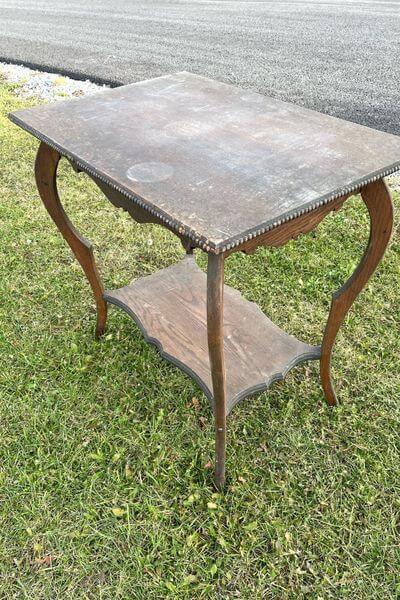
My “before picture” of the small table.
A good coating of oven cleaner on the tabletop. Not sure exactly what I was protecting with the plastic, but it did keep grass from getting on the legs.
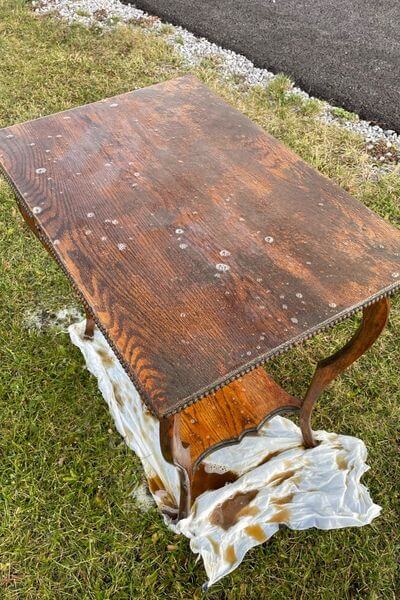
The table after being scrubbed with water and dawn, and then sprayed with water.
The table in the process of drying (it would have been better if I’d had a sunnier day!)
Almost dry, notice the white residue from the oven cleaner.
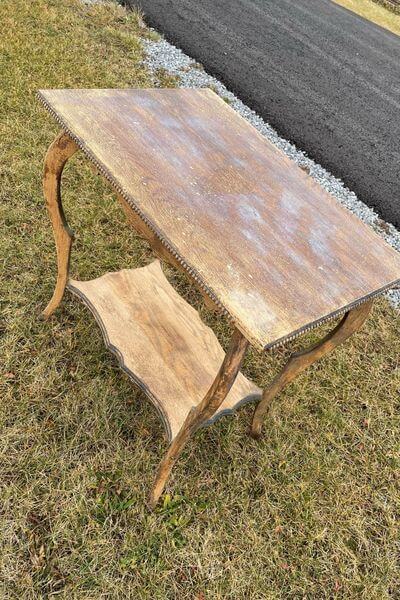
Repeated the process a few more times with oven cleaner to take off the remaining stain and residue.
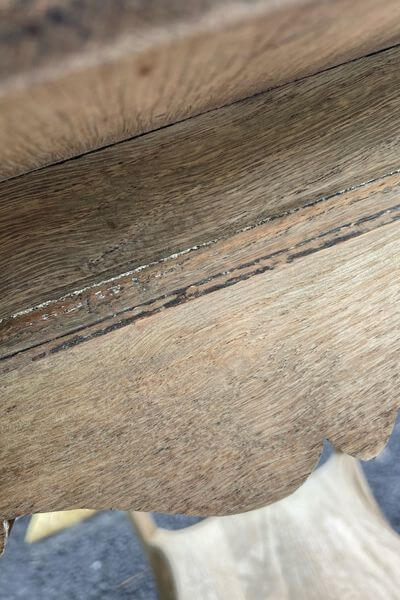
More white residue in the cracks of the table…I folded a piece of sandpaper and ran it through the cracks to decrease this.
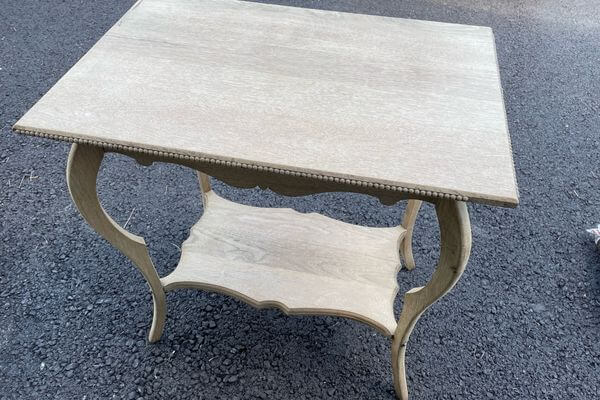
The small table that has been dried and sanded. Looking pretty nice here, and kind of wishing I would have used Flat out Flat Clear Coat instead of wax. As you’ll see the wax yellowed the finish a bit.


Finished small table after being stripped, sanded and waxed.
And just one more pic of the finished product. 🙂
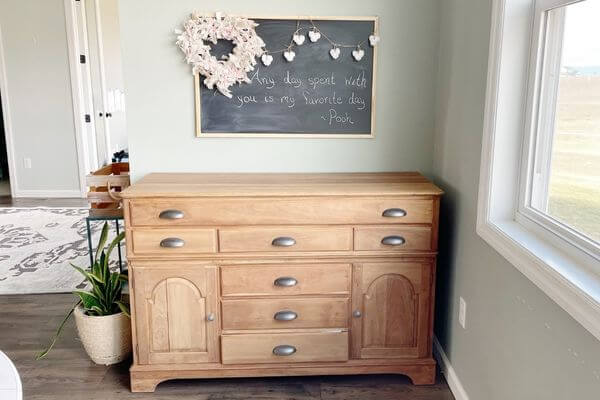
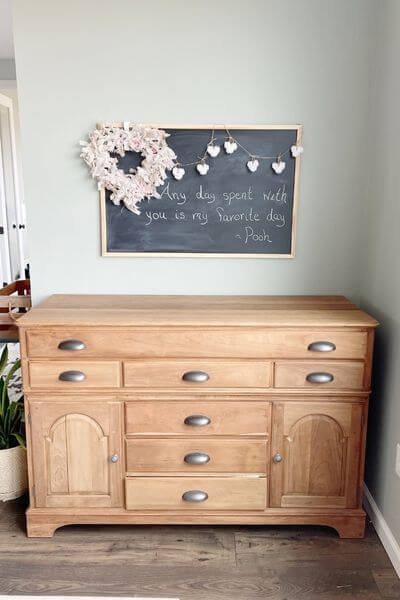
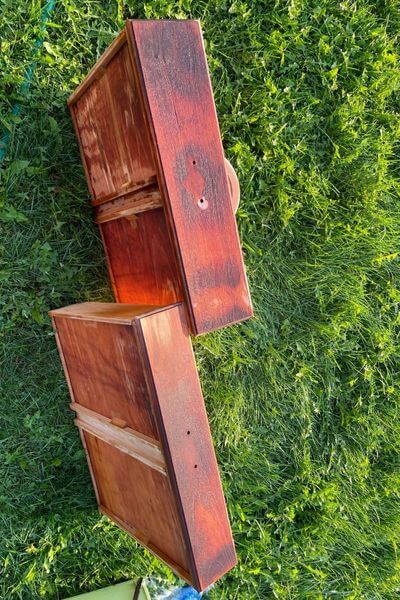
Oven Cleaner Trial Two: Buffet
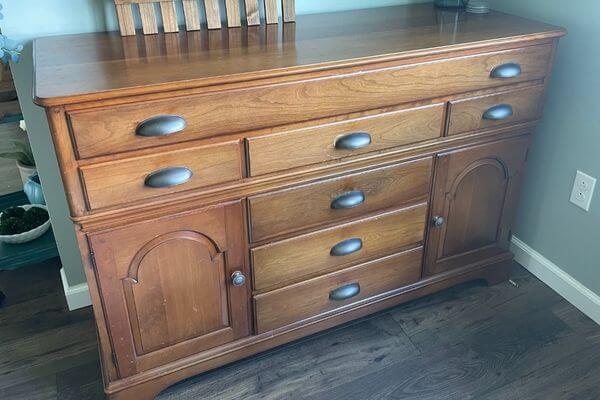
This is the buffet before the stripping and sanding.
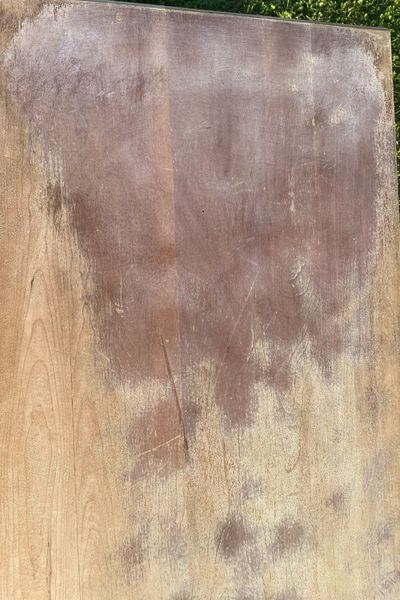
The top of the buffet. As you can see the stain is partially removed with the oven cleaner.
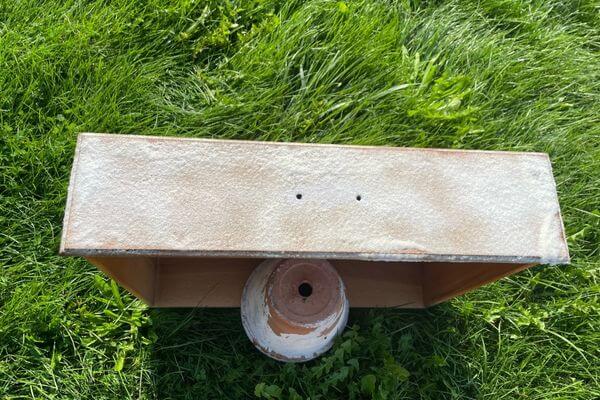
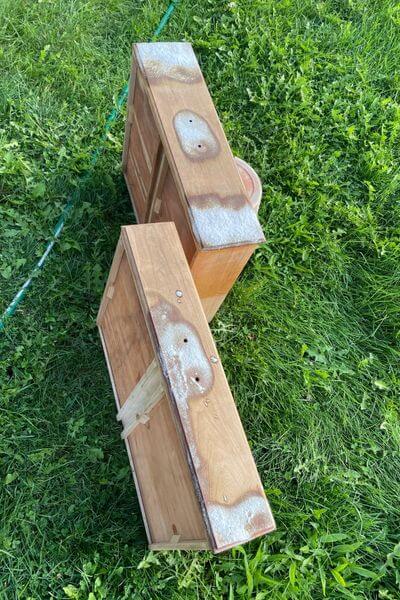
Below are pictures of stripping the drawers with oven cleaner (yes, I am holding them up with old clay pots).
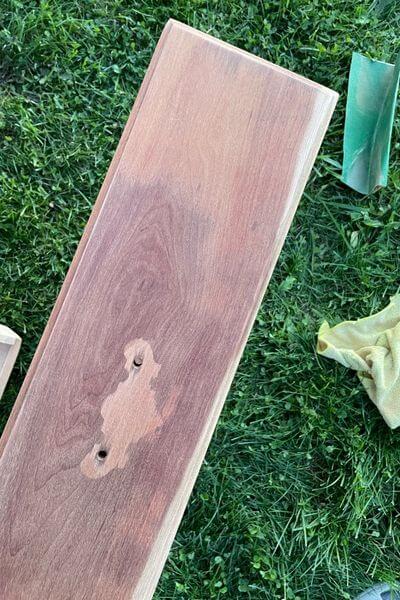
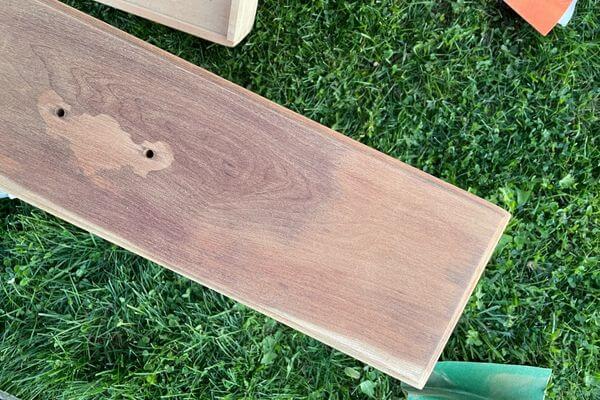
As you can see, I had to respray multiple times. And even so, some drawers were more stubborn than others. I ended up sanding them at the end.

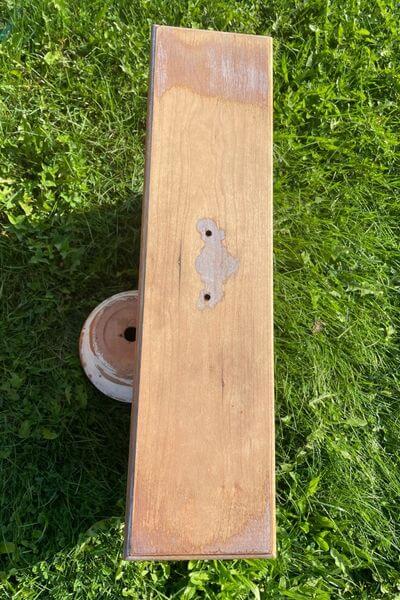
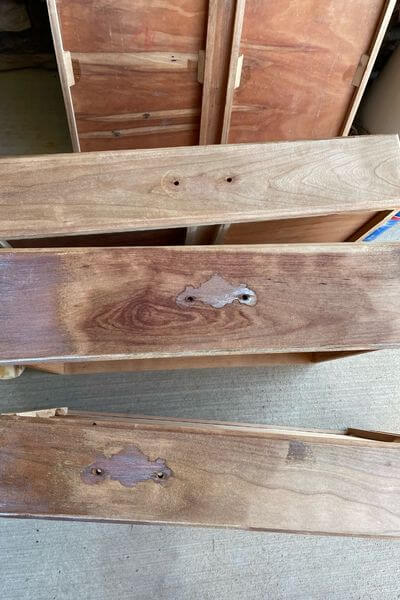
One drawer, in particular, gave me problems. I ended up sanding this drawer and then also sanded in the crevices with a folded-up piece of sandpaper.
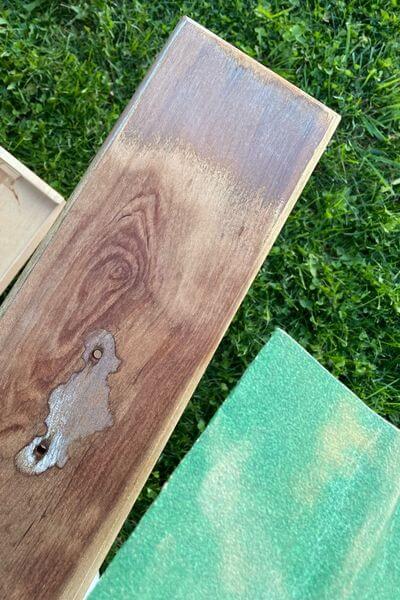

It was still a little discolored even after all the sanding!
This is the final product!
Oven Cleaner Furniture Hack Conclusion
So, would I try another piece with this oven cleaner technique? Hmmm that’s a good question.
I think I would but, in the future, I may try out some other ways to strip furniture too.
I’ve seen tutorials with a Citri-Strip product that look interesting. I’ve also seen some more natural stripping solutions on IG that may be worth a try since they don’t have the harsh chemicals.
All in all, I like the look that the thrifted furniture pieces had at the end of the process, so I’d say it would be worth another shot!
So, you guys tell me now, would you try this method? I hope you’ve enjoyed my tips and tricks and fails post on this DIY stripping project. Leave me a comment with any questions and I’ll give them a go!
As always, thanks for reading!
Do you have a thrifted piece of furniture sitting in your garage to try this oven cleaner furniture stripping hack on? If so, give it a try and I think you’ll really love the raw wood look!
Pin me on Pinterest to save this post! ⬇️

Please consider subscribing to my email newsletter below for more DIY projects and craft ideas 👇
Gosh, thanks so much. Ive been really interested in whether this works or not, and this is a really clear, realistic perspective which I appreciate. Its so important to share the learnings not just the successes, so thank you!!
Hi there! You’re welcome and thanks so much for your kind words. 😊 Yes, things are not always as easy as they seem. In reality, how difficult the process may be, depends on the particular piece of furniture you’re working with. I’m so glad you found the post helpful!
I tried and SUCCEEDED (after about a week… And only half of it finished). I have come to the conclusion that this works wonderfully for a solid wood piece with only one or two layers of paint on it. I got a cute dresser off Facebook, bought some easy off, a scrub daddy and a paint scrapper. It came off like chewing gum. It was so easy. Messy, but easy. However underneath the silver glitter paint came mint paint, then light pink, then dark pink, then gold, then a dark brown wood stain. I got the top completed and it was beautiful! I got one side done and the other. Now I’m too tired to finish it. My friend also did it and said it worked amazing and got it done in one afternoon. My friend did not have five layers of paint wrapped up in silver glitter like myself. I think I need to do a little more research next time.
Hi there! Thanks for your comment and sharing your experience regarding the oven cleaner furniture stripping technique! I totally agree, it can be quite the process depending on the piece and how many layers of paint, stain and topcoat that have been applied to it! Good luck with the rest of the project…I’m sure it will turn out beautifully! 😊