
I picked up a vase for 8 bucks at the thrift store. Check out the transformation to make it look like stone with a few simple supplies.
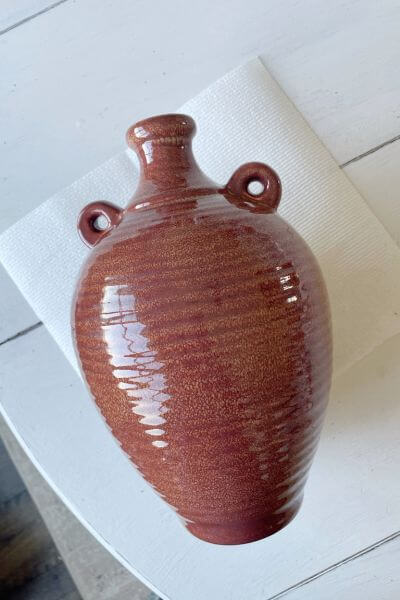
While browsing the thrift store, I found this vase that was a very neat shape, and it was just 8 dollars. I just had to bring it home.
Although, I loved the shape of this vase, I wasn’t thrilled with the color.
I’ve worked with paint and baking soda on terra cotta pots before. So, I figured why not give this same formula a shot on this ceramic vase.
Read on for the tutorial on how to create a textured stone finish on a cheap thrift store find. Let’s get to it.
Supplies for Faux Stone Vase DIY
Awesomely enough, just a few simple supplies are needed for this tutorial. All materials can be found at Walmart.
- Thrift Store Vase
- Acrylic Craft Paint
- Baking Soda
- Chippy Brush
Mix Up the Paint and Baking Soda
Here’s the cool looking vase from the thrift store.
Start by mixing up the paint and baking soda. I used a 1:1 ratio of these two supplies.
If the mixture seems too grainy and dry, mix in a bit more of the paint.

Sometimes I use one of those small medicine cups to measure out the ingredients.
Initially I used white acrylic paint (just the craft kind from Walmart) and baking soda and applied it to the ceramic vase.
I changed the color up toward the end, so be sure to read to the end of the post!
Apply Paint and Baking Soda Mixture to Vase
Once you’ve got the right texture of paint and baking soda, it’s time to apply it to your vase.
A cheap chippy brush (also from Walmart) works great to apply this mixture. Paint the mixture onto the vase.
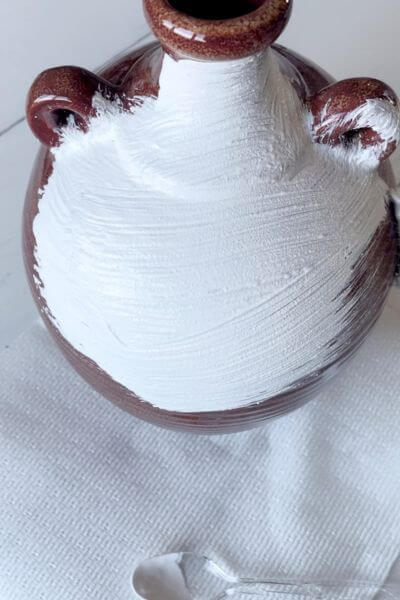
But here’s the real trick to achieving a stone-like finish.
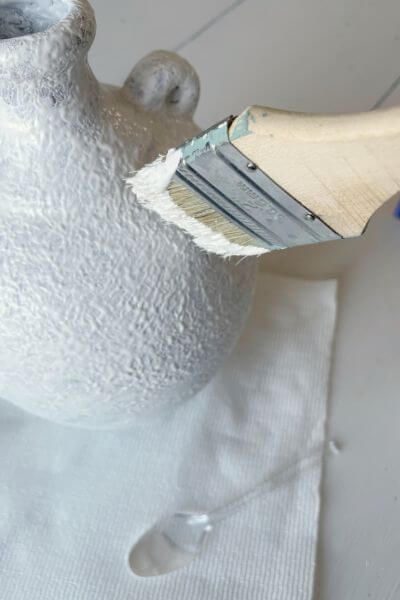
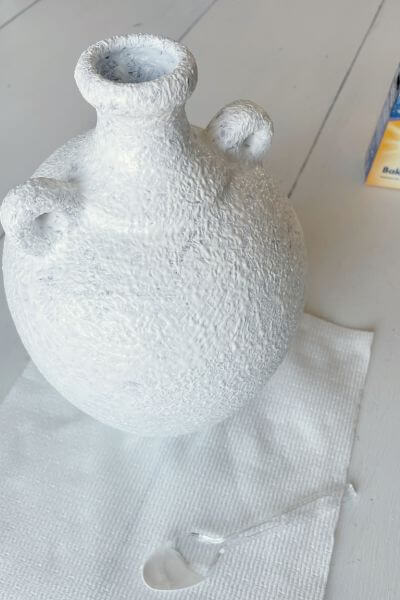
Once you have the vase covered with paint and baking soda, you need to use the end of the brush to dab it onto the vase.
You can wait til that first layer dries before texturizing your vase.
This technique produces little peaks on the vase, creating that faux stone finish.
Depending on how dark the initial finish is, you may need another coat to cover the base finish up completely.
Simply repeat the dabbing paint process again, if need be, to completely cover the original finish.
It’s really surprising how well the mixture sticks to the vase surface, but it does!
If you like the white and textured appearance of your faux stone vase at this point in the game, just leave it as is.
I, however, am unable to leave well enough alone.
Dry Brush Additional Colors onto the Stone Vase Finish
I tried dry brushing additional grey and tan craft acrylic paint colors onto the white finish.
Dry brushing is simply dipping the brush in the paint, blotting most of it off onto a paper towel, and then lightly brushing the paint onto the vase surface.
You want to make sure enough of the paint is blotted off that it doesn’t create any paint splotches.
This is how it came out.

Okay, so I wasn’t satisfied with the bright white underneath the grey and brown. Back to the drawing board
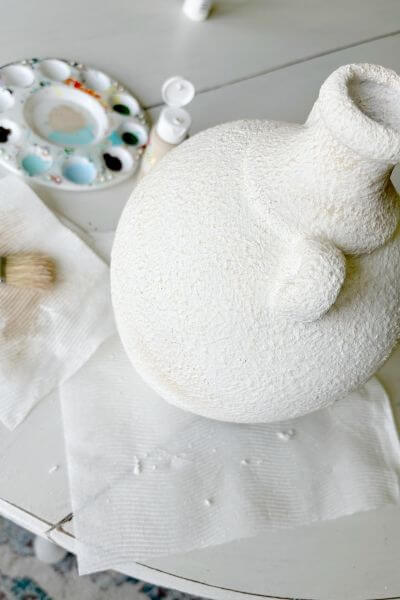
After that, I tried out several creamier white craft paints on the vase. The top is antique white, the middle is antique parchment, and the bottom is the previous finish.
The antique parchment was my favorite, so I painted the entire vase in that color.

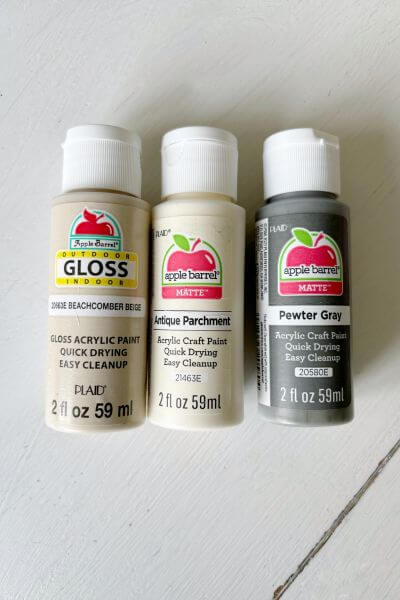
Urgggg, at this point in the process I was getting frustrated. However, I must love this dry brushing technique, so I got the grey and tan colors out again. Here are the colors that I used.
- White (not pictured, but same brand)
- Pewter Grey
- Beachcomber Beige
- Antique Parchment
I thought the Pewter Gray was a bit dark, so I mixed the Pewter Grey with white paint at about a 1:1 ratio and dry brushed it onto my vase. Blot a good bit of it off onto the paper towel before applying it to your vase so you don’t create paint splotches.
You can use the same chippy paintbrush to do this (even though in this picture I grabbed a craft paintbrush for some reason). 😉

Then I got out the Beachcomber Beige paint and repeated the dry brushing process with that color.
Try to vary the amount you place, so that it doesn’t look entirely uniform throughout.

Here’s how it’s looking so far…

Continue to work the colors in until you like the look of your faux stone vase. Make it as dark or light as you want.
I chose lighter colors for this DIY textured vase however you can get creative with it and choose any colors you like.
There’s always an option to paint over it and start again, kinda like I did 😉, if it doesn’t turn out perfectly the first time.
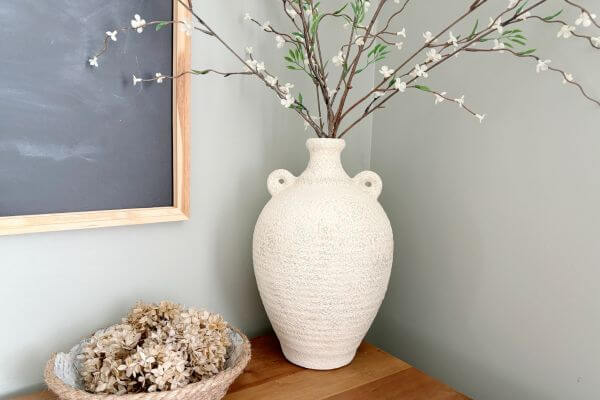
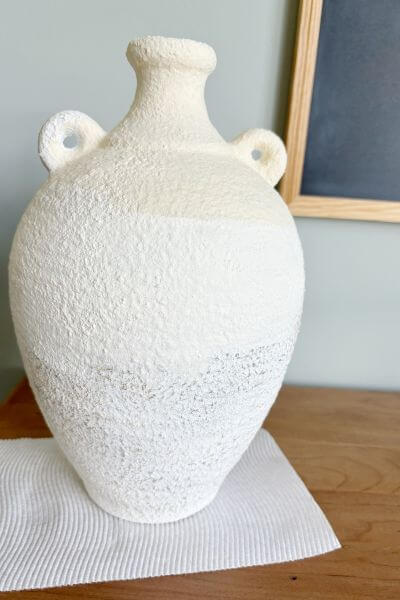
Here’s the finished product.

Finishing Up this DIY Textured Vase Tutorial
This stone texture vase DIY is made with a few simple supplies including paint, baking soda, and a chippy brush making it very cost effective.
All you’ll need to find is an inexpensive vase at the thrift store. Or maybe you have one sitting at your house right now.
The chippy brush technique and baking soda give that faux stone finish texture to the vase. Adding extra layers will make even more texture I bet!
I may coat this with my favorite sealer to give the finish more stability. But honestly, I’m debating about adding more color to the vase before I do that. I’ll keep you all posted!
This DIY texturized vase is definitely worth a try for a simple and easy DIY to make a plain old vase look like stone.
Any questions, just let me know. And, as always, thanks so much for reading!
Grab a few of your favorite paint colors, baking soda from the pantry and a cheap chippy brush and create a faux stone finish on a thrift store find!
Pin me on Pinterest ⬇️

Please consider subscribing to my email newsletter below for more DIY ideas delivered straight to your inbox 👇
Love this! As someone who works with texture-focused décor, I’m impressed by how you captured the raw, stone-like finish—it’s both creative and accessible. Great tutorial!
Thanks so much for your kind comment on the tutorial ☺️ It’s amazing how well just baking soda and paint create this textured finish!