The kids and I created these cute DIY gnome houses with all Dollar Tree supplies including a Jenga game, wood blocks and popsicle sticks. We even found these super adorable gnome figurines to go with them…read on for the tutorial!
Gnomes seem to be everywhere I look these days. In the windows of stores, at all the craft shows, hanging on wreaths and in gardens too.
So, when I was thinking about a spring and summer craft idea for the kids, gnomes came to mind!
And as I made a quick stop at my local Dollar Tree, I quickly found a few supplies to make wooden gnome homes. I also bought some reindeer moss to help them look extra foresty (if that’s a word 😉 ).
There were also cute fairy garden gnome figurines, mushrooms, and flowers to add to the decor of the gnome house.
The only other supply I needed was glue! We used two kinds…one kid tried out a glue gun and the others plain old Elmer’s Glue.
Now on to the super easy tutorial of crafting these gnome houses with your kiddos.
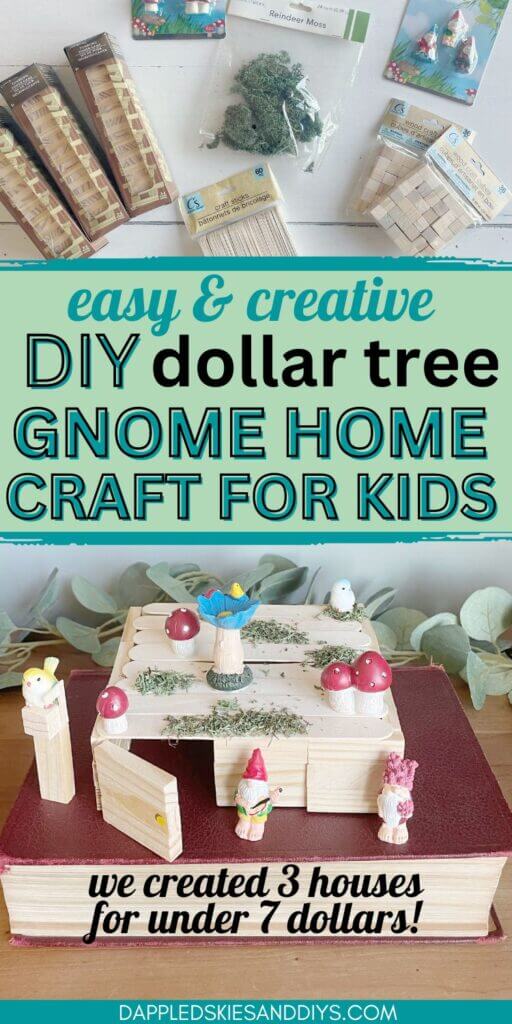
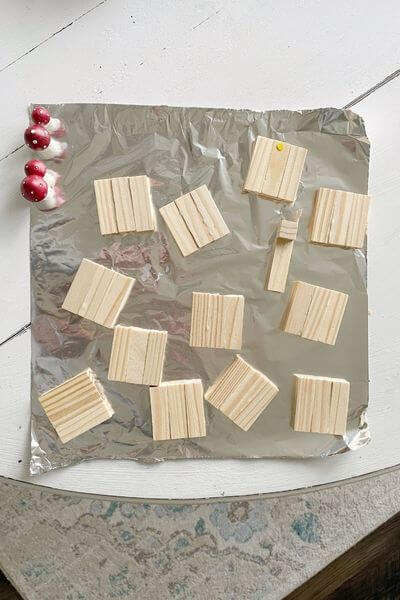
Supplies for Gnome Home Spring and Summer Kids’ Craft Idea
***I took this picture of supplies before we began crafting. We actually ended up using only 1 package of wooden blocks, 2 Jenga games and 1 bag of craft sticks to create 3 gnome houses***
Of course, this would vary depending on how large you make your DIY gnome homes. We made ours tall enough to fit our gnome figurines.
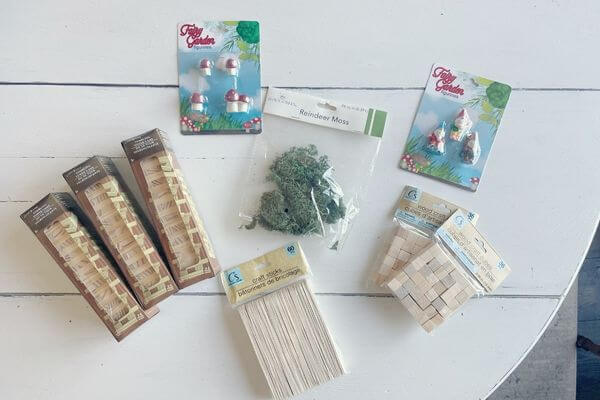
- Wooden blocks (1 package)
- Jenga Game (2 games)
- Large Craft Sticks (1 a package)
- Reindeer Moss (1 package)
- Hot Glue or Elmer’s Glue
- Gnome Fairy Garden Figurines and accessories
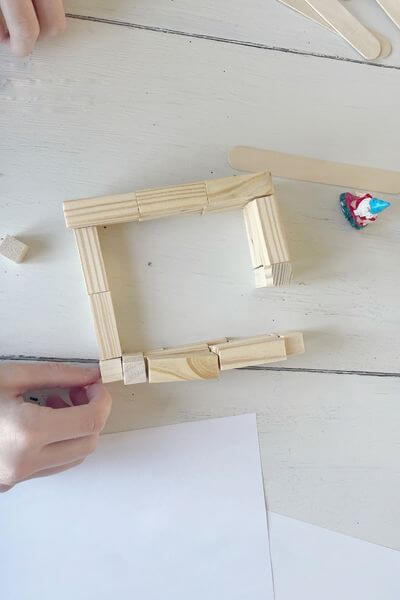
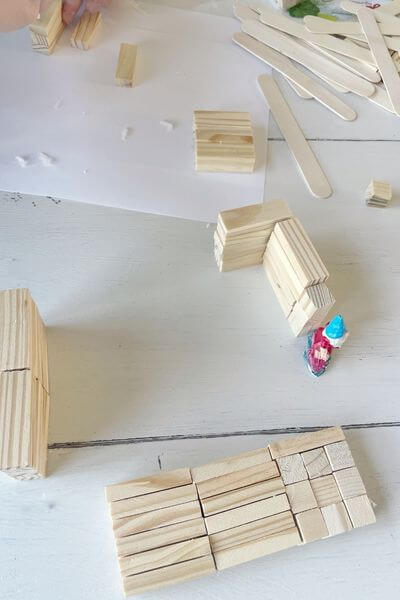
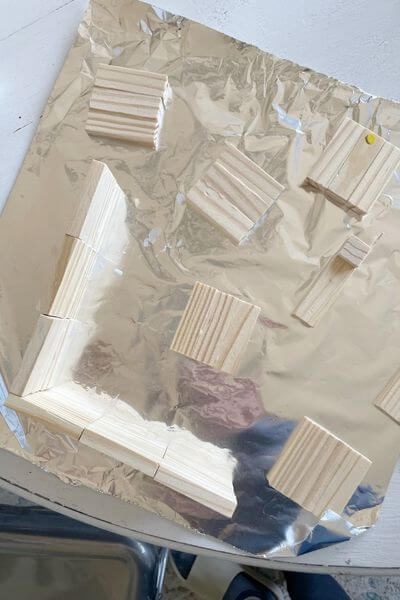
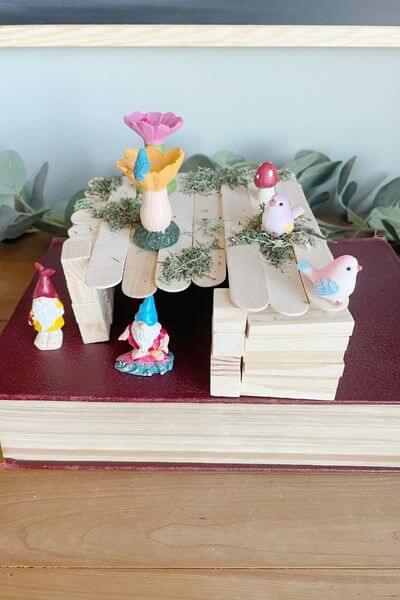
First Build the Gnome Home Walls Without Glue
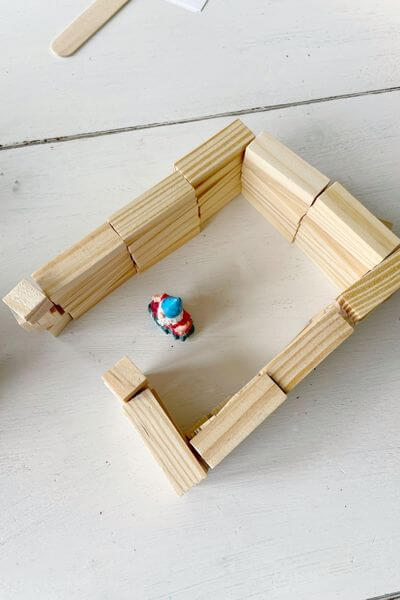
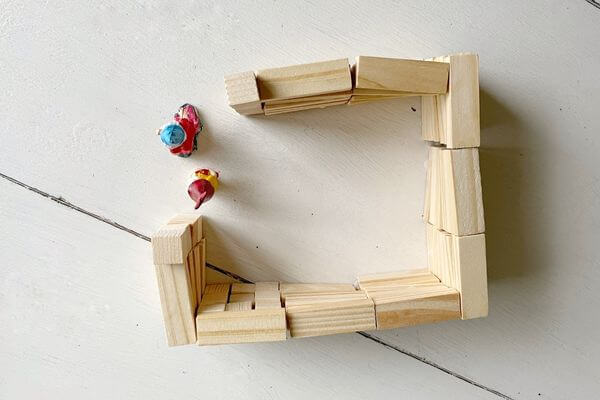
We found it was best to do a dry run build before getting out the glue. I let the kids get creative and build their gnome houses the way they wanted to, so all the gnome homes turned out differently.
I simply said to build it tall enough to allow the gnome figurine t0 fit inside the house.
Pictured is the dry run gnome home without glue.
He then removed the craft stick roof so just the walls were standing made of the small square blocks and Jenga pieces.
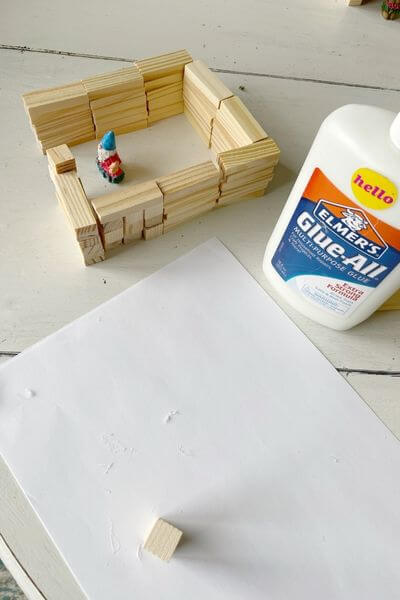
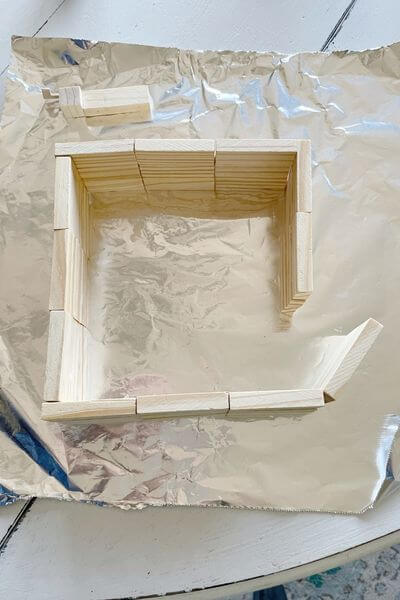
Glue the Jenga Pieces and Wood Blocks to Create the Walls
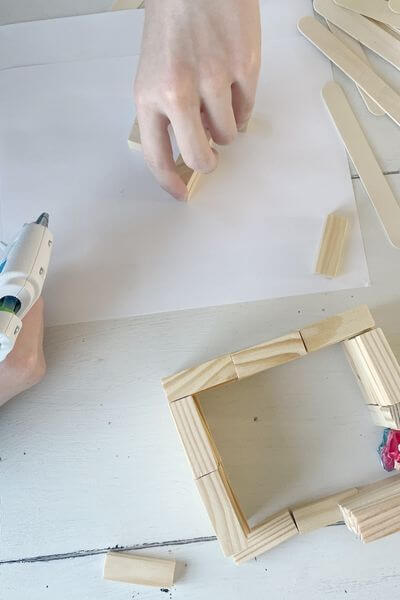
Then, it’s a good idea to take apart the gnome house walls section by section and glue them with either the glue gun or Elmer’s Glue. My oldest decided to use hot glue because he wanted to get the job done faster. He doesn’t always love my crafty ideas. 😉
I actually think Elmer’s Glue worked better, but more on that at the end of the post.
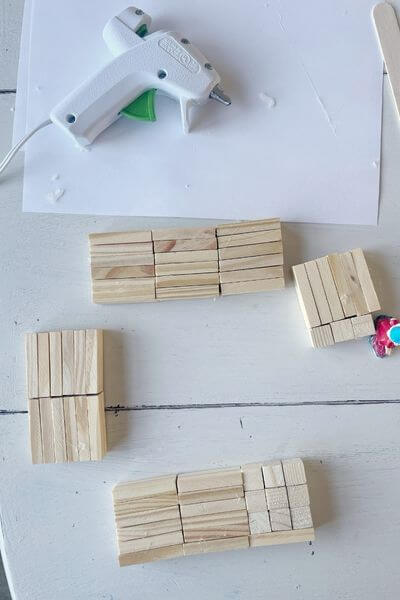
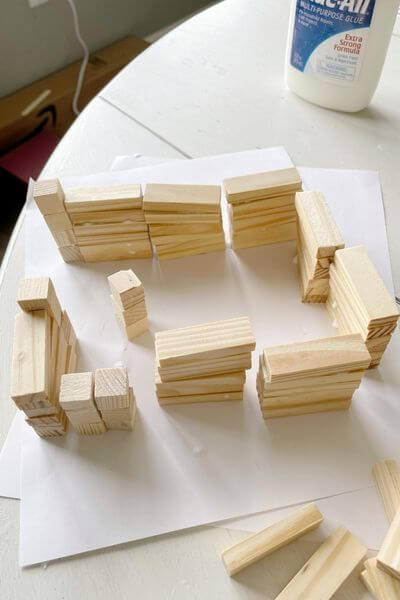
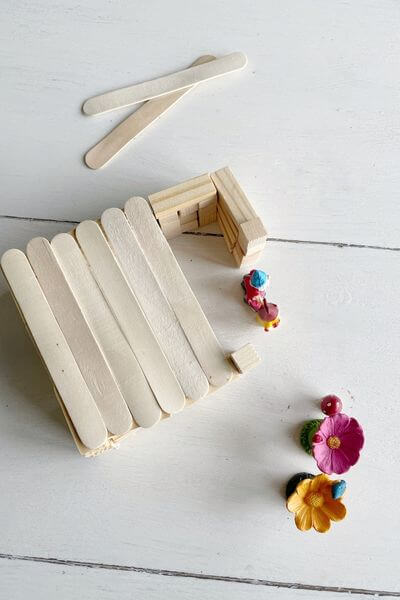
Here, the gnome home wall sections are completed and ready to be glued together.
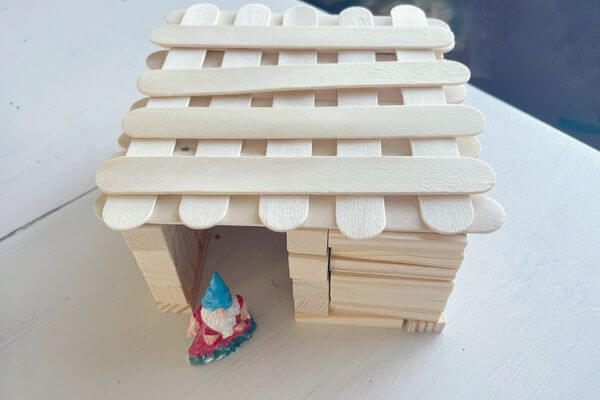
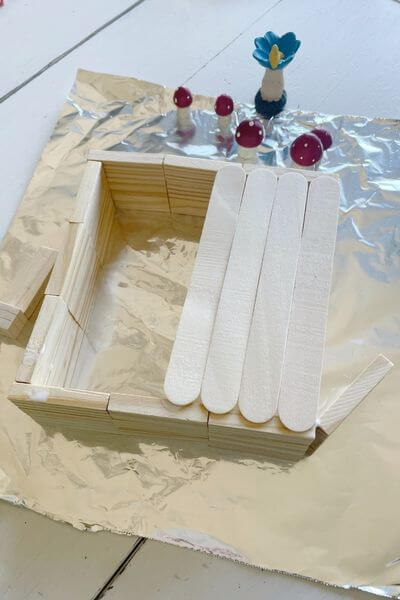
Create Gnome Home Roof Using Craft Sticks
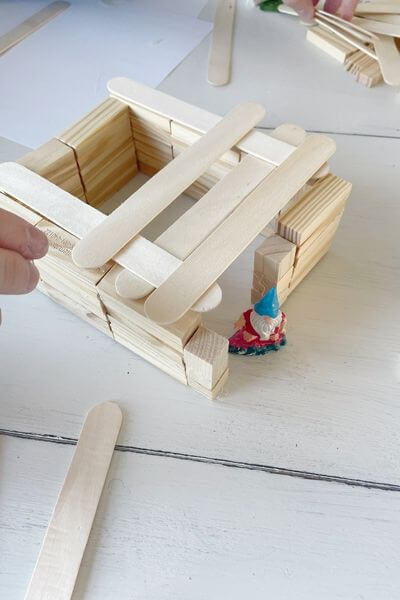
After the walls were assembled and glued together, it was time to glue the roof on using the large craft sticks.
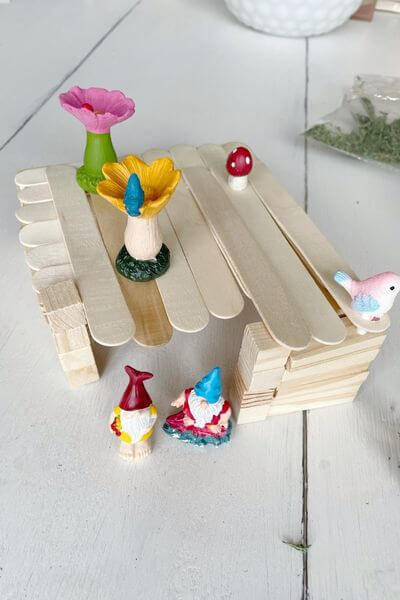
Glue on Reindeer Moss for a Woodsy Gnome House
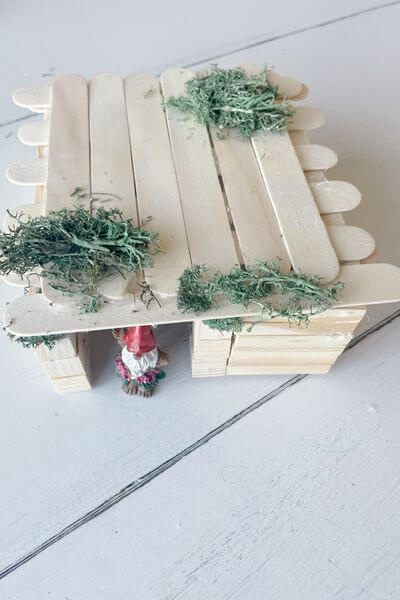
Once the roof was completed, he glued on some reindeer moss in various areas. And this gnome home was finished!
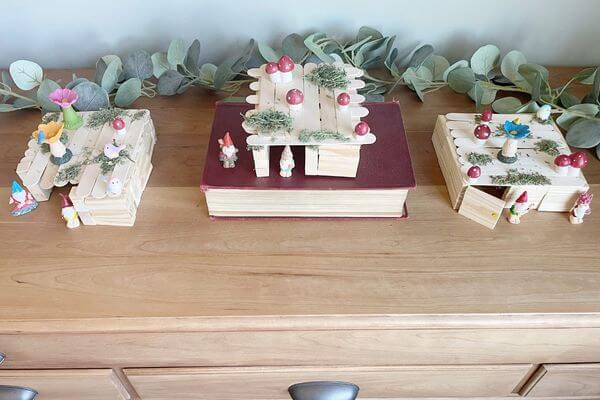
Additional Gnome Home Ideas
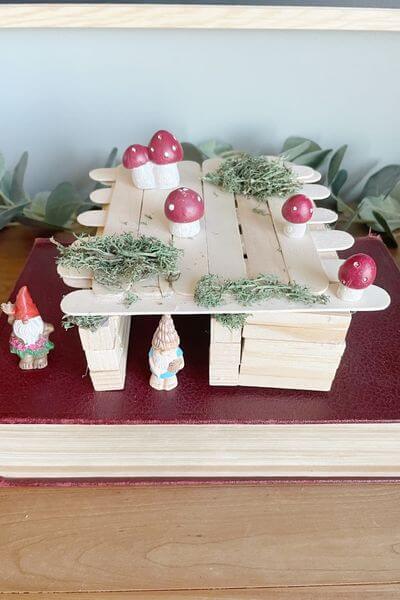
My littlest assembled her gnome home in the same way, only she used Elmer’s Glue instead of hot glue. Here is how she built her gnome house in pictures.
Dry run of the walls being built…
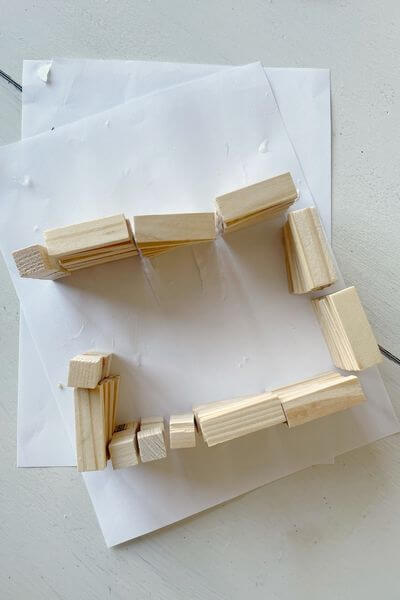
Gluing the pieces of the walls, section by section. Notice that the glue does make the wood stick to the paper, so it may have been better to use tin foil instead.
Once the sections were dry, then they were glued together using Elmer’s glue. It doesn’t have to be perfect since it’s a homemade gnome home!
Gnome house roof was then created by gluing on the craft sticks. And then accessorized using the fairy garden gnome figurines, mushrooms and flowers.
FYI the little bird did not come from Dollar Tree. She found that in my craft supplies. But the rest of the figurines did!
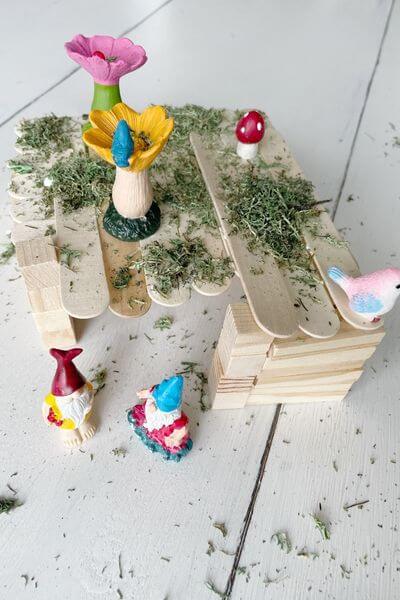
Reindeer moss was added using Elmer’s Glue. Note that this moss stuff is pretty brittle and can make a mess! But this cute little gnome home was finished!
Just One More Wood Gnome Home Idea
Ok, just one more idea for your gnome houses. This one was built a little different by my middle guy. We did use Elmer’s Glue, but we used tin foil instead of paper as we were building the gnome house, so that the boards didn’t stick to it.
Here it is in pictures…
He glued a bunch of Jenga blocks together each containing 3 sections. Instead of being stacked like Jenga pieces, these were glued end to end.
The walls were assembled using Jenga pieces and a door was added to the gnome house. Then popsicle sticks were applied to build the roof.
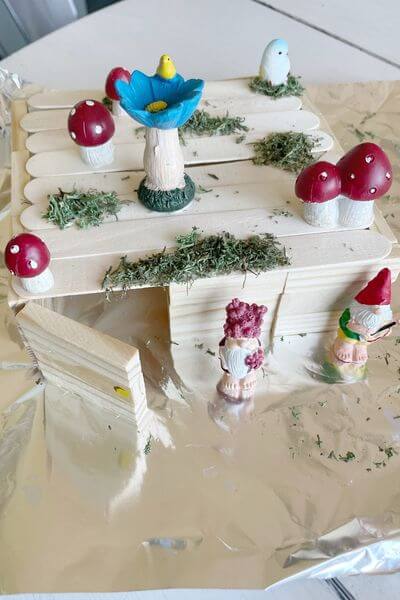
After the gnome home roof and walls were finished, then reindeer moss was glued to the top along with the figurines. Again, all of the figurines are from Dollar Tree except the little bird. I found them on Amazon. 🙂
Finishing Up Gnome Home DIY Kids’ Craft Post
Here’s a quick look at the three gnome homes all completed!

All in all, a very cute, very fun, gnome house craft idea for kids. I think this would be perfect for summer vacation activities when the kiddos are bored.
Just a few thoughts…
We liked the Elmer’s Glue better than the hot glue because we were able to get the blocks flush against each other. The hot glue created a small gap between the boards. However, both worked well, so you could use either one!
The tin foil worked better than paper as a work surface, because it didn’t stick to the house when we removed it.
The reindeer moss was a bit of a mess because it was brittle, but we liked the way it gave the house a woodsy look!
There are so many different figurines you could use at the Dollar Tree, so accessorize your gnome homes as you like!
We were able to create 3 gnome houses for under 7 dollars. That is not including the figurines, however! We started with just a few mushrooms and gnomes but went back for a few more accessories for our houses! Because they are so dang cute!
I like that it gave the kids creative freedom to build and design their own gnome home. Each one was a little different!
The kids can even use them for decor in their rooms, or I think they would look super adorable among some plants on a shelf! Gnome home decor ideas for the win!
As always, thanks for reading. And any questions, just leave me a comment and I’ll get right back to you! Also please consider subscribing to my newsletter below for more kids’ activities and easy DIY projects.
If you’re looking for a spring or summer craft activity for the kids, I suggest giving these DIY gnome homes a try! Both easy to create and inexpensive since the materials are from Dollar Tree. A win-win!
Pin me for Later! ⬇️