


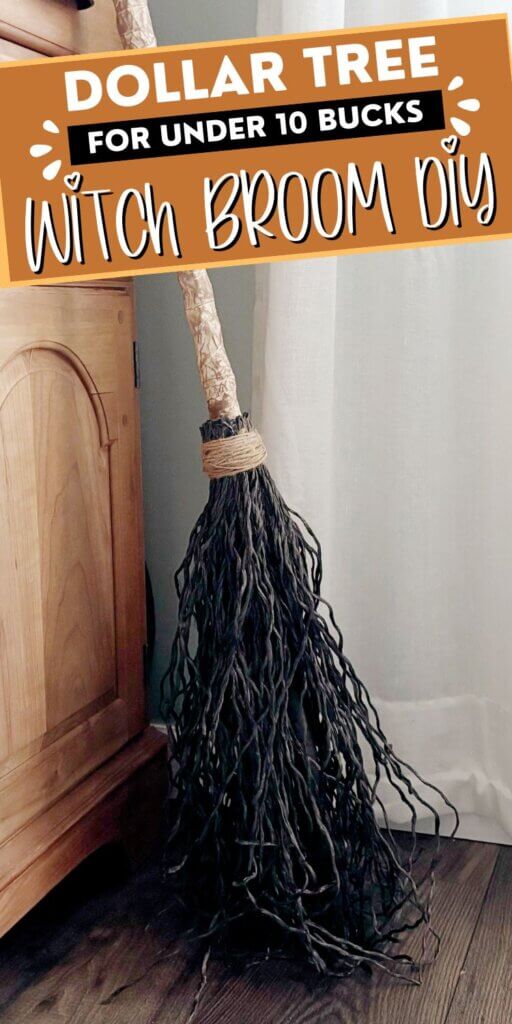
Ready to craft a witch broom for spooky Halloween decor made with supplies from Dollar Tree? Wait til you see this inexpensive and neat Halloween craft!
Hey there friends, it’s that time of year again! The season where the nights get crisp and cool, the leaves start changing into an array of pretty colors and pumpkin spice is everywhere.
And you know what that means, fun and spooky Halloween is just around the corner.
We’ve always loved spooky stories, trick-or-treating and dressing up in homemade costumes here at my house. Now that my kids are older, I don’t get to do as much costume making as I used to. 🥺
So, I decided to make a cheap and easy DIY for Halloween decor instead.
This DIY witch’s broom is made with Dollar Tree supplies and comes in under 10 dollars. And I’d make a bet that it would be perfect for your front porch this Halloween.
So, let’s get to it before Halloween rolls around. Here are the simple steps to make this DIY witch broom.
Supplies for DIY Witch Broom
All supplies were from Dollar Tree except the glue gun, paintbrush and craft paint. These supplies were purchased at Walmart.
- Broomstick Handle
- Masking Tape
- Black Poly Rope (2)
- Jute Twine (not pictured)
- Glue Gun
- Craft Paintbrush
- Brown Craft Paint in the color Burnt Umber
- Black Craft Paint (not pictured)

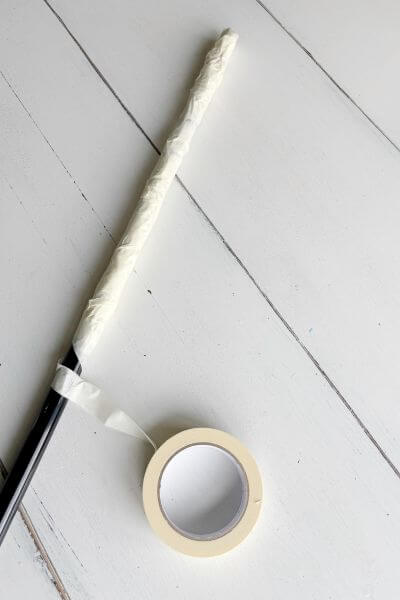
Wrap Masking Tape Around the Broom Handle
First, grab your masking tape and broom handle. Begin wrapping the tape around the broom handle.
Wrap it all different directions. If there are creases, that’s great!
I wrapped the entire handle in masking tape. Just kept wrapping and criss crossing the tape. Just be sure that the sticky side isn’t on the outside.
Here are a few pics of the process.

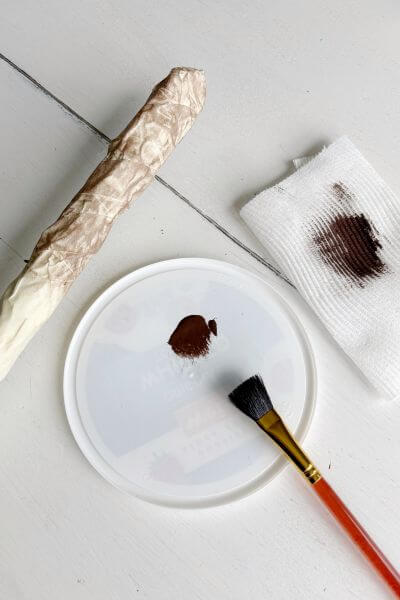
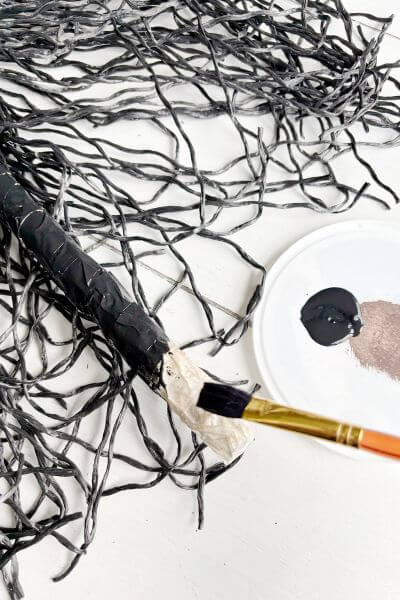
Dry Brush Brown Paint onto the Masking Tape
Now we’re going to make the broomstick handle look like wood.
Dry brush paint onto the masking tape. Dip your brush into the paint, then blot most of it off onto a paper towel. Lightly paint over the masking tape.
This allows the brush to graze only the “sticking up” parts of the tape job.
Do you think it looks a bit like gnarled wood?


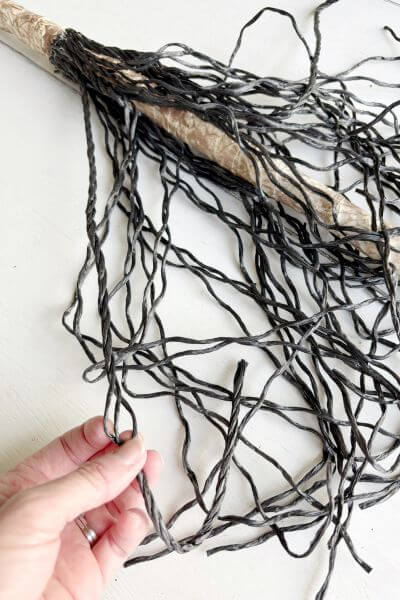
Hot Glue the Poly Rope to the Broom Handle
Now it’s time to heat up the glue gun. Once the paint is dry, begin hot gluing pieces of polyrope to your broom handle.
I started gluing mine about 18 inches from the bottom of the broom handle and made the pieces of rope about 19 inches in length.
Glue all the way around.

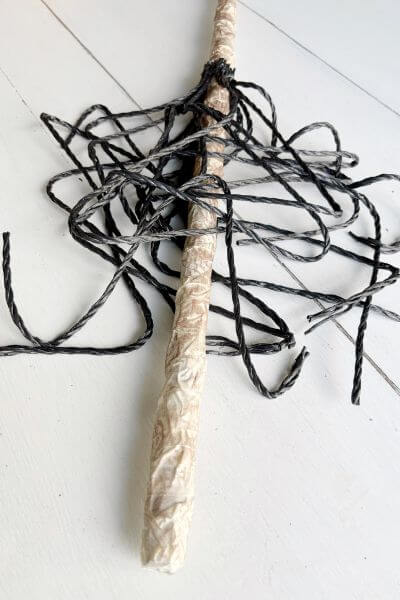
After I had glued all the way around once, I began gluing another row about 1/2 inch down.
***I think if I had it to do over again, I would have just glued all the remaining rows right over my first row. I ended up gluing the third row around where my first row had started and didn’t make it all the way around. This made an off step on one portion of the broom. 🫤 ***
You’ll be able to go around the broom handle with the 2 bundles of poly rope about 2 and 1/2 times. Be sure that the rope is hanging a bit below the handle.

Spread Out the Poly Rope Strands to Look More Like Straw
Next, you’ll use your fingers to spread out the strands of poly rope to make the broom look more full.
Paint the Bottom of the Broom Black
The bottom of the broom was showing through the poly rope, so I got out my trusty paint brush and painted it black.

And, wa-la, no more broom handle to be seen!
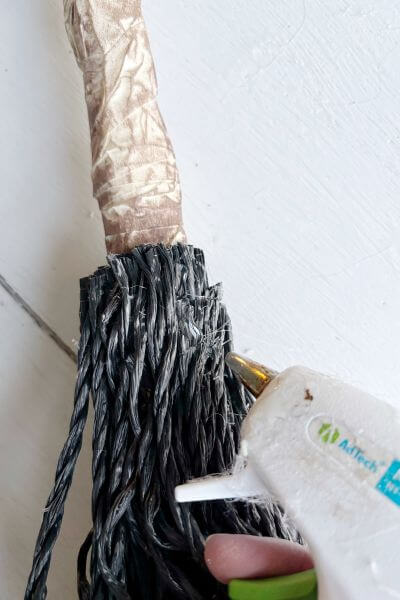
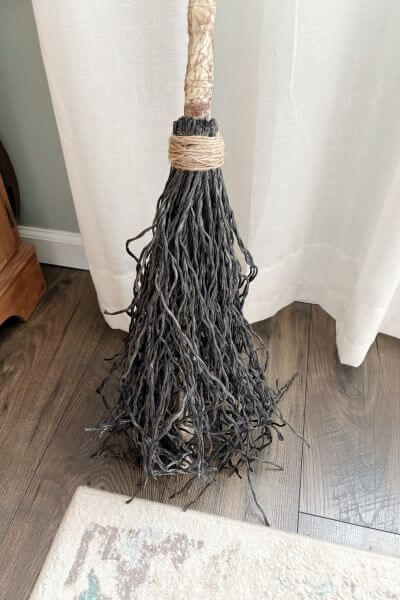
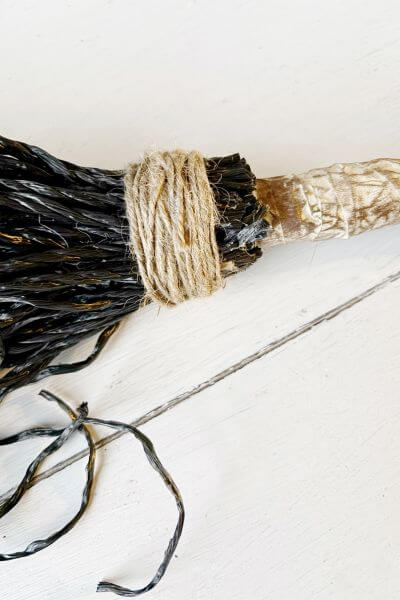
Wrap Twine Around the Rope
It’s time to wrap your broom with some jute twine or rope. Simply tie it around the rope and then wrap it as many times as you like. Hot glue it into place.


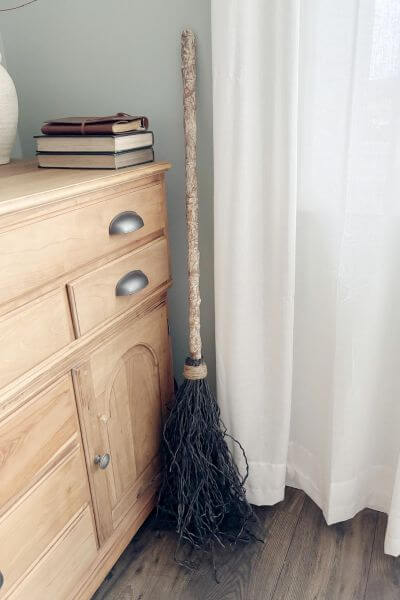
And that’s a wrap! Display your DIY witch’s broom with your Halloween decor!
You can even add battery operated twinkly lights to make it more sparkly!
Final Thoughts on this Dollar Tree Halloween DIY
So, do you think this would be a super easy witch broom to craft for your Halloween decorations?
This broom comes in under 10 dollars with the handle, masking tape, poly rope (2) and twine coming in around 6.25 and the craft paint usually costing about 1.50. That’s a grand total of 9 dollars and 25 cents.
I’ve seen the pottery barn witch’s broom floating around the internet, and though this one is a little less full, it’s definitely a whole lot cheaper for something you’ll probably keep up for about a month!
And you get to make your own unique witch broom craft…that’s the best part!
Let me know if you have any questions down in the comment section.
As always, thanks so much for reading. And of course, Happy Spooky Season!
Now it’s time to head out to Dollar Tree for a broomstick handle, rope and masking tape to craft your own unique witch broom DIY.
Pin me on Pinterest ⬇️
Please consider subscribing to my email newsletter below for more craft ideas! 👇