
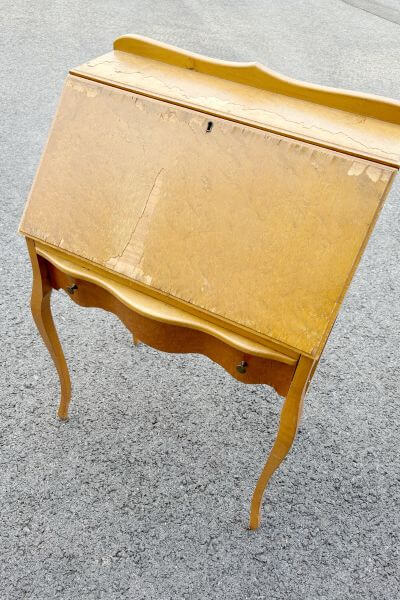
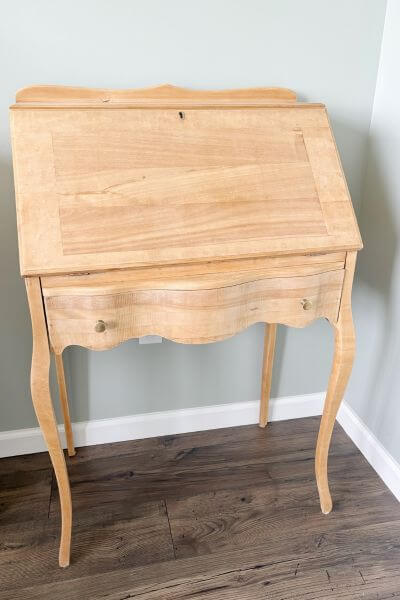
I was scrolling Facebook Marketplace when I came across this old wooden secretary desk for 25 dollars. All it needed was a makeover. Removing cracked veneer, sanding and painting gave this little desk a whole new life.
Of course, that makes the project sound easy, doesn’t it?
I see so many furniture makeovers on Instagram and because the reel is only like 20 seconds it seems like the project is quick and simple (although, don’t get me wrong, I love to watch the transformation!)
Well, when I redo furniture, I quickly realize that things are not always what they seem in a short reel or video.
There’s something to be said too for the folks that do this as a business. Redo a piece and then make a profit. I’m sure that helps to make the process go more smoothly. Practice makes perfect. And a wide assortment of tools always helps too, I’m sure!
But if you’re a “weekend warrior furniture refinisher” like me, the project from beginning to end isn’t always quit that simple.
So, read on for the scoop on this cute little secretary desk that I recently refinished. And I’ll try to give you as many tips and tricks as I can that I’ve learned along the way.
***Many of the supplies I used are linked throughout the tutorial. If you have any questions regarding the materials I used, just post them in the comment section. 🙂
This post contains affiliate links. As an Amazon Associate, I earn from qualifying purchases. This means when you click a link, I may earn a small commission at no cost to you. Thanks for your support!
Remove Cracked Veneer from Thrifted Desk
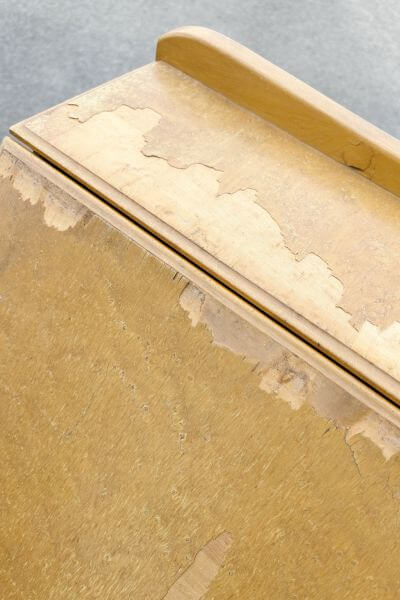
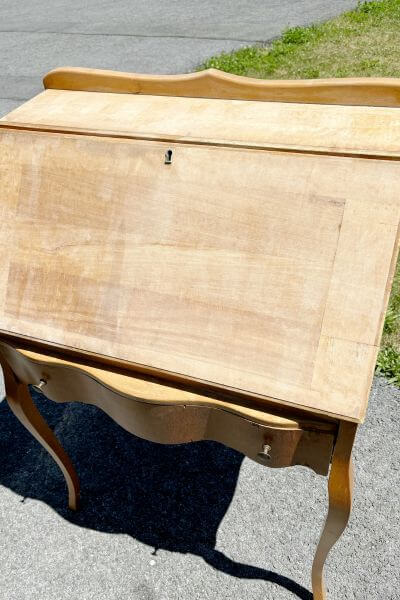
This is how she looked at the beginning. The cracked veneer was in rough shape and had to be removed.
I found a super easy way to remove veneer on YouTube. Here’s the link for that video if you want to check it out.
Basically, you place an old wet towel over the areas of veneer that you wish to remove. Be sure that it is wet but not dripping.
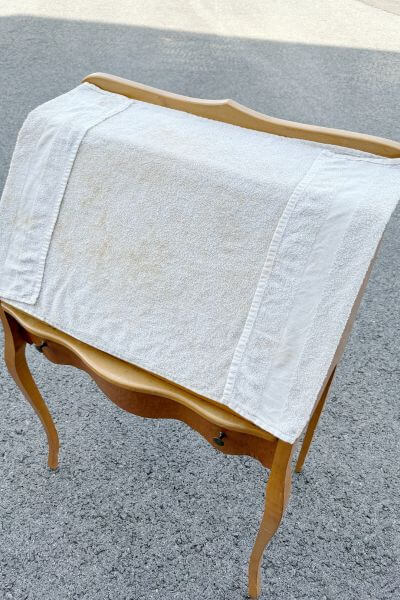
Allow the towel to sit there for a few hours. You should be able to tell when the veneer is ready, mine even bubbled up a little.
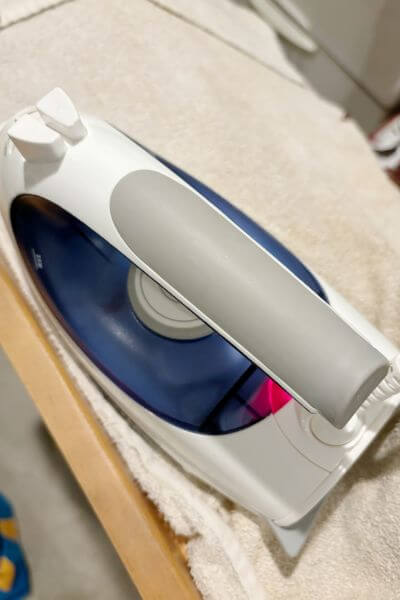
Next, heat your iron up to the highest setting. (Do not use your good iron, mine ended up rusting!)
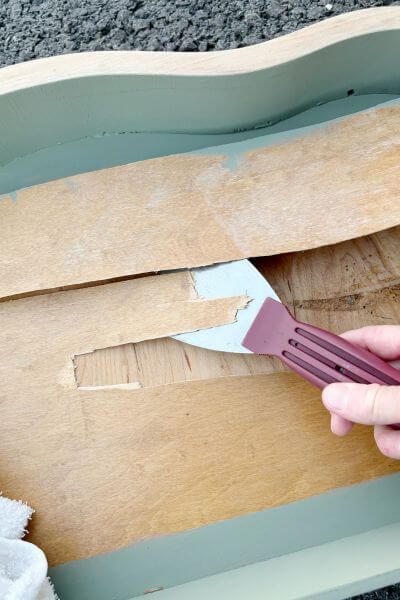
Working in sections, place the iron over the wet towel and hold it there for about 30 seconds.
Remove the towel and use your scraper to lift up the veneer.
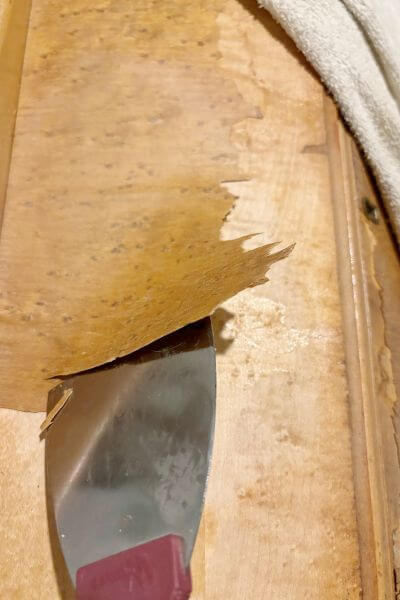
Working in small sections, use your iron to loosen the veneer’s glue and then lift it up with the scraper.


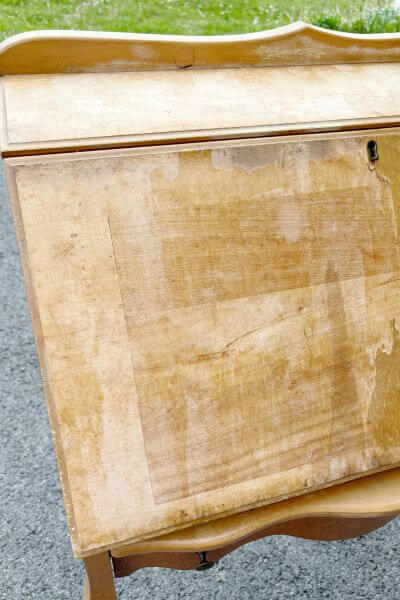
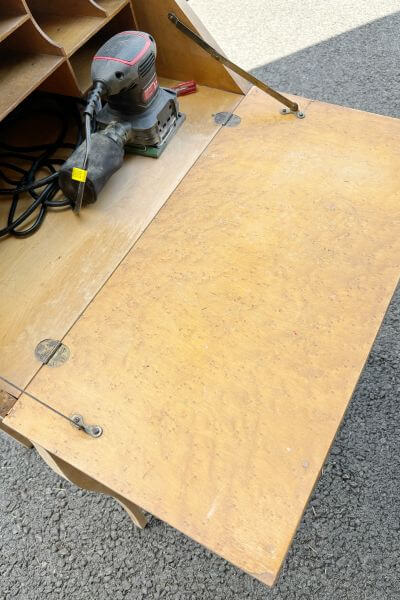
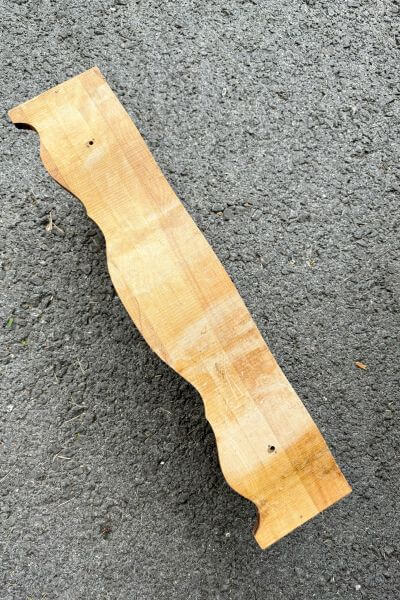
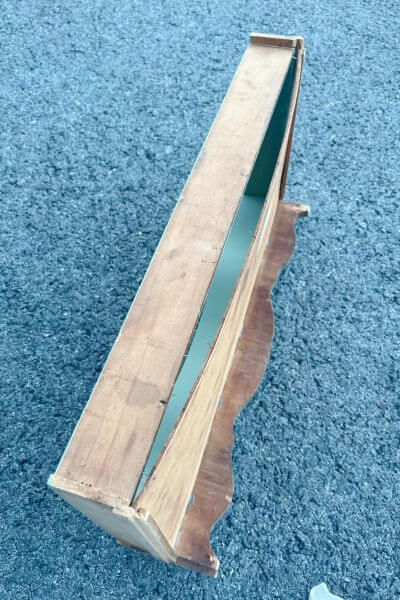
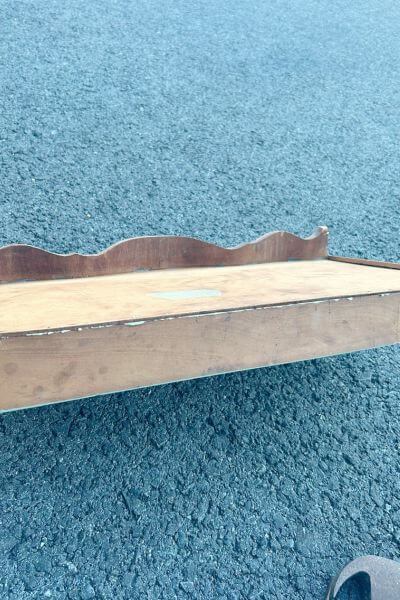
Here’s the old wooden desk with the veneer removed. You can see how the wood looks darker due to the remnants of the glue.

Little did I know that there were two more areas of veneer located on this desk. Here on the front of the desk drawer.
And here inside the desk too. 🥴 I ended up removing the veneer from the drawer but went a different direction with the interior of the desk as you’ll see toward the end.
Sand this Old Wooden Desk DIY
Start with 60 or 80 grit sandpaper to remove the topcoat and stain from the wood. I used 80-grit, and it worked well to sand the piece down to bare wood.
I found that 60-grit sometimes scratches softer woods, especially with the electric sander. When I hand sanded some areas, I did use 60-grit at times if the finish was being stubborn.
My sander is nothing special. In fact, I think my husband won it for free at work during a holiday giveaway.
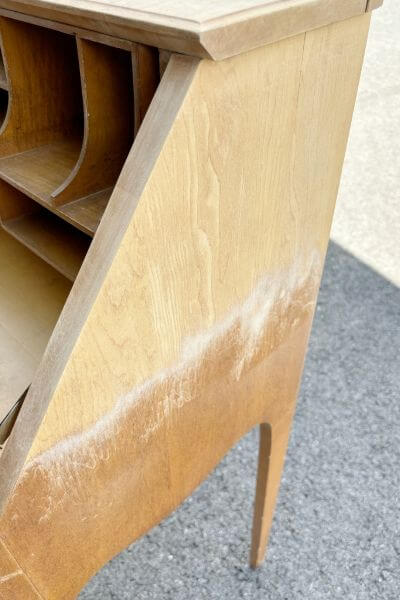
This also worked to sand off the glue which had adhered the veneer to the desk. The pic directly below shows half the front sanded, and the other half with the glue still apparent.

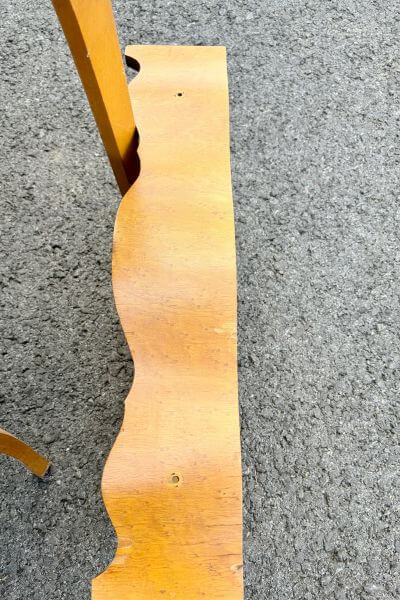
Now on to sanding the sides and legs. Below are a few pics of the sides being sanded. For the legs, I did as much as I could with the desk standing, but then turned it over for the harder to reach places.
This is a pretty small desk, so it wasn’t difficult to turn over.

Sorry about this Jimmy, but the signature’s gotta go. 😉

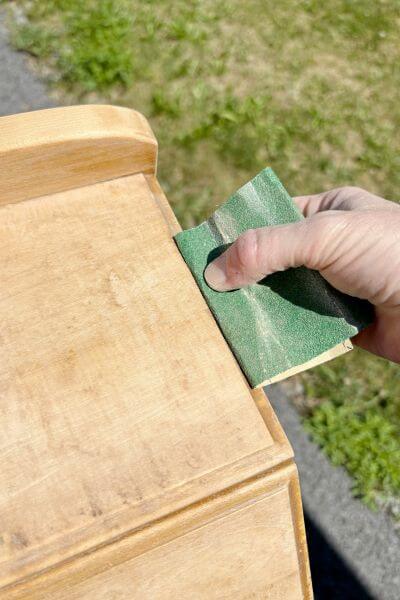
I used a folded-up piece of sandpaper to complete the hard-to-reach places on the desk.

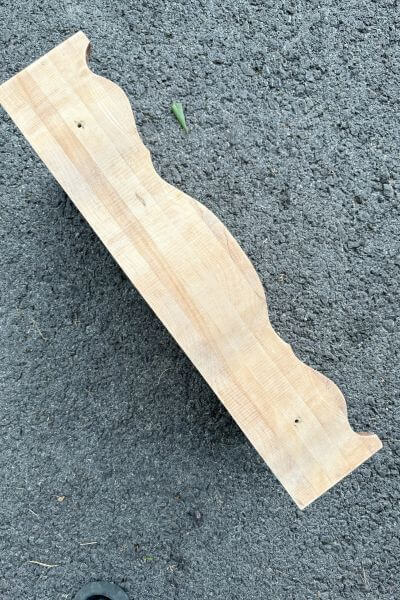
Once the 80-grit was completed for the entire desk then it was sanded with 120 grit. To finish it completely and give it a soft and smooth appearance this old desk was sanded with 220 grit sandpaper (you can also use 150 depending on how you like your finish).
Going over it with coarse to fine grit sandpaper gives the desk a nice smooth finish.
Here’s a quick and easy guide for what grit sandpaper to use for sanding raw wood before staining or sealing by General Finishes.
Now On To the Front of the Desk Drawer
I decided to use the same method of wet towel/iron on the front of the desk drawer to remove the chipped veneer.
Then I sanded the front beginning with coarse and progressing to fine grit sandpaper.
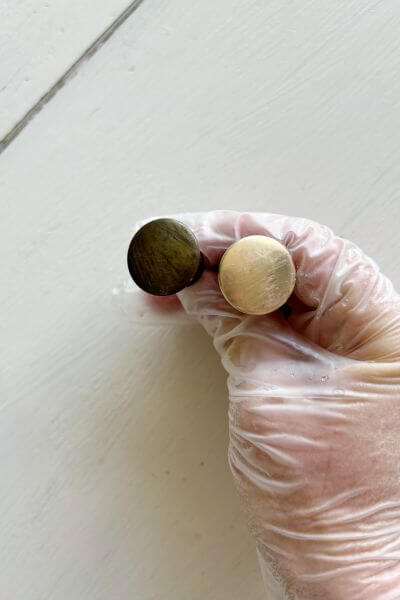
The knobs were cleaned with Barkeeper’s Friend. Look at the difference!
Let’s Talk the Inside of the Desk Now
After redoing the front of the drawer, I’ll show you how I decided to refinish the inside of the desk. Remember there was veneer there too. Yay!
The inside of the little drawer I saved for last, so be sure to stay tuned for that! Because let me tell you, it was super-duper fun!
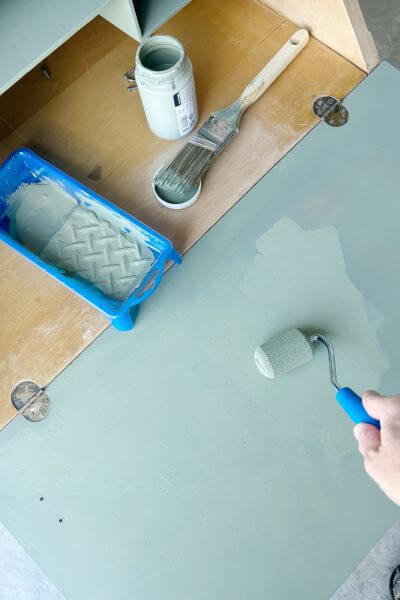
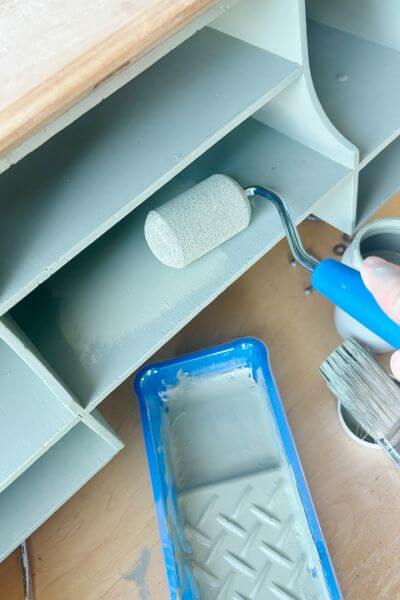
I decided to use paint to cover the cubbies on the inside of the desk. A paint brush was used for part of the process. The paint was from Walmart and is Waverly chalk paint in the color Moss.

I also found this handy little paint roller on Amazon that worked great to paint the larger inner portion of the desk.
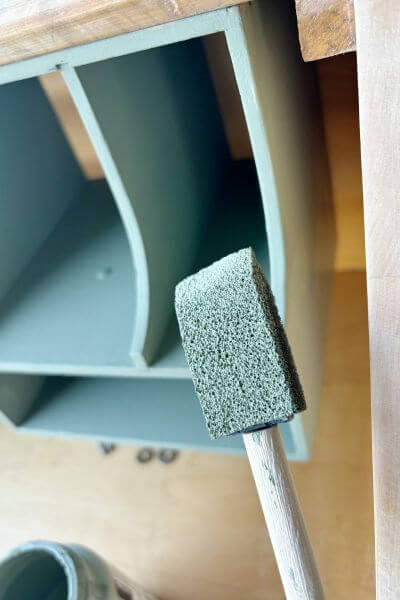
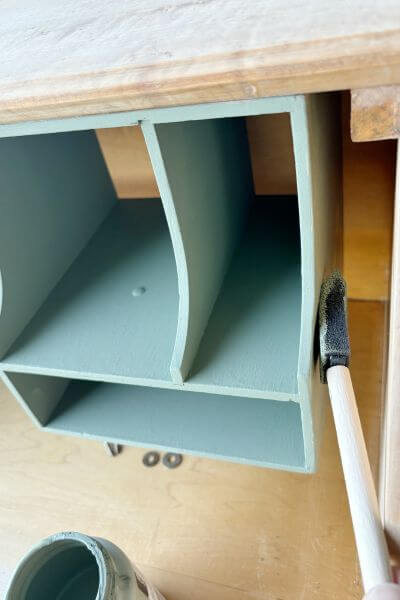
It worked well on the cubbies too, however I couldn’t get it in between the cubby and the inside of the desk. So, I used a small sponge paintbrush I had on hand for the narrow parts.
The cubbies were a bit of a bugger. SO MANY SMALL CREVACES!

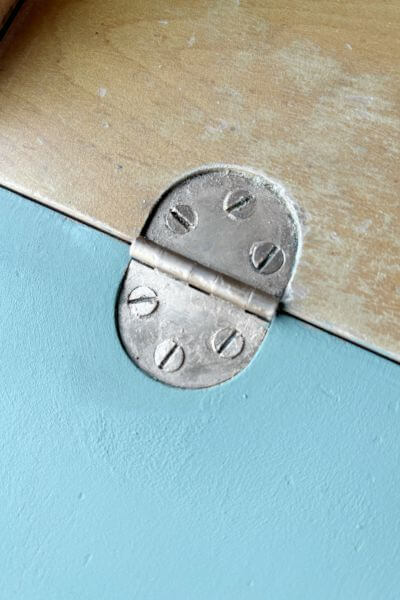
This little hinge on the inside looked a little rough and discolored. It would have been tough to remove and clean it off.
So, I chose another route. Rub n’ Buff for the win! That stuff is like magic in a bottle.

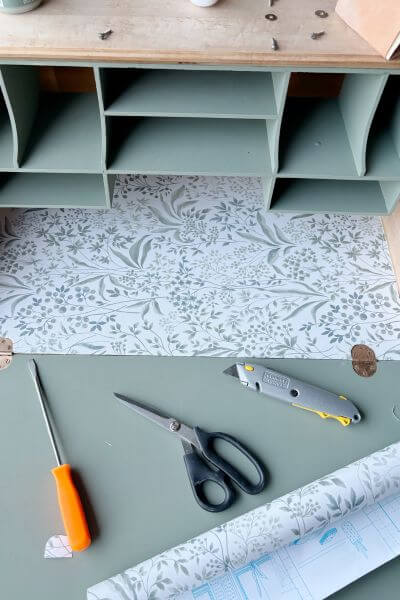
Contact Paper the Inside Portion of the Wooden Desk
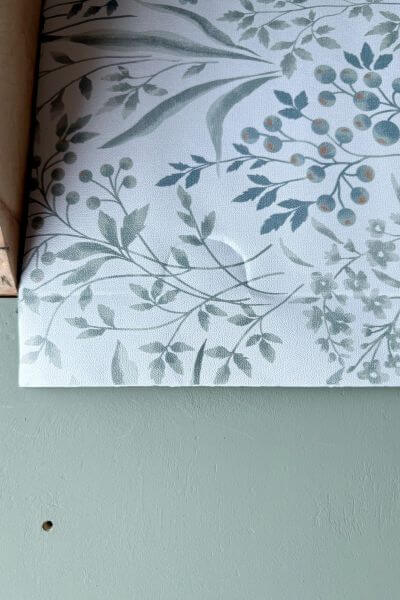
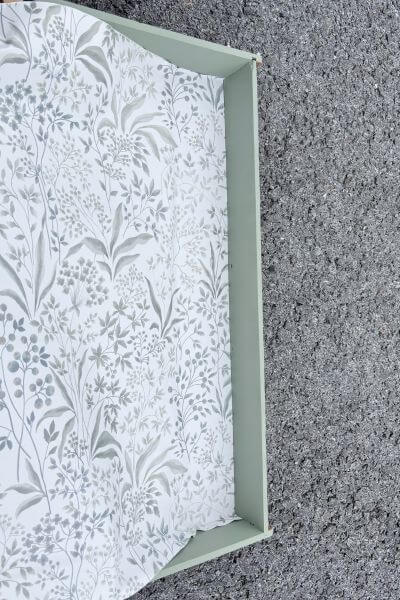
After the paint dried on the inside of the desk, I got ready to apply the contact paper. This is the same brand, but mine appears to be out of stock, so I’m linking a similar version of this green contact paper.
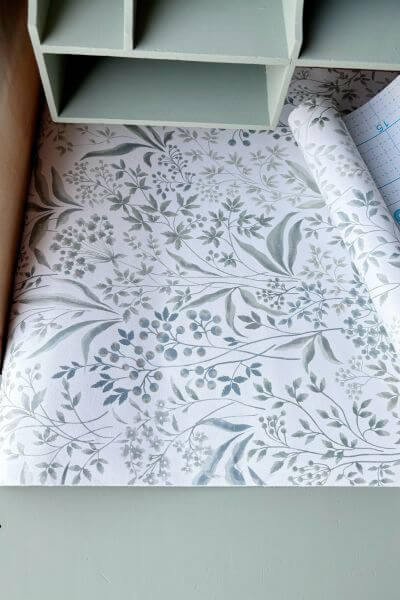
First, I measured the inside from left to right, creased it along the edge and then cut it with the scissors.
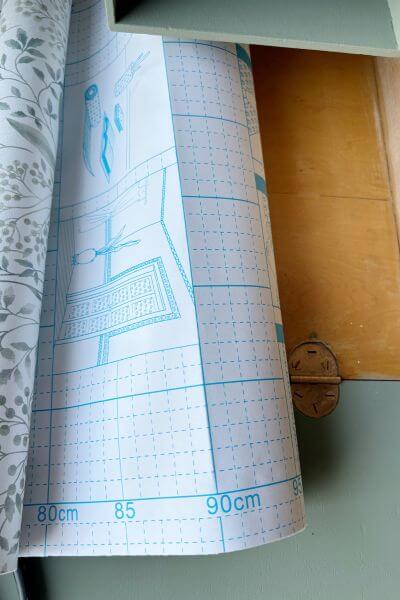
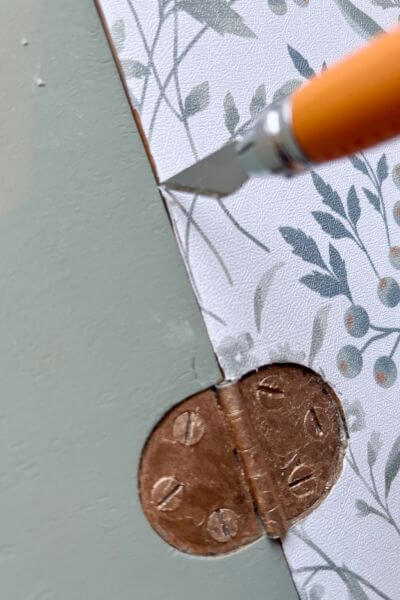
Next, I creased the part of the desk by the inside part of the hinge.
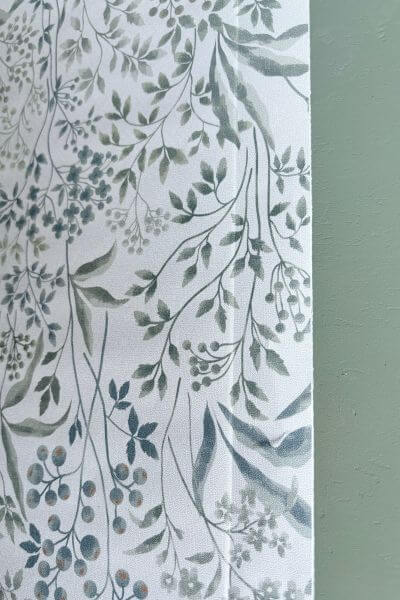
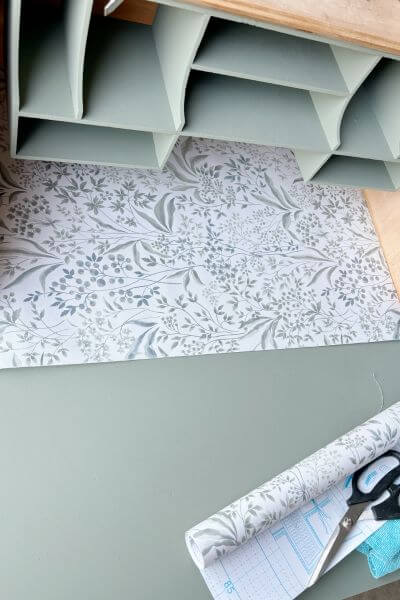
Use scissors to cut along the creased part and then carefully remove the back of the contact paper and apply it to the desk, rolling it out a little at a time.

I used this little exacto knife to trim any excess pieces of contact paper.
Now back to the inside of that dang drawer!
Remove Veneer from Inside of the Drawer
The inside of the drawer had chipped veneer too. 😱 Of course it did.
So, at this point I had to make a choice and decided to get the old iron out again.
Here is the inside of the drawer…
Repeat the process with the towel and iron, as above, and then use the scraper to remove the veneer.
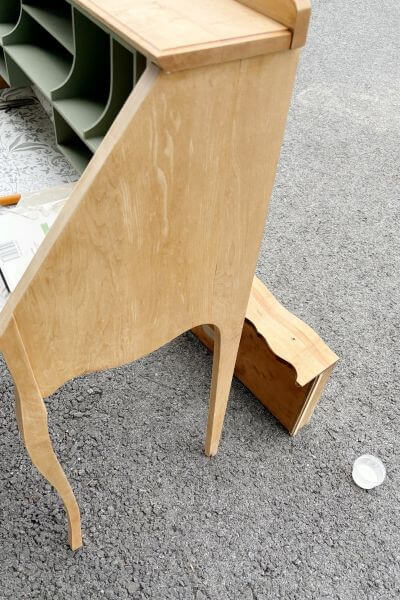
I kid you not, the hot iron and moisture warped the drawer. How could I make this stuff up?
And this is why you look for pieces with dovetailing in the drawers. So much sturdier than what i was working with.
So I literally pulled the little nails out of the drawer that were holding it together. Then I used wood glue to put the drawer back together along with re nailing the small nails into the drawer.
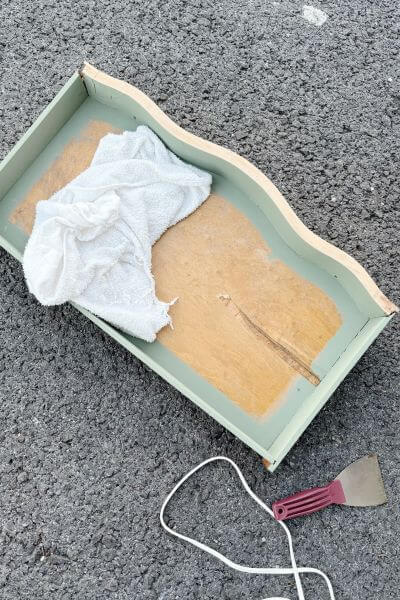
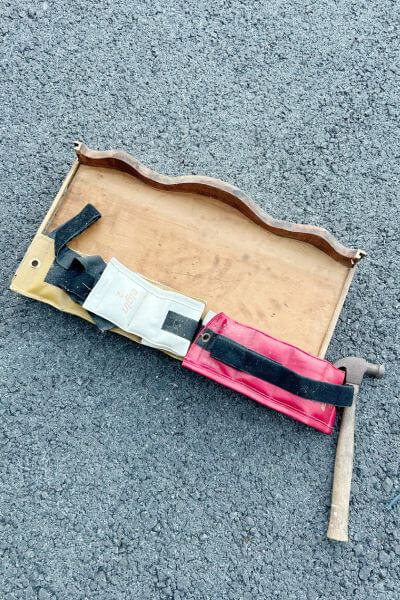
I had to hold it down with weights I found in my garage until the wood glue dried. Here’s what that looked like…
First up, the warped bottom of the drawer.
Glue applied along the seam of the desk. See the tiny nails sitting by my hammer.

Nails re-pounded into the bottom of the drawer.
Ankle weights to hold down the drawer until the wood glue dried.
It worked! Cue the relief since I had already put a great deal of effort into this project!
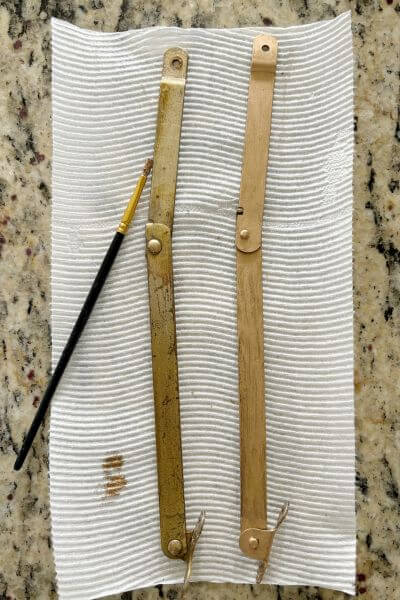
Quick pick of the hinges that I had taken off and tried to clean with Barkeeper’s Friend. That didn’t work, so next best choice was to coat them with Rub n’ Buff.
Apply Contact Paper to the Inside of the Drawer
Now it was time to apply the contact paper to the inside of the drawer. It turned out to be a little tricky because the front of the drawer was curved.

First, I placed the contact paper along the back side of the drawer. I took the paper off gradually and pressed it onto the drawer.
Now, here was the tricky part… pushing the contact paper as close to the curved front part, and then cutting it with the exacto knife.

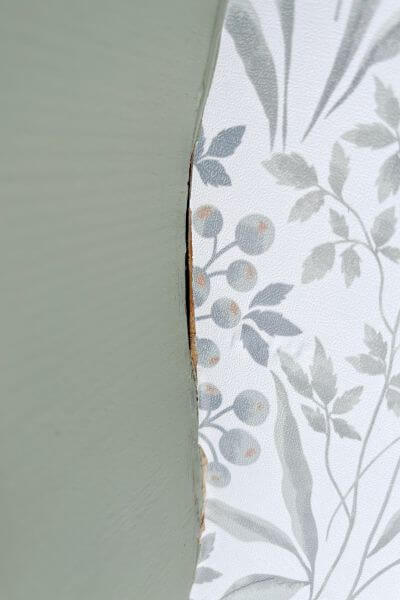
Here’s a pic of the small gap I left at the front part of the drawer. If I had more contact paper, I would have tried again.
However, I ended up having to repaper the inside of the desk. I accidentally closed the desk and pushed some screws straight into the paper, tearing it. (I wish I were joking)
If I had it to do-over, I would have used regular paper to create a template of the drawer, and then traced it onto the contact paper. But live and learn, I guess.
Apply Topcoat to the Finished Secretary Desk
Finally, the easy part! I gave the whole desk (excluding the contact paper) a topcoat using General Finishes Flat Out Flat.
It initially darkened the desk a bit, but when it dried it pretty much returned to the original color.

Replace the Hardware and Finally Done!
Now, just replace all the hardware including the desk drawer knobs, and the hinges holding the drop down part of the desk.
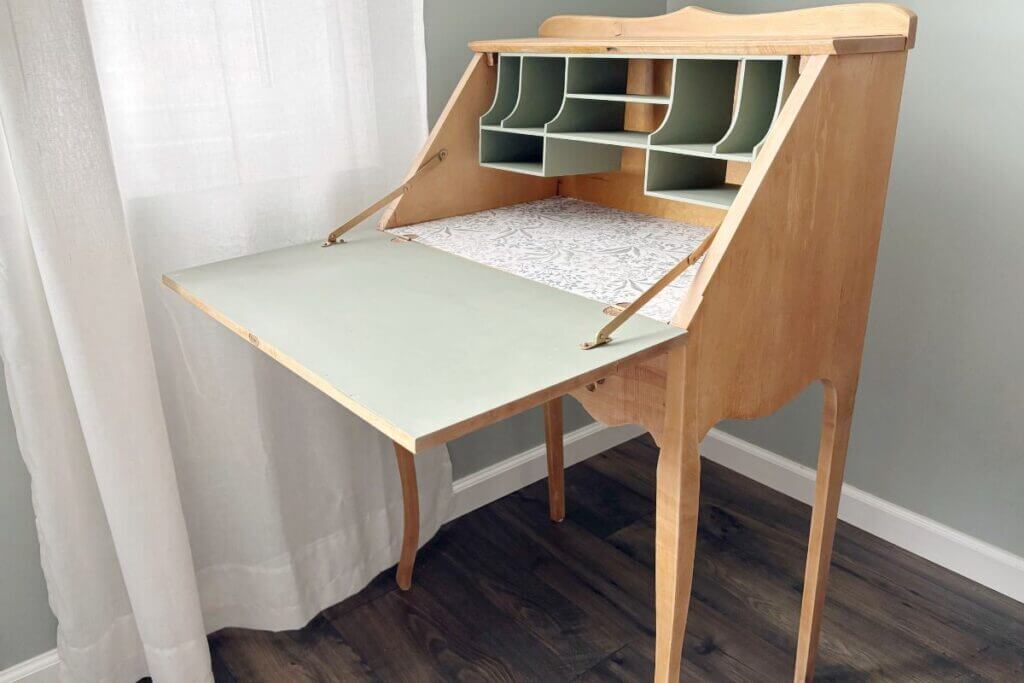
Finally, (after spending months and months in the garage) this vintage furniture secretary desk DIY is completed! Whew 😅
Here are a few pics of the finished project!


Final Thoughts on this Old Desk Makeover
Final thoughts… things are never as easy as they seem. 😉 This old desk proved that for sure.
From trying to paint the nooks and crannies of the interior shelving. To removing the veneer from inside the drawer and warping the board. To tearing the contact paper that I had just applied. It was not easy peasy. Lol.
Certainly though, you definitely learn a lot from doing a project like this. And, in the end, I like the completed look of the desk (although that little gap in the contact paper in the drawer still bugs me!)
The saying “practice makes perfect” I’m sure holds true too though. The more furniture renos you do, the more tricks of the trade you learn.
So, do you have an old desk or piece of furniture sitting in the garage collecting dust?
Then it’s time to get that baby out and do a furniture redo of your own! I know you can do it! And, if you have a funny DIY story, please post it.
Pin me on Pinterest! ⬇️

Please consider subscribing to my email list for more DIY ideas 👇