


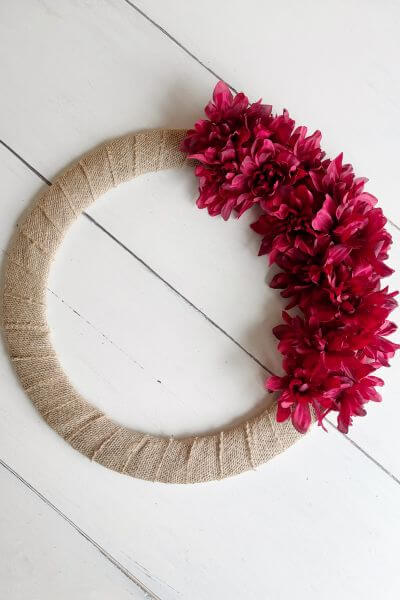
Create this easy DIY fall wreath with faux wildflowers and dahlias that’s perfect for your front door. Best part is that most of the supplies can be found at Dollar Tree making this both a budget friendly and beautiful wreath idea.
It seems like you blink once, and the fall season arrives. Cooler temps, changing leaves, roasted marshmallows, pumpkins and corn mazes are already here.
I don’t know about you, but I’m definitely a fall girlie. So, I’m ready. Bring on all things fall! 🍂
I’ve made fall wreaths before; however, they have been on the neutral color side. This time, however, I wanted to add a little bit of color to my front porch.
I love those deep red fall mums, so when I saw these pretty red dahlias at Dollar Tree, I just had to grab a few bunches.
This fall wreath is easy to make; you’ll just need a glue gun, scissors and wire cutters on hand. The actual wreath supplies come in right around 15 dollars which is not too shabby!
So, without further ado, let’s get to crafting this pretty fall wreath that will be an eye-catching addition to your fall front porch decor.
Supplies for Autumn Wreath DIY
As I said, the floral supplies and wreath form can be purchased at Dollar Tree. I found the roll of burlap at Walmart and had the glue gun, scissors, and wire cutters already on hand.
- 18-inch wreath form
- Dahlia Flowers (3 bunches)
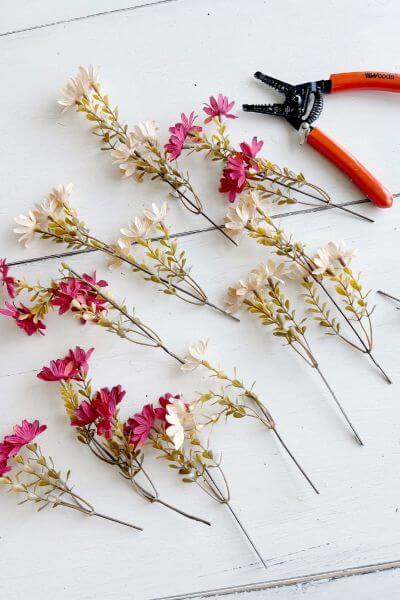
- Wildflowers – (2 bunches of red and 2 bunches of cream)
- Burlap
- Glue gun
- Wire cutters and scissors (not pictured)
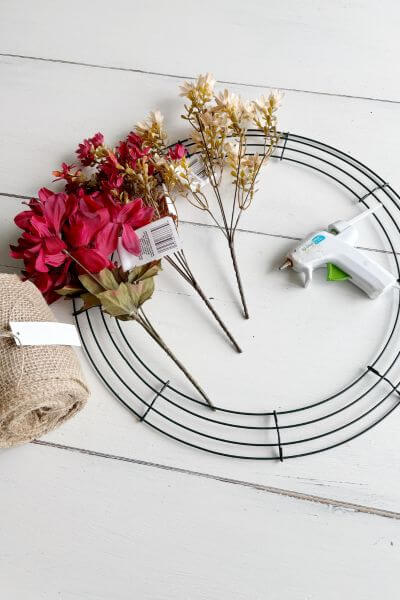
This particular 18-inch wreath form I had on hand, but this size is also available at Dollar Tree.
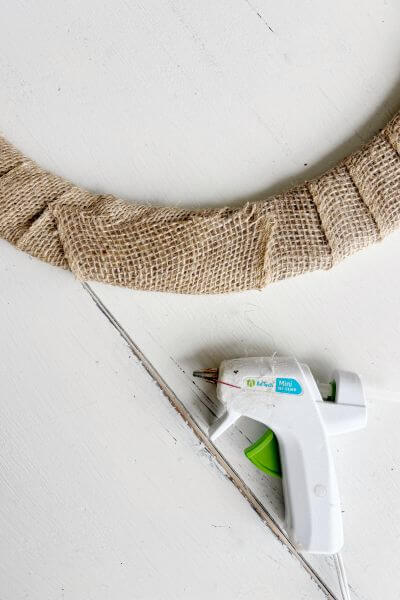
Wrap the Wreath Form in Burlap
First things first, heat up your glue gun and grab your burlap roll.
Hot glue the burlap to the back of the wreath at a slight angle.

Begin wrapping the burlap around the wreath form keeping some tension on the burlap as you wrap. This helps to ensure the burlap doesn’t bunch up.
Keep the loops relatively even. As you can see in the picture below, I kept an eye on the the width of each loop as I wrapped.

Once you’ve gotten all the way around the wreath form, then you can cut the remainder of the burlap and hot glue it to the back of the wreath form.
This is how the wreath looks so far.
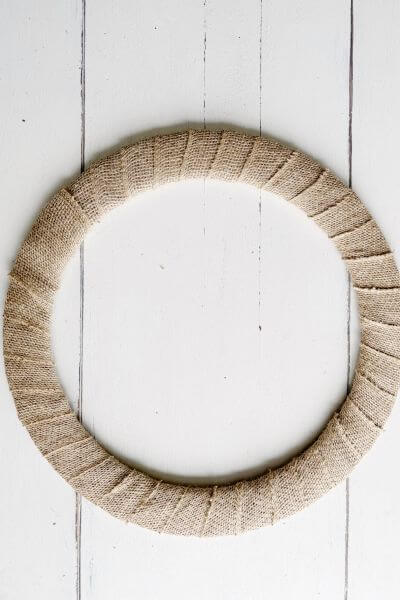
As you can see the part where you ended the wrapping doesn’t look exactly the same as the rest of the wreath. But that’s ok. That’s where we’ll put the flowers.

Clip the Dahlia Flowers Off the Stem
Now, we’ll add the floral. Clip the Dahlias off the central stem using the wire cutters.
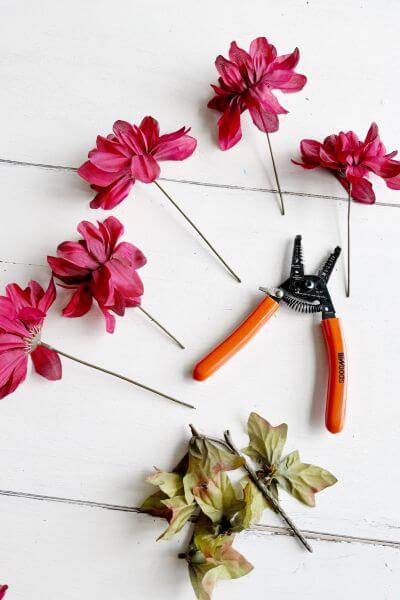
Bend the stem of the Dahlia.

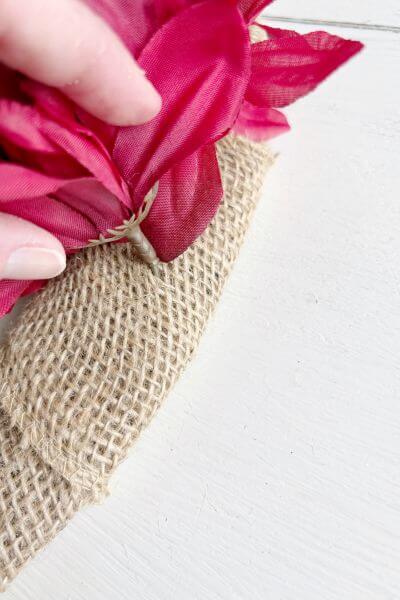
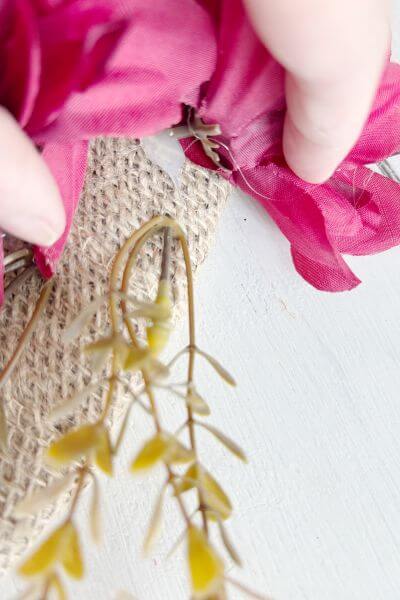
Tuck the Dahlias Stems into the Burlap
Tuck the stem into the wreath. Trim as needed to be able to tuck it in easily.
You can tuck some of the flowers into the seams of the burlap. Others you’ll tuck into the holes in the burlap. You may have to wiggle them in there.
Keep tucking the first bunch of Dahlias into the burlap. This is how the wreath looks with one bunch of dahlias.
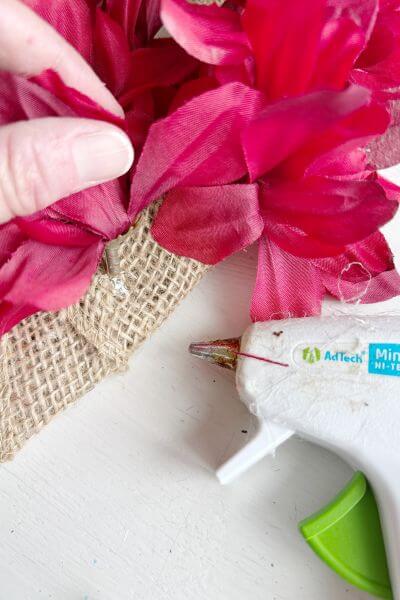
Hot Glue the Stems to the Burlap
Once you have the first bunch arranged how you like. Grab the glue gun and glue the stems to the burlap.
A little glob of glue where the stem goes into the burlap will secure them. You may have to hold them in place for a bit while the glue dries so that they stay where you want them.
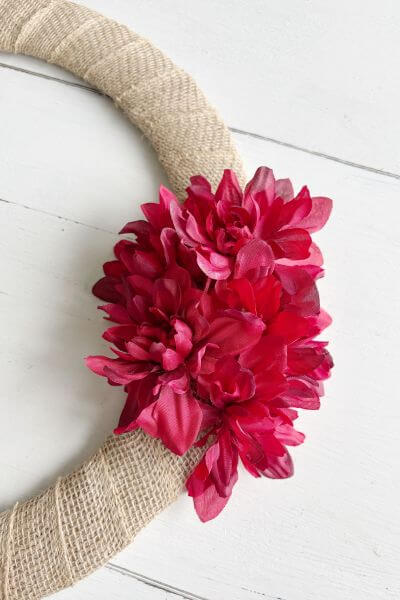
Add a second bunch of dahlias…

And a third and final bunch…
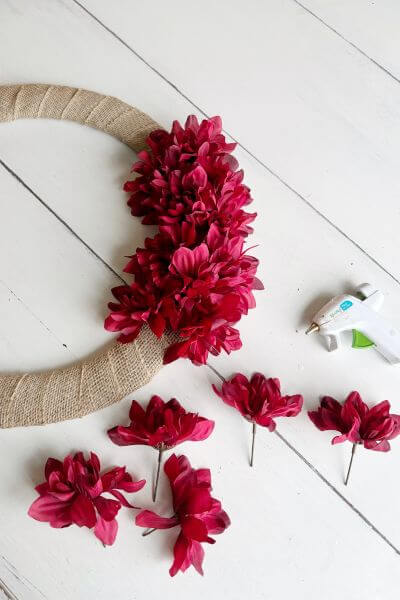
Clip Wildflowers from Central Stem
Now we’ll add wildflower bunches to either side of the dahlias.
Clip the wildflowers from the central stem using the wire cutters.

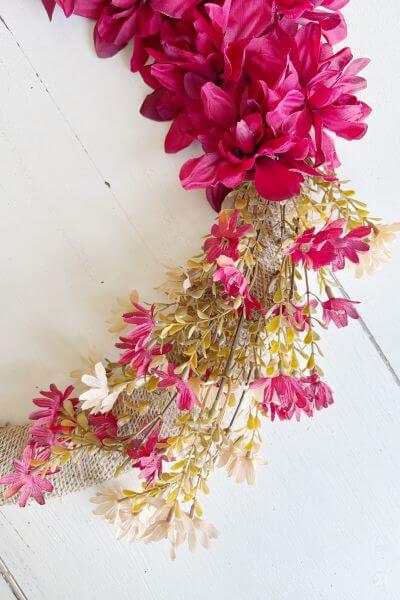
Tuck the Wildflowers in Beside the Dahlias
Grab one of the wildflower pieces that have been cut off the central stem. Clip the stems shorter as needed to allow for easier tucking.

Tuck the stem into the burlap.
Continue tucking wildfower stems into the burlap alternating red and cream colors.
Hot Glue the Wildflowers to the Burlap
Once the wildflowers are arranged in an eye pleasing way, use a dab of hot glue to adhere each stem to the burlap.
You may have to hold them in place for just a short bit while the glue dries.

Repeat the process on the other side of the dahlias.

And that’s a wrap on this pretty fall wreath using dahlias and wildflowers.
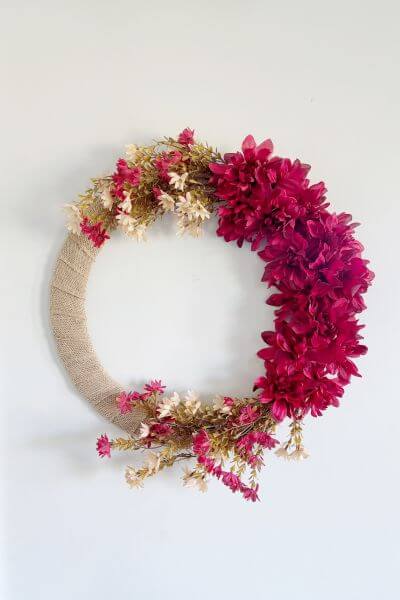
Finishing Up this Dollar Tree DIY Fall Wreath Tutorial
So now that this fall wreath tutorial is finished, is this a DIY project you’d like to create yourself? This wreath is pretty quick to make and doesn’t cost an arm and a leg. Which is a win-win in my book.
I plan on getting a few fall mums to complement the colors of the wreath. I haven’t quite gotten there yet, but if/when I do, I’ll be sure to share a pic with you all.
This fall wreath, excluding the scissors, wire cutters and glue gun, comes in around 15 dollars.
The burlap was purchased at Walmart and cost around 5 dollars, plus the 7 floral stems and wreath form that cost $1.25 each at Dollar Tree.
That brings the total to about 15 dollars without tax. Not too shabby for an 18-inch wreath that will look amazing on your front door!
Questions about this tutorial? Please post them down in the comments.
And, as always, thanks so much for reading. Happy fall y’all! 🍁
Now it’s time to make your own. Next time you’re out grab a wire wreath form, burlap, dahlias and wildflower bunches and craft this fall wreath for your own front door.
Pin me on Pinterest ⬇️

Please consider subscribing to my email newsletter below for more DIY and craft ideas 👇