
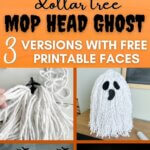
This cute and spooky mop head ghost DIY is made with Dollar Tree supplies. And if you have a few other materials on hand, you can make one for around 3 dollars.
The month of October is one of my favorites! The fall leaves, crisp air, warm soups, chilly nights, campfires, colorful mums and of course the pumpkin spice!
Halloween is another fun part of October. And my kids love decorating for it!
We put bats and spiders on the wall, a big monster face on the door, and a spooky witch hat that laughs creepily when you walk past its censor.
Recently, we also made a light-up haunted house craft decoration out of Dollar Tree supplies.
This cute, mop head ghost is also made with materials from the dollar store and is super easy and inexpensive to create.
You may even have a lot of the supplies on hand making this even more budget friendly.
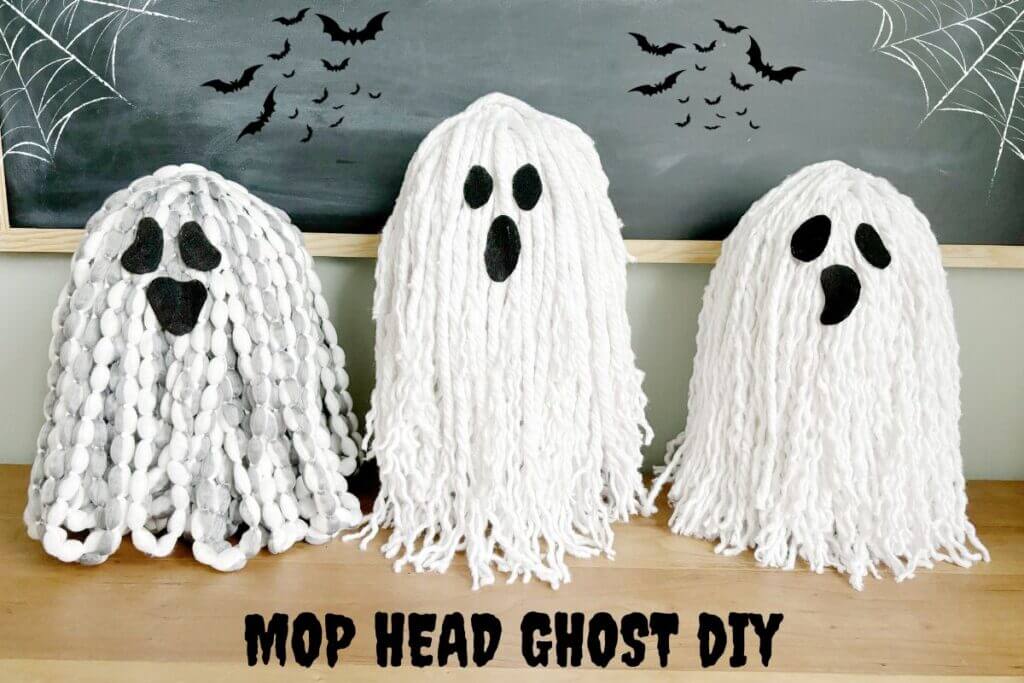
This ghost can be created 3 different ways, so you can customize yours any way you like.
Before we know it though, Halloween will be upon us. So, without further delay, here’s the tutorial for this mop head ghost DIY.
This post contains affiliate links. As an Amazon Associate, I earn from qualifying purchases. This means when you click a link, I may earn a small commission at no cost to you. Thanks for your support.
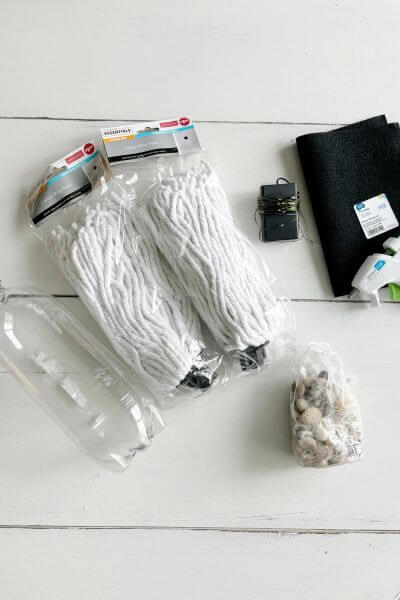
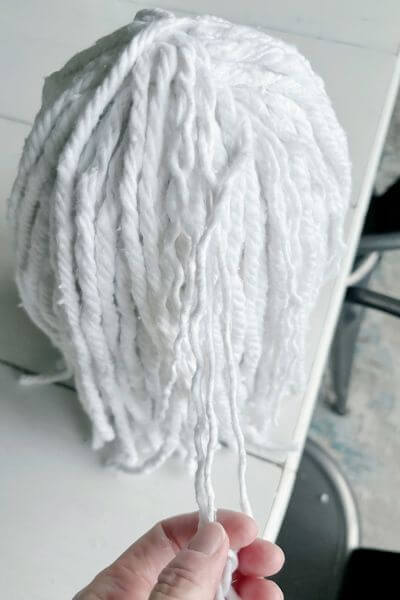
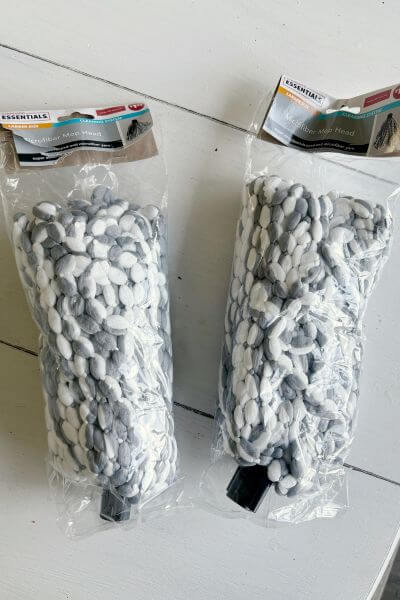
Supplies for Ghost Mop Head DIY
- Mop Heads (2) – Dollar Tree
- Black Felt – Walmart
- Twinkle Lights (battery operated with timer) – I got mine from Walmart
- Glue Gun – Amazon or Walmart
- Rocks
- Soda Bottle (rinsed and dried)
- Scissors – Amazon
Note: You’ll use one and a half mop heads for each of the white mop head ghosts.
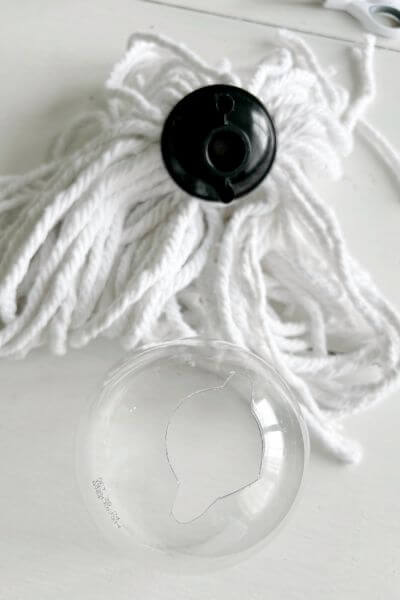
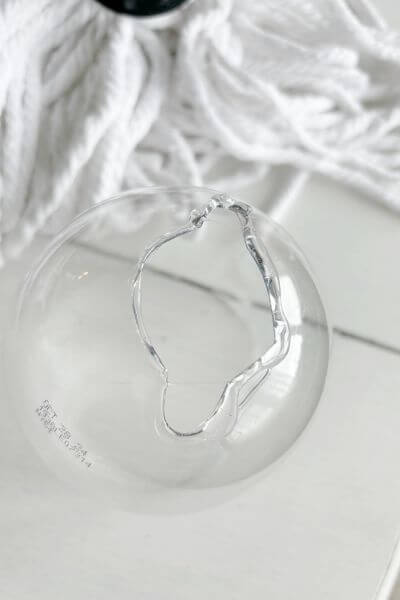
Cut Your Soda Bottle using Scissors
Cut the soda bottle in half as shown below using a sharp pair of scissors.
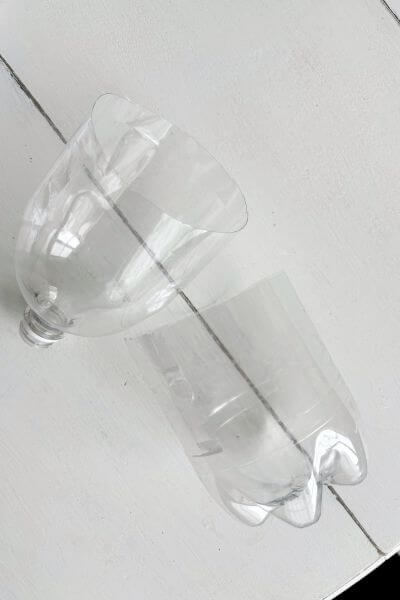
Pierce the bottle with the scissors, and then cut the top off the soda bottle.
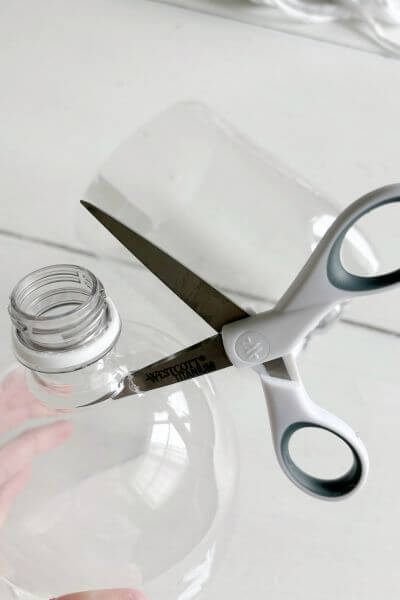

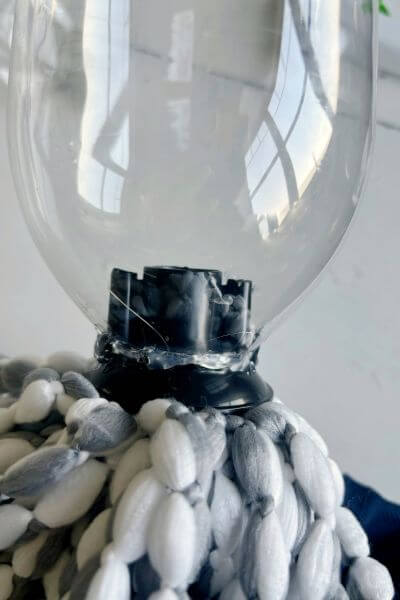
Next, you’ll trim the hole so that the plastic part (where the handle fits in) of the mop head fits down into it.
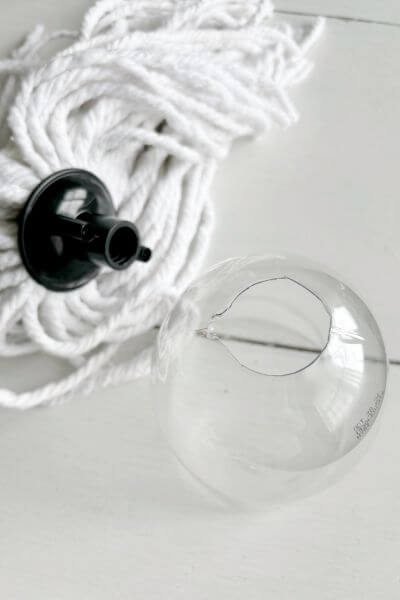
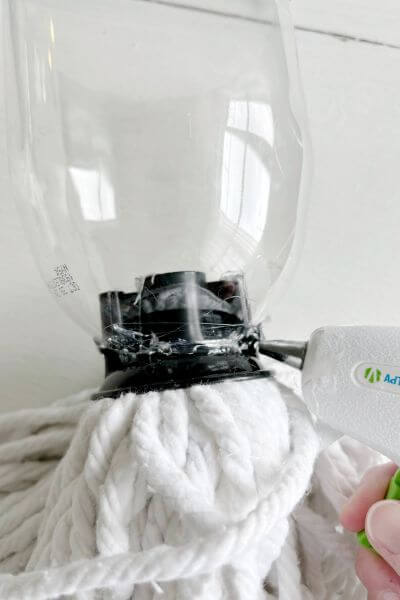
Hot Glue Mop Head to the Top of the Soda Bottle
Place a line of hot glue around the perimeter of the hole at the top of the soda bottle.
Insert the plastic piece of the mop into the hole and then hot glue all the way around to secure it.
Put the Top and Bottom of the Ghost Together
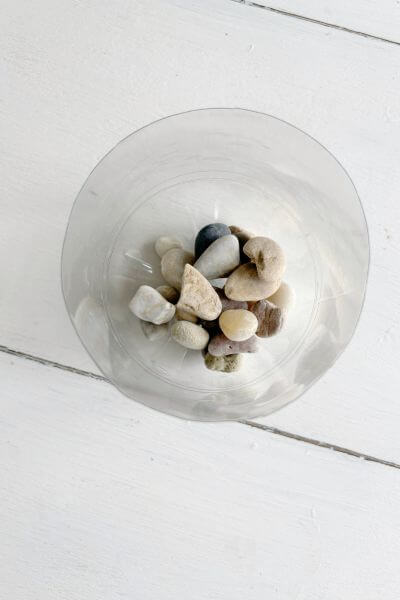
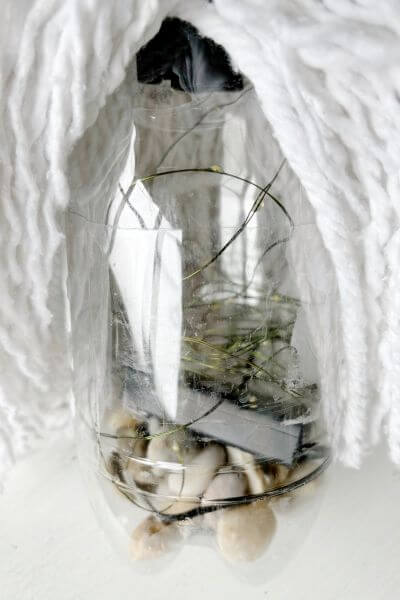
Now it’s time to place some rocks in the bottom of the soda bottle. This just helps to give the ghost more stability.
Insert the top half of the soda bottle into the bottom half. You may have to bend the top to get it down into the bottom half (we’ll add the lights later).
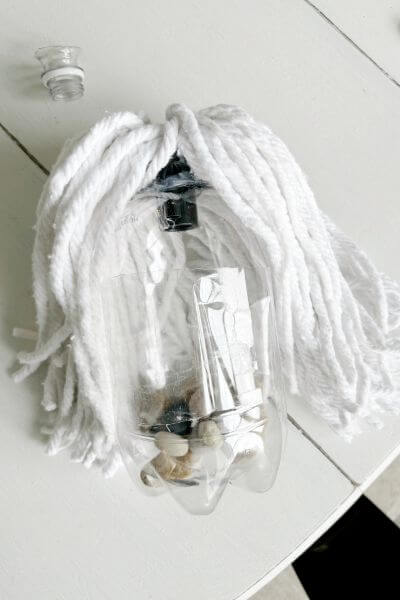
This is how the ghost mop head DIY is looking so far.
Cover Up the Black Plastic at the Top of the Ghost’s Head
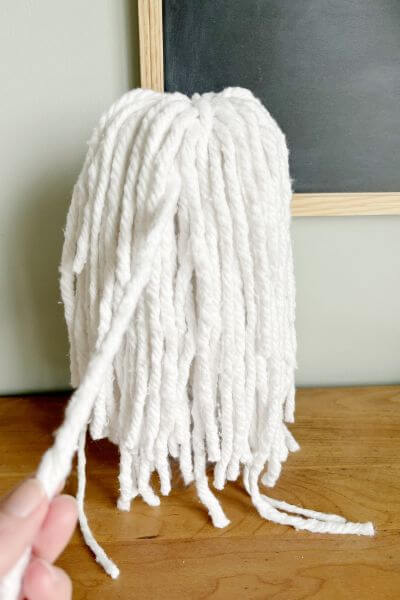
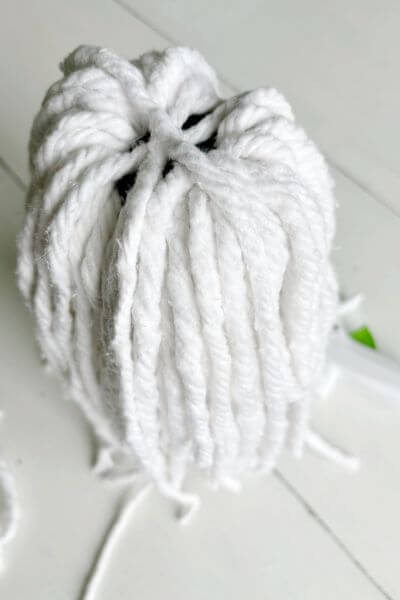
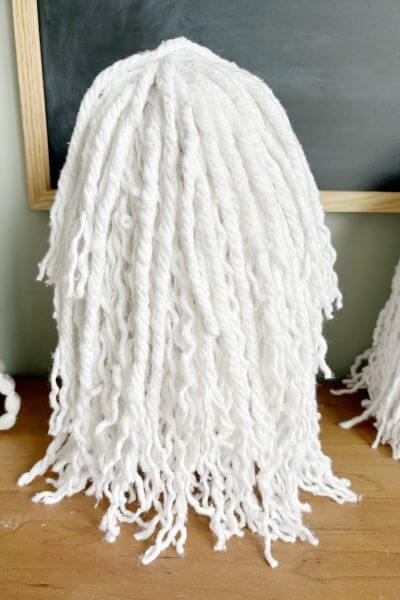
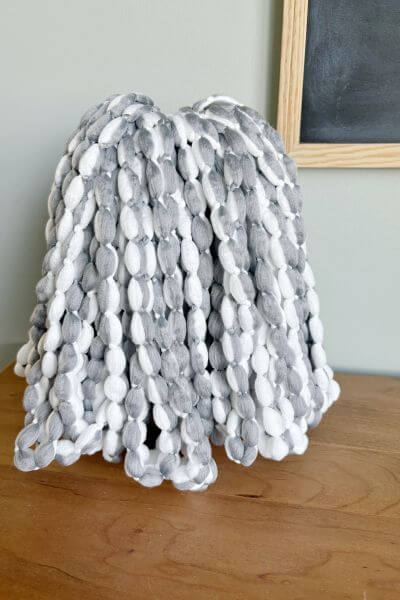
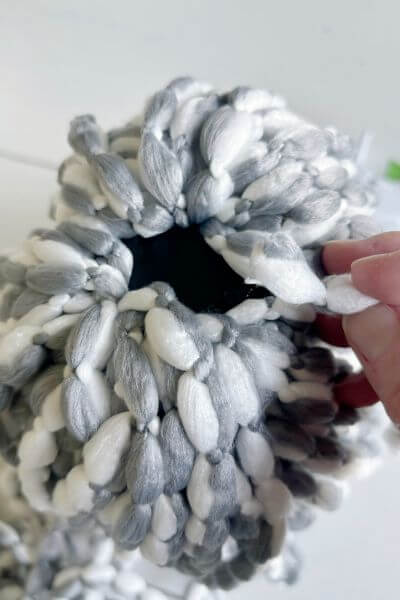
Now it’s time to use our second mop head to cover up the black plastic at the top of the head.
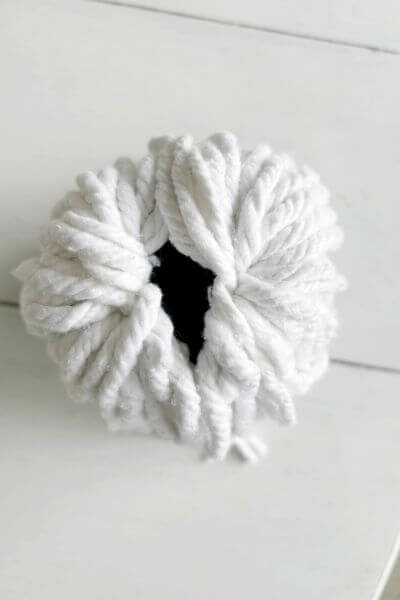
Pull the rope strands out of the plastic part of the second mop head. They come out pretty easily.
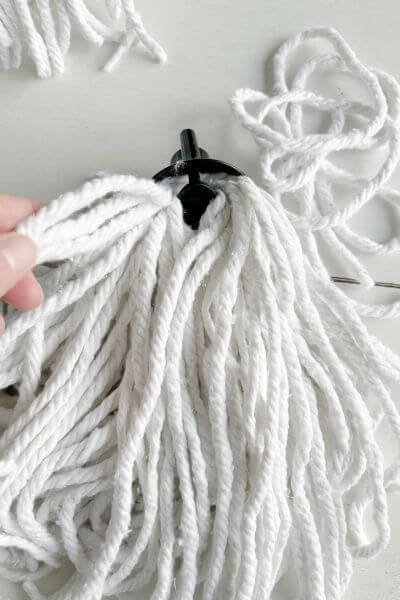
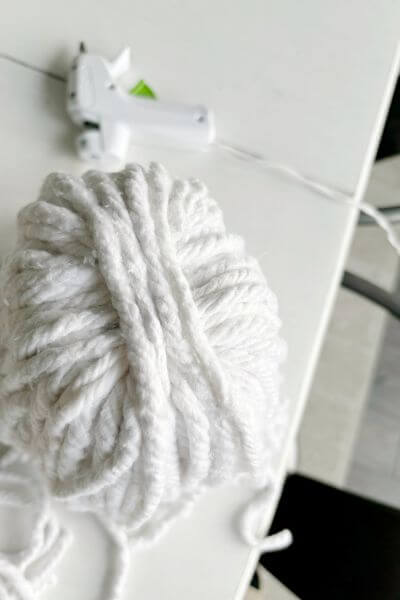
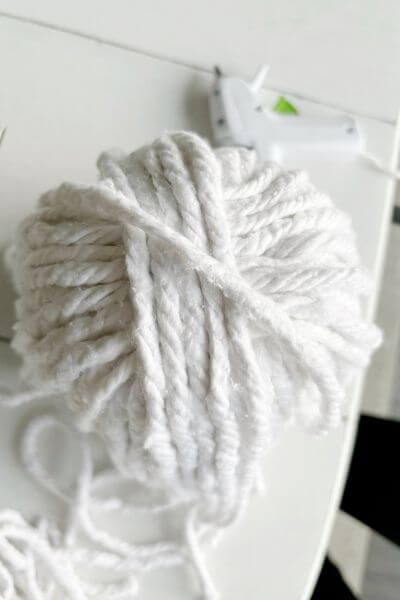
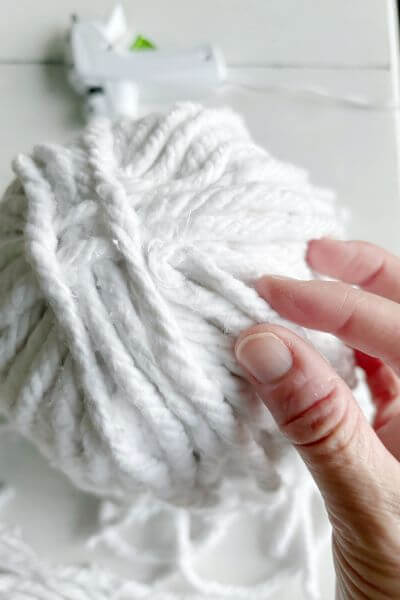
Now begin using your hot glue gun to glue the strands across the top of the ghost.
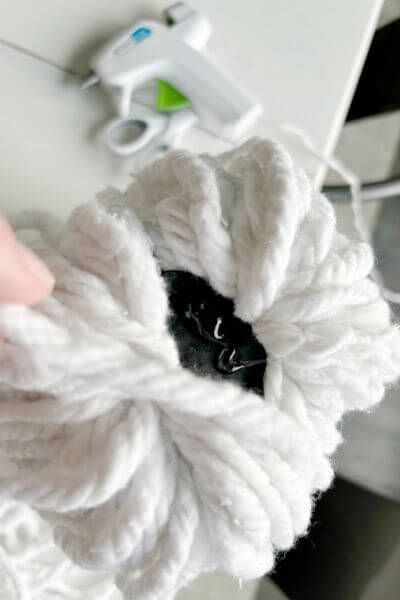

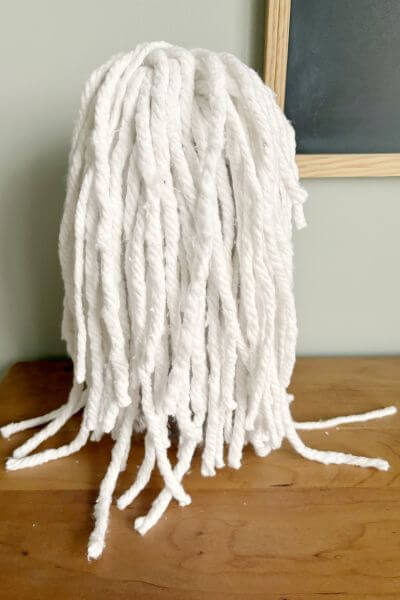
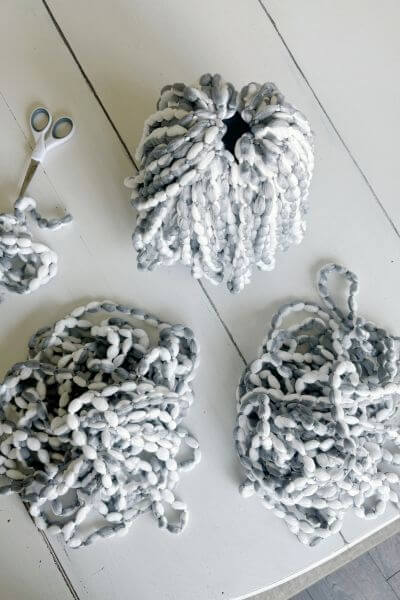
This is how I continued to crisscross the strands over the top of the mop head. If I had to do it over, I would have saved half for the other ghost.
As it was, I used a lot more strands on this ghost than the second one I made as you’ll see later. 😉
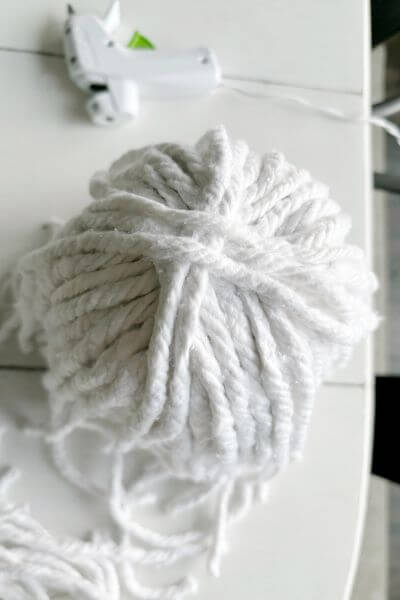
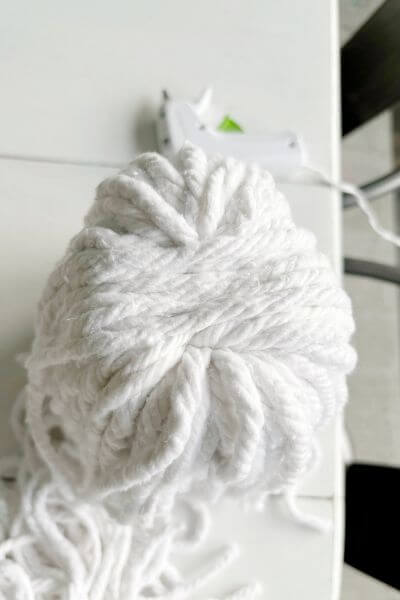
Make loops as needed to fill in the gaps. Almost done with all the pics of the top!
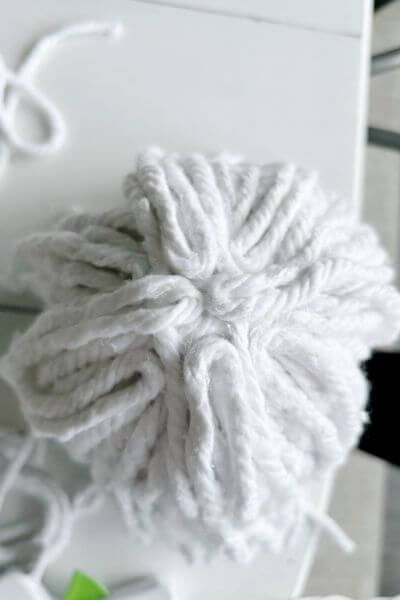
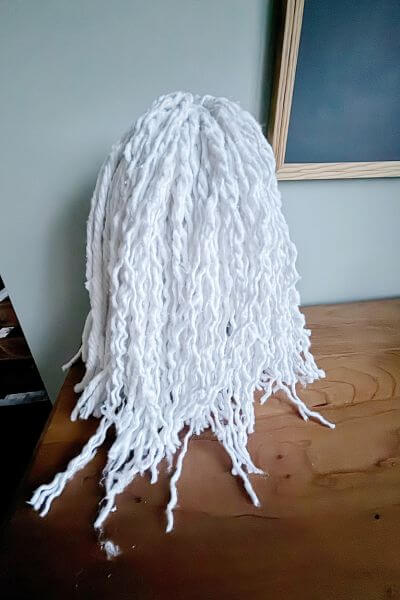
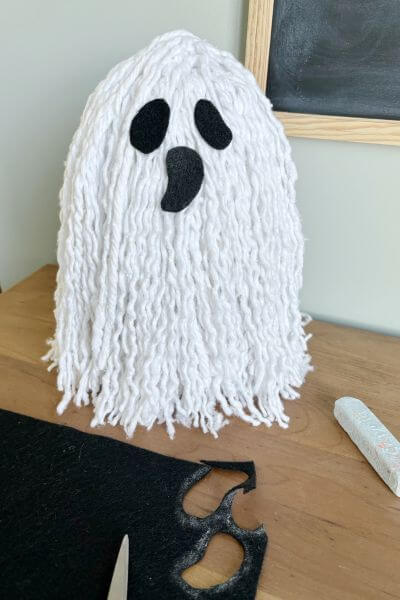
One final crisscross and the top of the mop head ghost is finished.
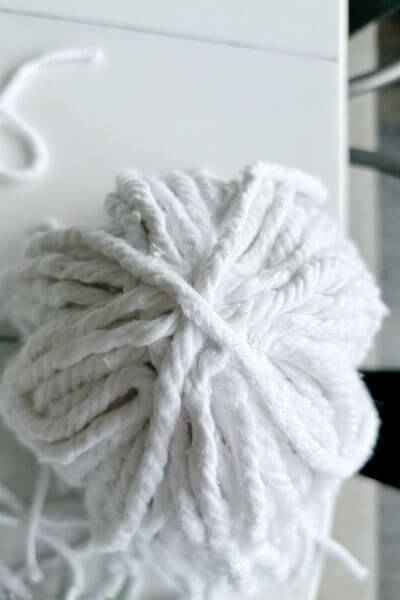
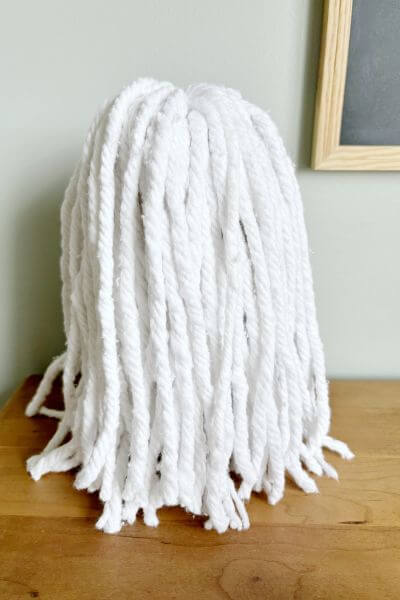
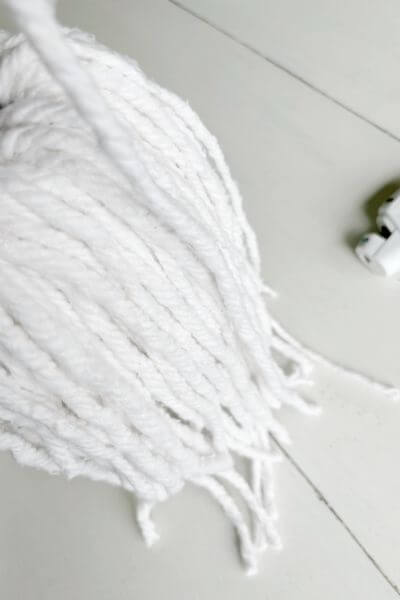
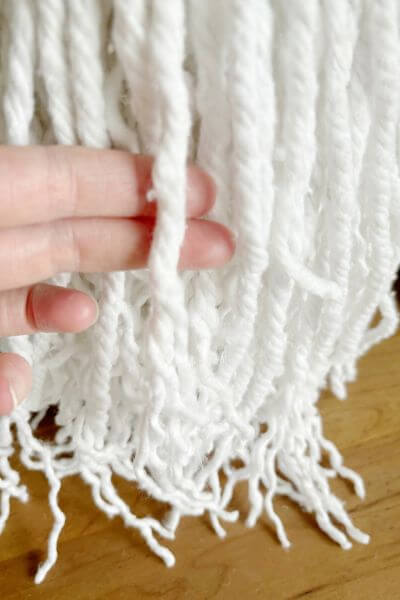
Separate the Cotton Mop Rope Strands
Next you can separate the rope strands if you like the look. This gives the ghost a different look than the “cousin It vibe” it had before.
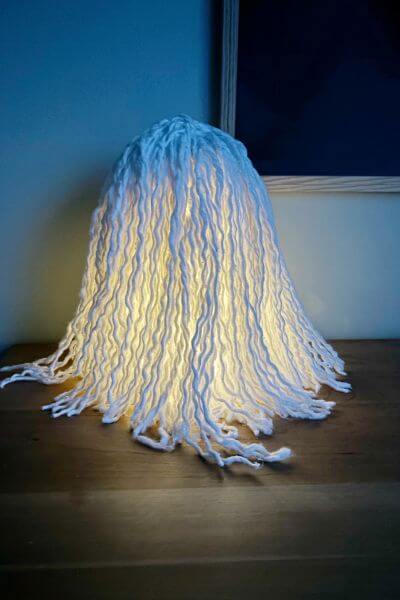
And this is how he looks at night so far
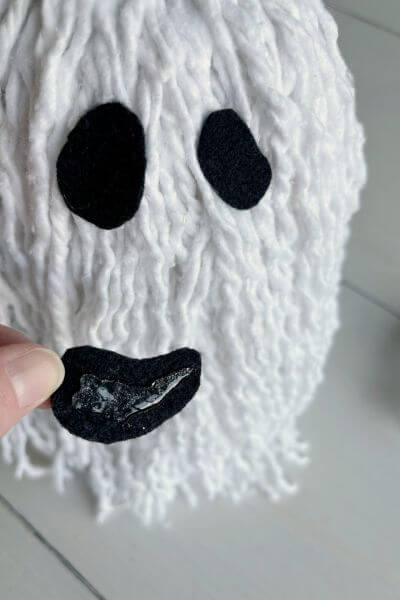
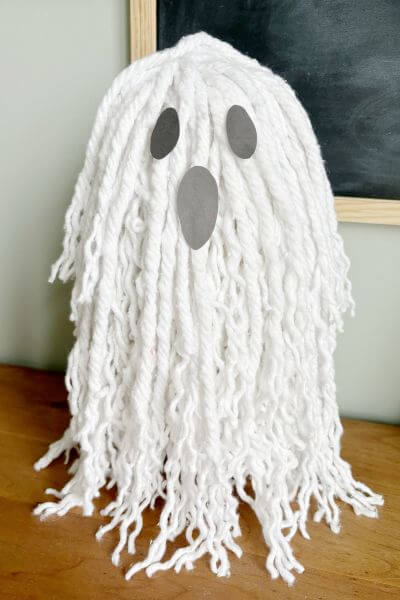
Add Felt Eyes to the Ghost Mop Head
Using the free printable provided, you can cut out different eyes and mouth to see which ones best fit your ghost.
FREE PRINTABLE – Ghost Faces
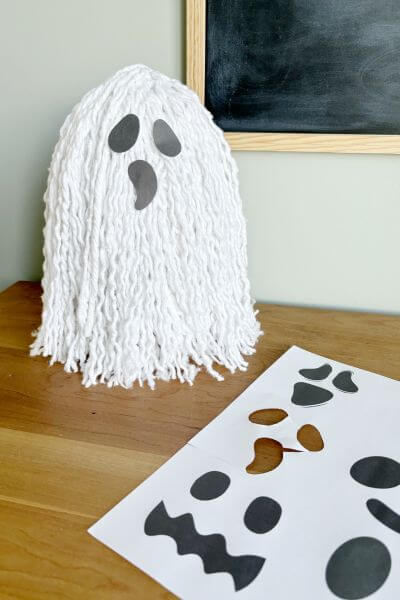
Trace them onto the felt with chalk and then cut them out. OR you can just hold them onto the felt and cut around them – I didn’t think of that until after I made them. 😉
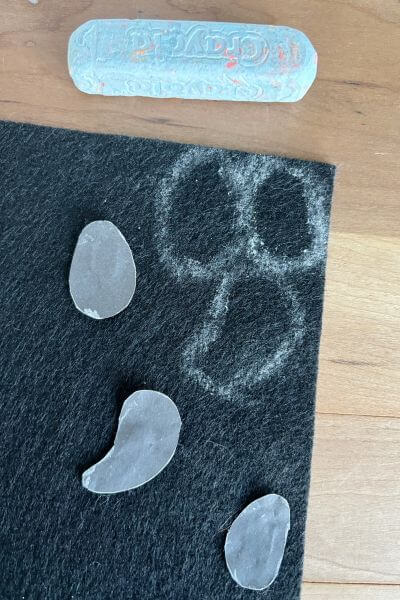
Hot glue the eyes and mouth onto the rope strands to make the ghost face.
Add Twinkle Lights (Preferably with Timer)
Wait until sunset (since that’s when you’ll want to start the timer), and add the twinkle lights in. These are from my Christmas stash, and I love that they have a timer so no need to turn them on and off.
Gently pull off the top of the pop bottle and add the lights and reconnect your ghost.
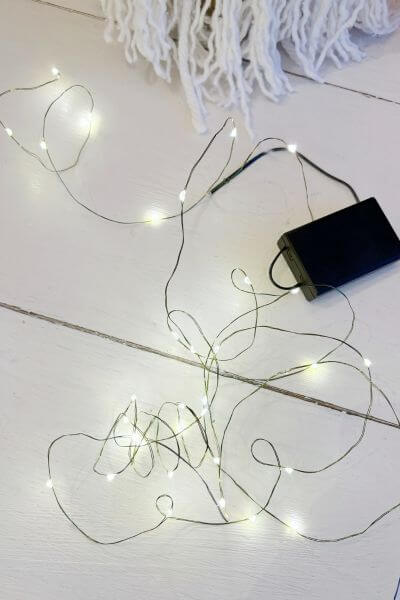
This is what it looks like on the inside after the lights are added.
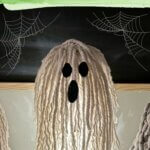
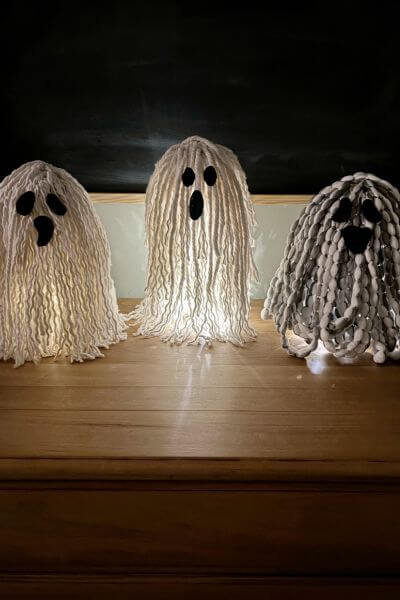
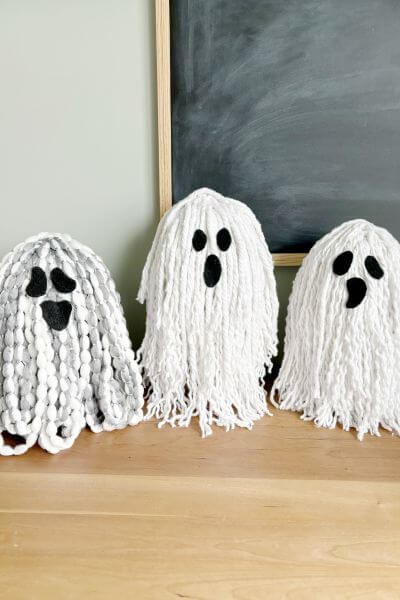
Here’s a pic of the 3 versions all lit up and spooky! The one we just made is on the left-hand side.
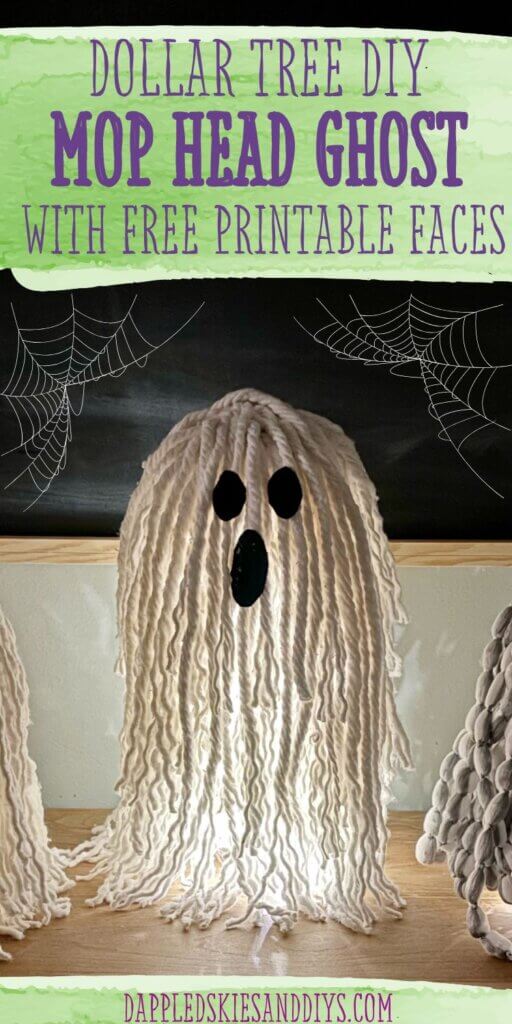
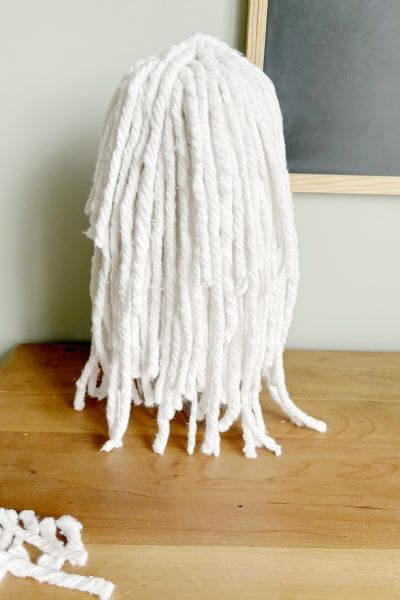
Now onto the taller version of this cotton rope mop head ghost! This ghosty is the one in the middle.
Taller Mop Head Ghost Version
Ok, so really to make the taller one, I just didn’t push the top of the soda bottle down as far as for my initial ghost.
You’ll be using up the rest of that second mop head you used to make the first mop head ghost.
The steps are similar to make the taller ghost, but not exactly the same.
Here’s how this cute ghost guy is made.
Cut the bottle just the same as in the first ghost, and connect the mop head with hot glue.
However, on this ghost, don’t push the bottle down as far so that the ghost is taller.
You want to pull out the rope strands on both sides (just a bit) so that they hang down and cover the bottle.
Now use the remaining rope strands from the first ghost to place across the top to cover the plastic part, securing them with hot glue.
You want to make sure that they are reaching the bottom of this taller ghost, so the rope will be uneven.
Work your way around, filling in the gaps that the initial mop head left.
Crisscross them just as with the first DIY ghosty.
This is how the taller ghost looks so far.
This guy didn’t quite look full enough to me, but I didn’t want to separate all the rope strands like in the first ghost. So, here’s what I did.
Tie up the outer rope strands with a hair tie and then separate the underlying ones to allow for a fuller ghost.
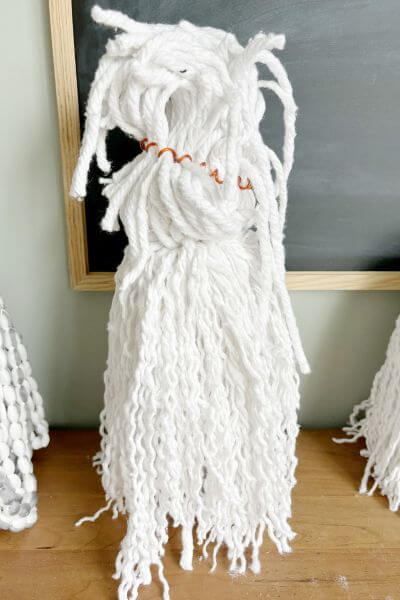
Then let the hair tie out and leaving most of the outer strands intact, just separate the very bottom of them.
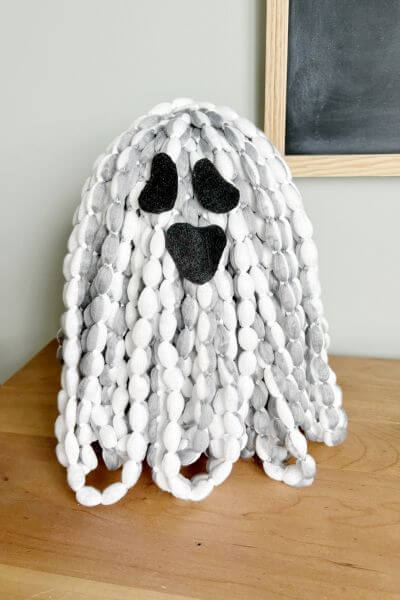
This is the face I chose for the taller version. Using the free printable you can try out different faces to see which one suits you best!
After choosing, simply trace and cut out the felt and hot glue the face to your ghosty!
Ok just one more ghost to try out!
Now that the taller ghost is completed, let’s move on to the grey mop head ghost!
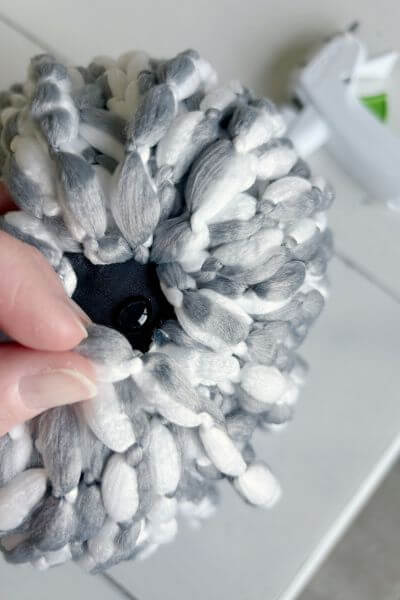
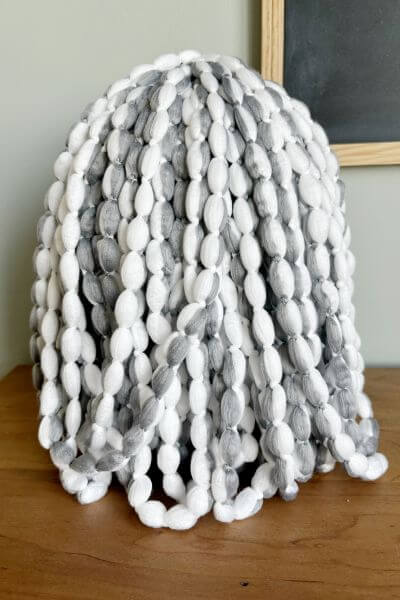
Grey Microfiber Mop Head Ghost
I used one and a half microfiber mop heads to make this grey ghost.
The process starts out exactly the same with the cutting the soda bottle and connecting the mop head with the hot glue.
Now remove the microfiber mop strands from the second mop head.
This wasn’t as easy as the white mop head. I tried to pull them apart but had to end up cutting the mop head strands some. This microfiber mop head appears to be just one long piece.
I was able to remove the mop head strands in 2 piles. Each pile is one long strand of microfiber mop.
Use only half of the mop head, start by connecting the end piece to the plastic part on the top with the hot glue.
Then make a loop to the bottom of the soda bottle. And bring the other strand back up securing it with hot glue.
Keep looping and crisscrossing across the top until your ghost is as full as you like, or you reach the end of your rope. 😉
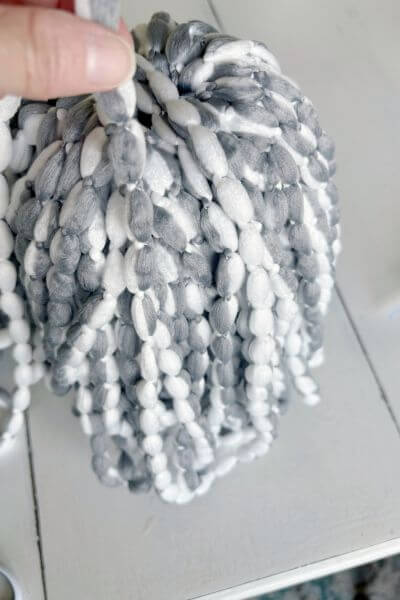
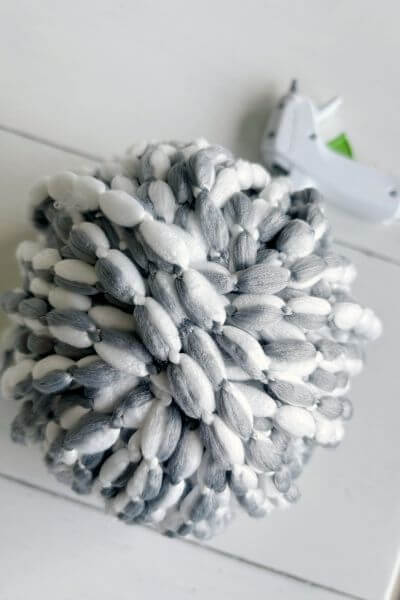
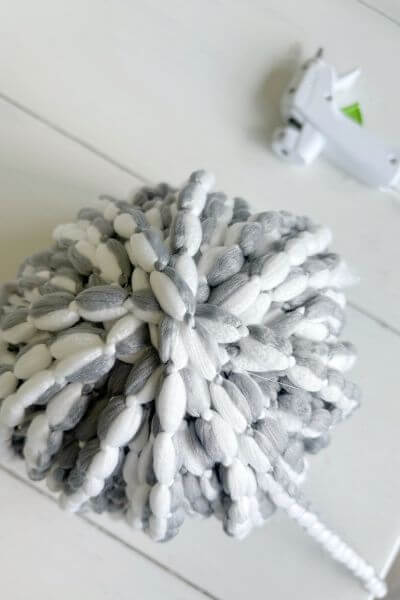
Tuck the remaining end in and now this grey ghost is completed.
Just add the felt eyes and mouth!
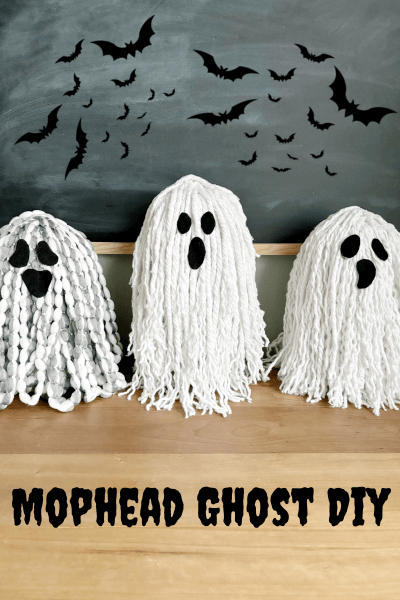
Here are the three ghosts looking spooky and ready for Halloween!
And one more pic of them all lit up!
Final Thoughts on this Mop Head Ghost DIY
So, which mop head ghosty do you like best? I add a lot of pictures in my posts, so that the steps are easy to replicate.
Use this tutorial for an idea and craft these cute mop head ghosts your own way!
I will say, I think I went overboard on the rope strands with the shorter ghosts. The taller ghost lights up the best, because he has the least amount of rope.
So, if you’re crafting these guys, then you may want to use enough rope to cover the bottle, but not too much where the light has difficulty shining through.
If you have a soda bottle, some twinkle lights, rocks, scissors and a glue gun on hand, you can make one ghosty for about 3 dollars since you’ll only need to buy the two mop heads and felt.
Also, if you put them out on the covered porch, the rocks should give the ghosts more stability, so they don’t topple over!
Questions or comments about the tutorial, just post them down in the comment section.
And, as always, thanks so much for reading! Happy Halloween!
Now head out to Dollar Tree, grab your mop heads and craft this lighted mop head ghost DIY that’s perfectly spooky for Halloween.
Pin me on Pinterest! ⬇️

Please consider subscribing to my email newsletter below 👇