
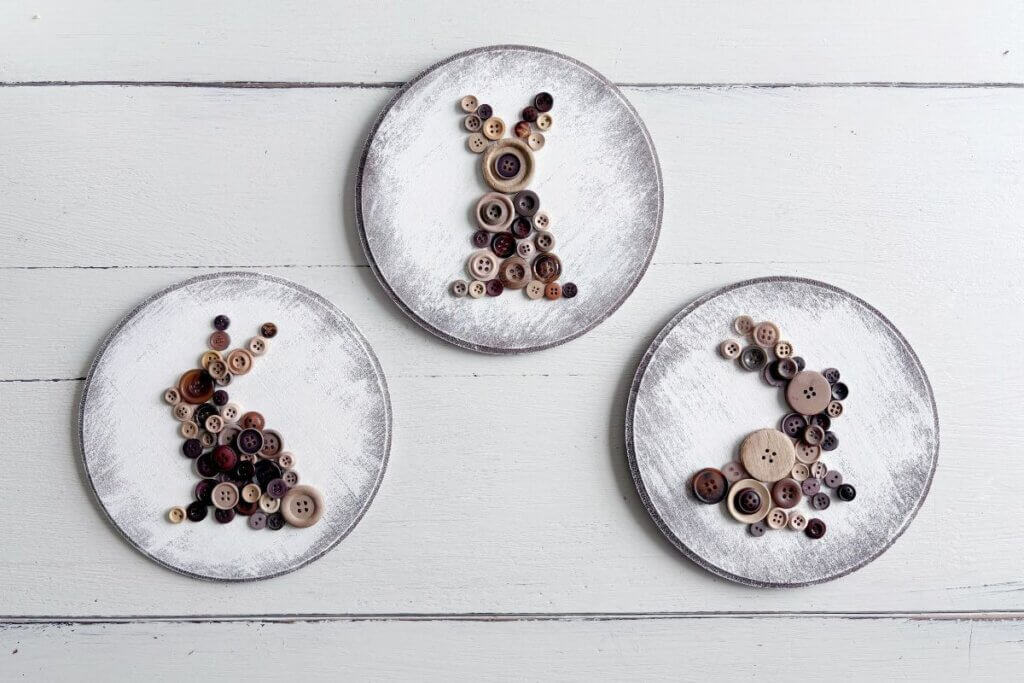
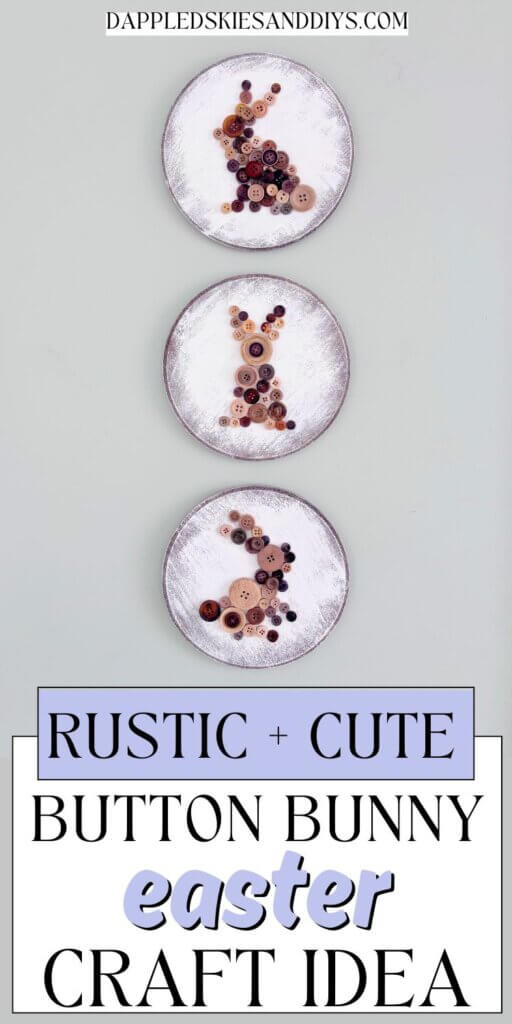
This rustic-style bunny button craft is an easy project and looks cute as wall decor for both Easter and Spring.
Spring has almost sprung around these parts. And March weather is here with its ups and downs.
From sunny summerlike days that want to entice you to go work in the garden to blustery cool grey days that make you don a scarf and winter coat.
But every season there is something to look forward to. For my daughter in this particular season, it’s buying two cute pet rabbits. She’s been saving up her dollars and cents and has finally squirreled away enough to purchase a pen, supplies and, of course, the bunnies.
So, this button craft is inspired by the house being full of bunny rabbit discussions. Every. Day. 😉
How to Make a Button Bunny on a Wood Round
The process to make these cute button bunnies is pretty straight forward.
Take a wood round, I found mine at Walmart for a few bucks. Paint it.
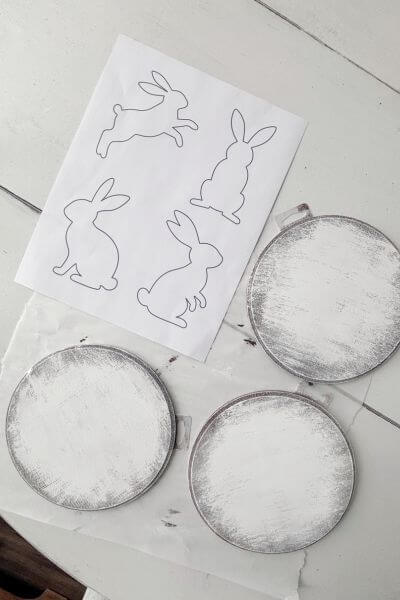
Get a pattern of different bunnies…I’m giving you a free one, or you can create your own.
Grab a bag full of different size buttons (I chose a big bag of different shades of brown and grey buttons for mine).
Get creative and use mod podge to glue various buttons onto the wood round in bunny shapes.
And that’s it! Now let’s get to the tutorial.
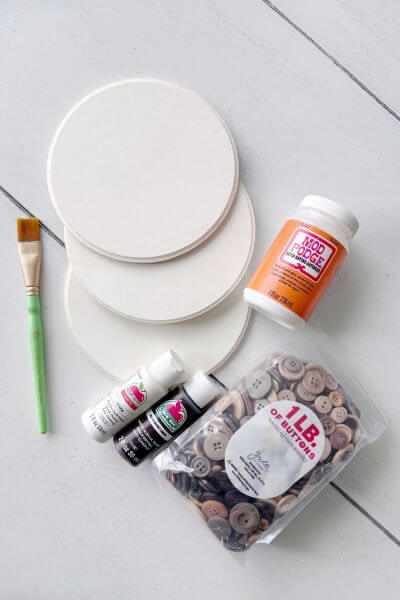
Supplies Used for this Button Bunny Easter Craft
I obtained all my supplies at Walmart for this button craft.
- Buttons of different sizes
- Three 7-inch wood rounds
- Mod Podge
- Paint (I used both White and Burnt Umber colors)
- Craft paintbrush and chippy paintbrush (not pictured)
- Free Bunny Templates
Step-by-Step Instructions for the Button Bunny Wood Round Craft
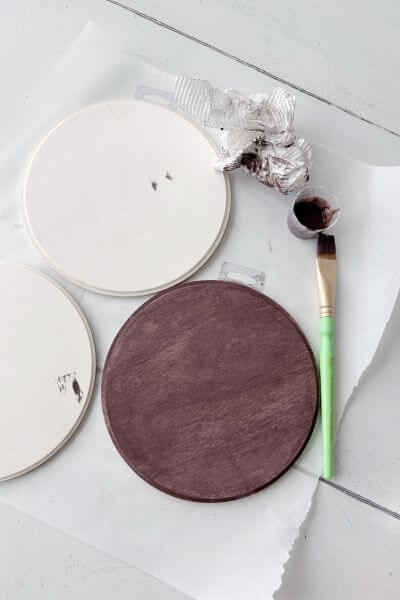
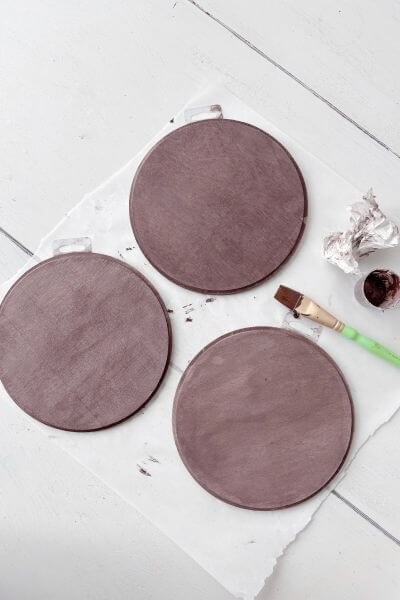
First, paint wash the wood rounds with the Burnt Umber paint mixed with water.
Mix the paint and water at a 1:1 ratio. You don’t need much. I used a small measuring cup, the kind you get with liquid medicine.
Brush it onto the wood round with your craft paint brush, then wipe it off with a paper towel. This allows the wood grain to show through.
Don’t worry too much about this step, because in the next step we’re going to apply white paint on top.
If you’d like to keep it with the paint washed look then I would suggest using the white paint for the paint wash, especially if you have brown buttons like mine.
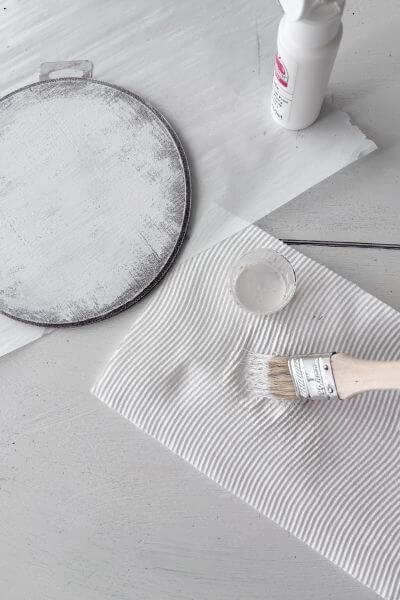
Apply White Paint to the Button Bunny Art
Wait until the brown paint is dry, before proceeding to this step.
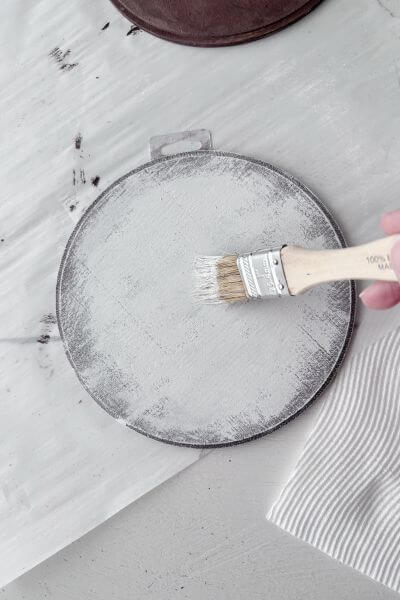
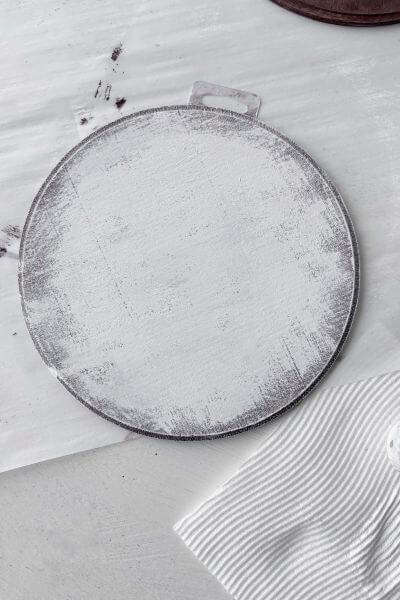
Next, you’ll apply the White paint on top of the brown paint.
Use a chippy brush and dip it into the white paint. Blot it onto the paper towel before applying it to the wood round. This is called dry brushing.
You don’t want to completely cover the brown paint.
I wiped it on in different directions, and let the brown paint show through especially around the edges.
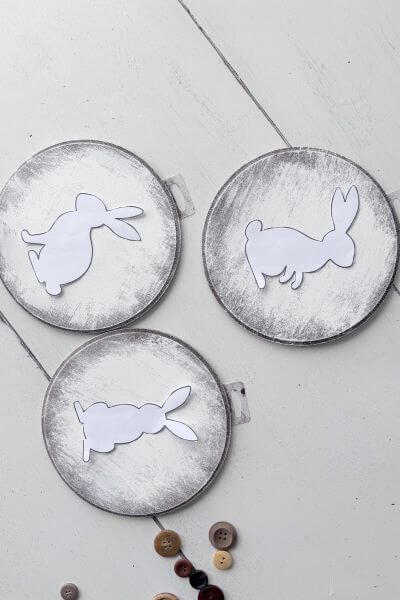
Cut Out the Bunny Templates and Trace Them onto the Wood Round
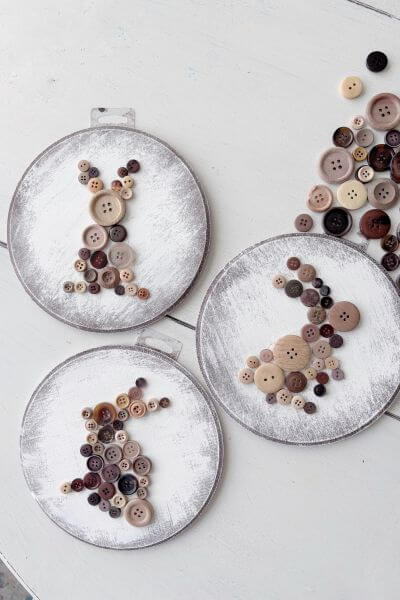
Print and cut out the bunny templates. There are four rabbits on the template, but I used the three I thought would be the easiest to create with buttons.
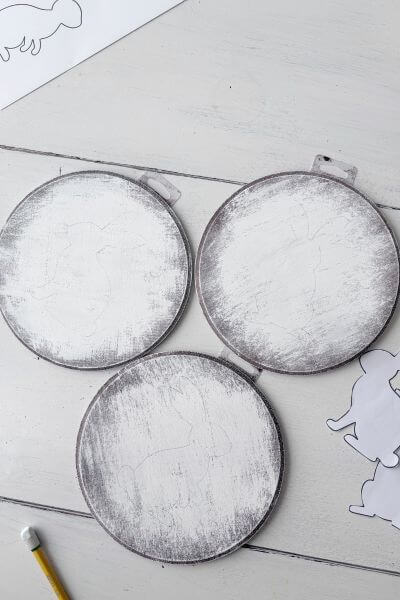
Place the templates onto the wood rounds and lightly trace around them using a pencil.
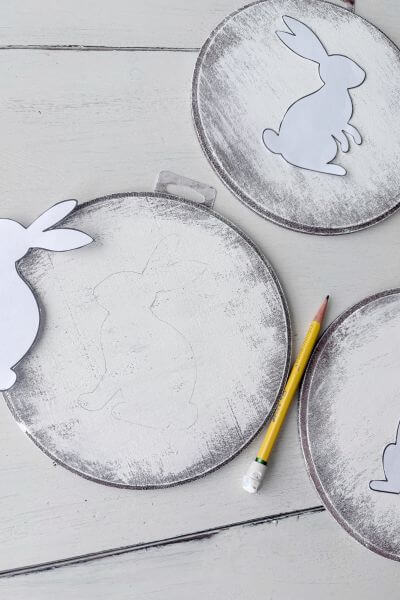
You can’t see them too well because I traced them very lightly, however they are there! 😉
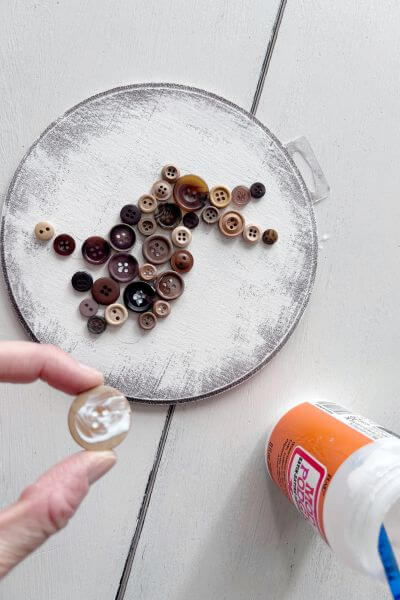
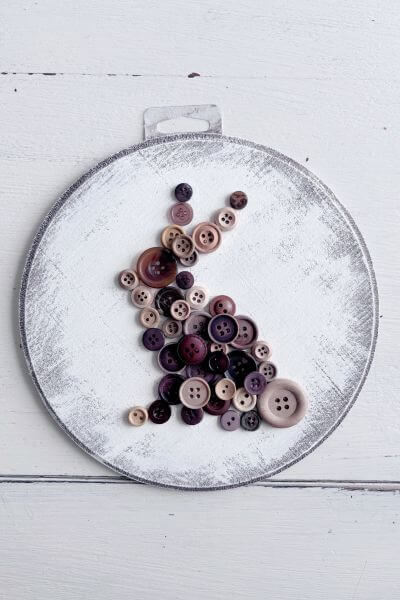
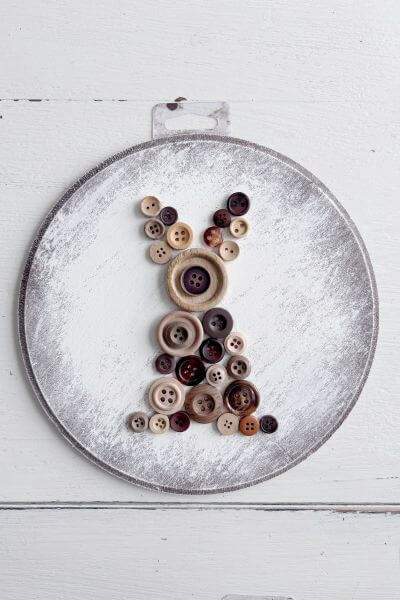
Use Mod Podge to Glue Buttons onto the Wood Rounds
Using varying sizes of the buttons, position them in the bunny shape on the wood round. Don’t get the glue out until you get the shape you want.
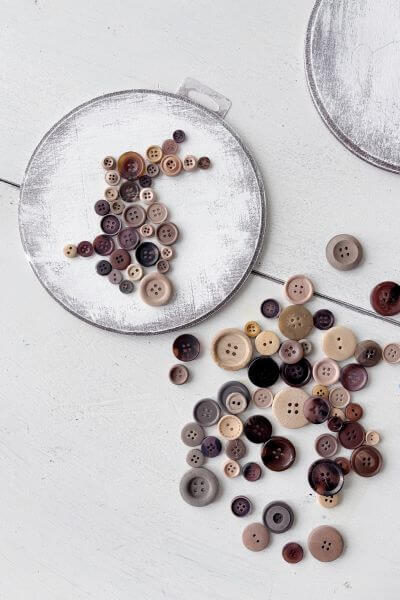
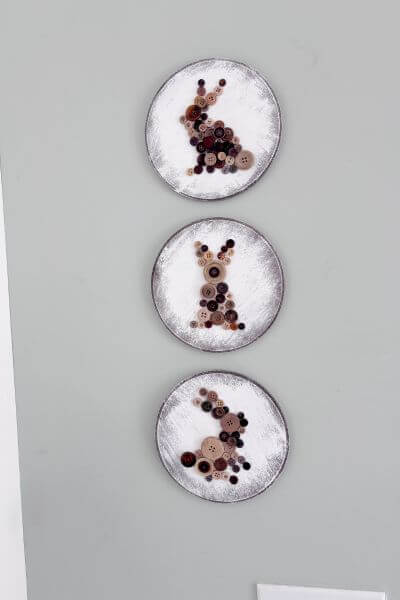
Here are my three button designs on the wood rounds.
Now it’s time to get the mod podge out.
I started at the ears and worked my way down.
Sometimes it’s a good idea to glue a few buttons and then wait til they dry for a little bit. Then move onto the next section.
This way the buttons aren’t all moving on you as you make the shape.
Place a dab of mod podge onto the button.
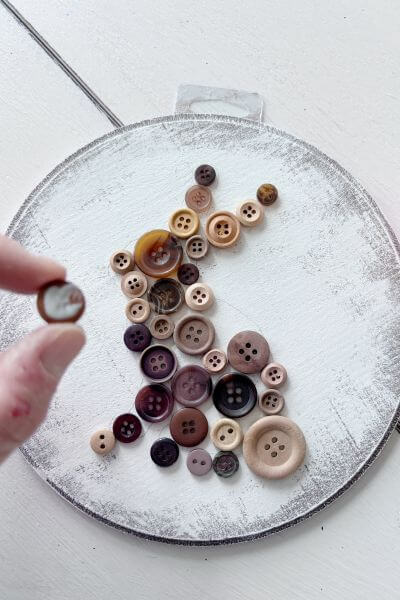
Then position it where you’d like it to go in the bunny shape.
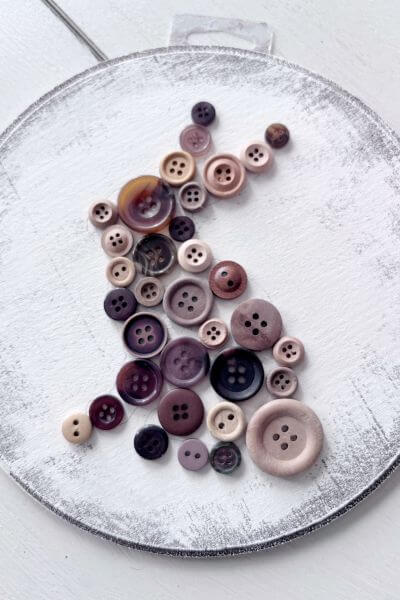
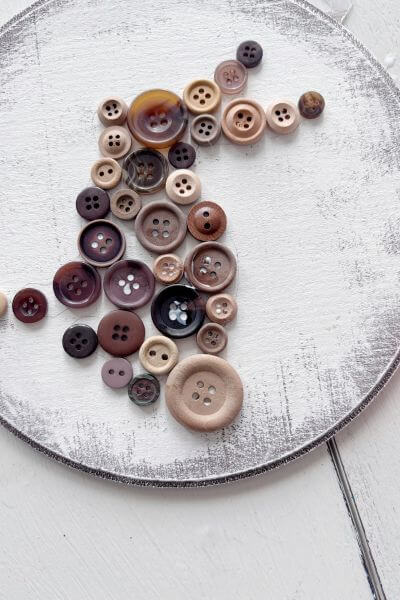
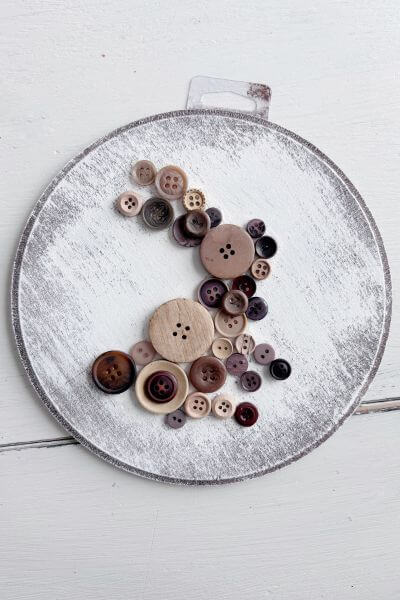
Continue applying the buttons using the mod podge until you complete the bunny shape.
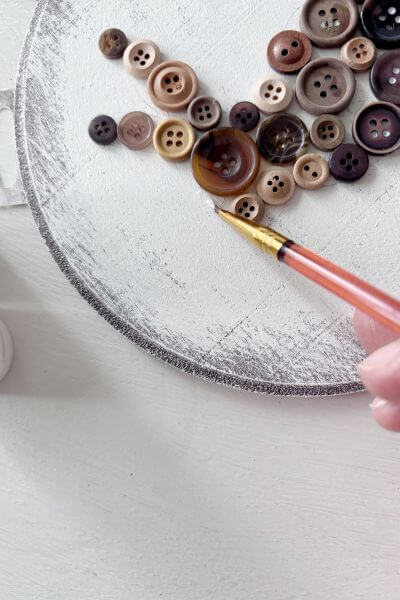
You can touch up the pencil lines with a small paintbrush and some white paint. I did this in a few areas, but my lines really weren’t that noticeable.
Here’s a closer look at the three bunny rabbit designs on the wood rounds.
If you want, you can add extra buttons on top of any gaps using mod podge. I also placed smaller buttons into some of my larger buttons to dress them up a bit.
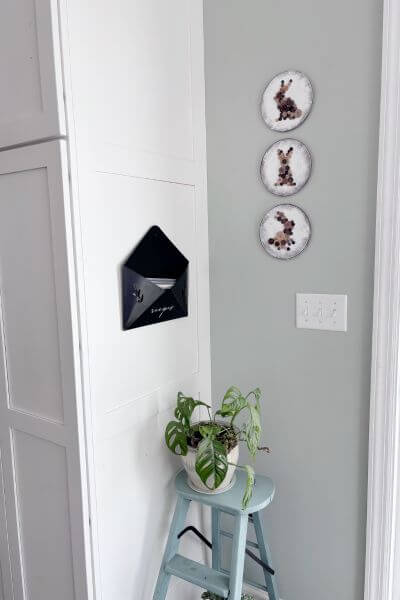
How to Hang your Button Bunny Decor
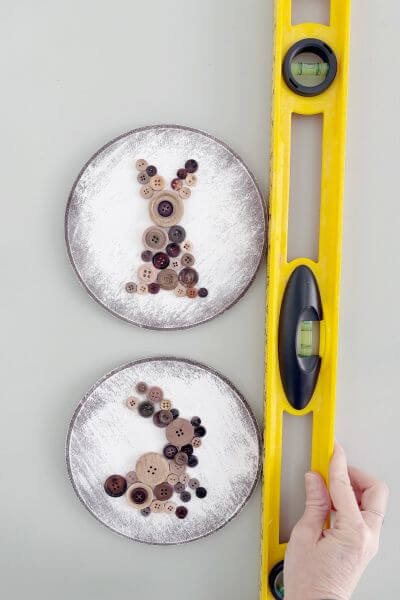
Here’s how I hung my rabbits on the wall for rustic Easter and Spring decor.
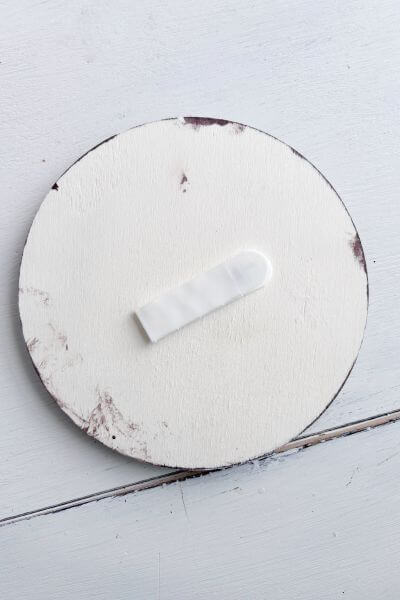
First place a command strip on the back of the wood rounds.
Place the first one where you want it on your wall. Then use a level to line up the others. I eyeballed the space between each wood round, however the level helped ensure they were lined up at the edges.
It looks lopsided in the picture due to the camera angle, but really, it is straight! 😅
And that’s a wrap on this button bunny craft idea!
Final Thoughts on this Button Easter Craft
So, is this a rustic craft idea you’d like to try for Easter and Spring?
I’ve always liked using buttons for crafts, and this bag comes with a great variety of different sizes and colors.
If you like the combination of brown and white like I do, then this just might be the craft for you for your own Easter decor.
You can even have the kids or grandkids help you with the designs too!
Any questions, please leave a message down in the comments. And, as always, thanks so much for reading!
Now it’s time to gather your buttons, wood rounds, mod podge and free templates to make your own homemade Easter and Spring decor.
Pin me on Pinterest ⬇️
Please consider subscribing to my email newsletter below for more DIY and craft ideas 👇