
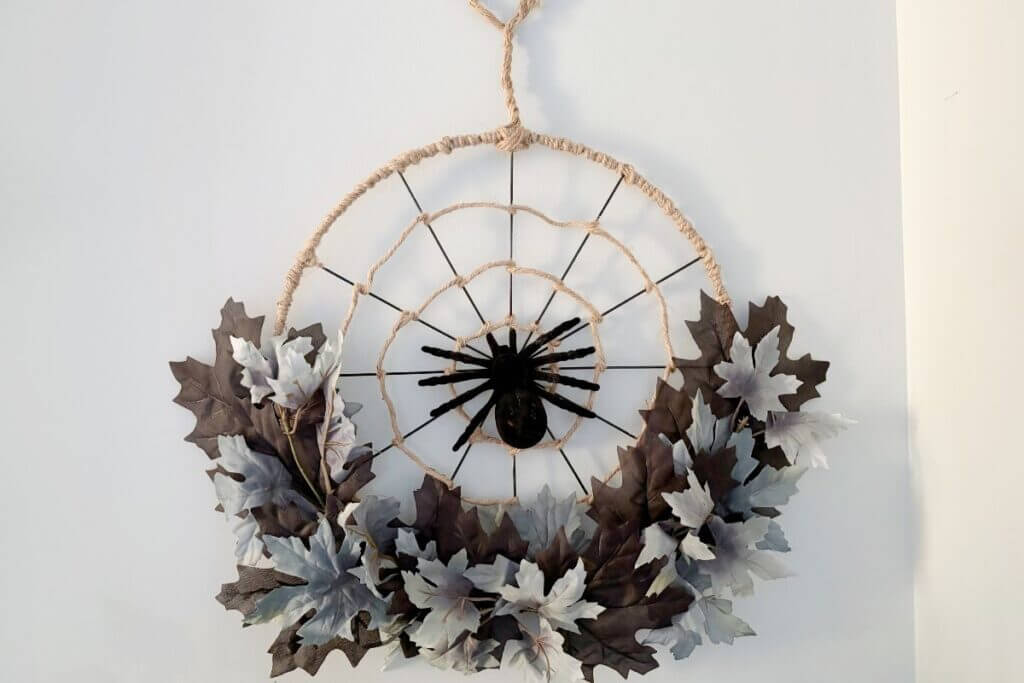
This spider web wreath for Halloween decor uses a bicycle wheel wreath form, faux maple leaves, and, of course, a spider to create a unique decoration perfect for October.
It’s that time of year again. The breeze is just a little chillier and there is a crisp feeling to the air, and there are orange, yellow and red leaves piling onto the ground. Soup and pumpkin spice are everywhere.
That means it’s also time for spooky season. Get them jack-o-lanterns carved and spiders, bats and ghosts out on the porch along with your fall mums.
So, today let’s make a spooky fall wreath that’s perfect to hang in your home or on your front door.
This bicycle wheel wreath form makes the perfect base for a spider web wreath.
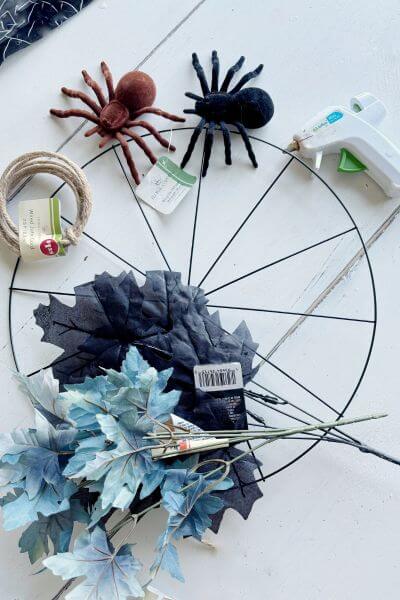
All supplies come from Dollar Tree and the only other materials you’ll need are a glue gun and wire cutters.
So, let’s get to it before Halloween is here and gone. On to the tutorial for this neat spider web wreath idea made with dollar store supplies.
Supplies for Dollar Tree Halloween Wreath
- Bicycle Wheel Wreath Form 14-inch
- Wired Jute Cord 7.5 feet (3)
- Black Spider
- Blue Maple Leaves (2)
- Black Maple Leaves (2)
- Glue Gun
- Wire Cutters (not pictured)
All supplies are from Dollar Tree except the glue gun and wire cutters.
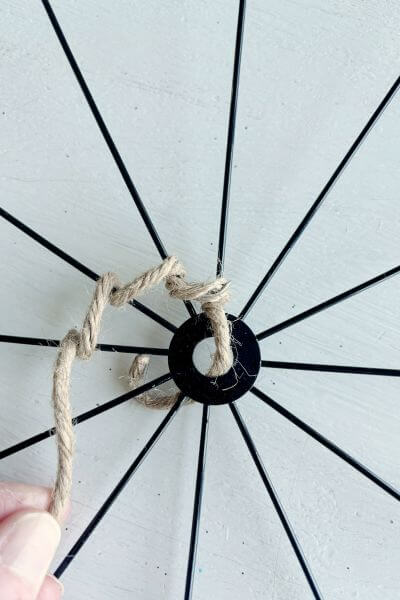
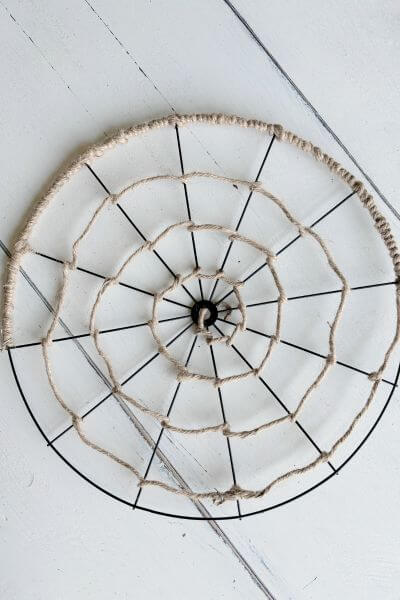
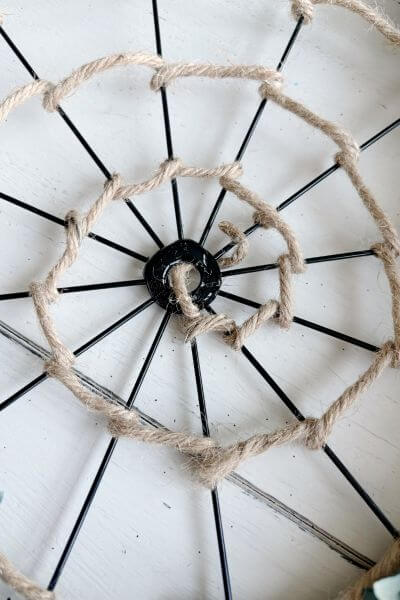
Make a Web with Jute Wire and Bicycle Wheel Wire Form
First, grab a roll of jute wire and place an end through the middle of the bicycle wheel wire form.
Begin wrapping the wire around each spoke once, then pull tight and continue to the next spoke (as shown in the second and third pics below).
Keep the jute wire in a circular roll as much as able, to allow for increased ease of taking it through the spokes.
Continue this pattern in an ever-widening circle to make it look like a spider’s web.

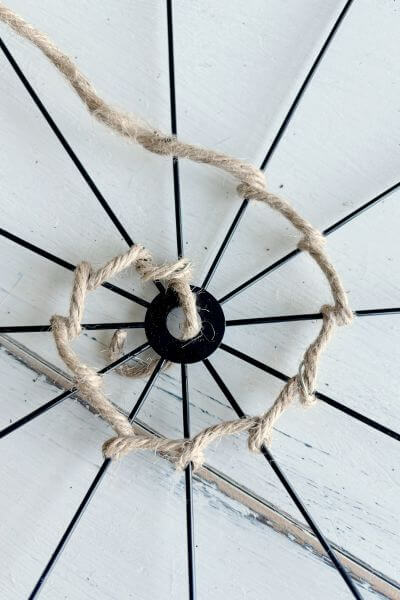

This is where I ran out of the first roll of jute wire.
Next, attach another jute wire roll to the end of the first one. I wrapped the two wires together and added a bit of hot glue to make sure they held tight.

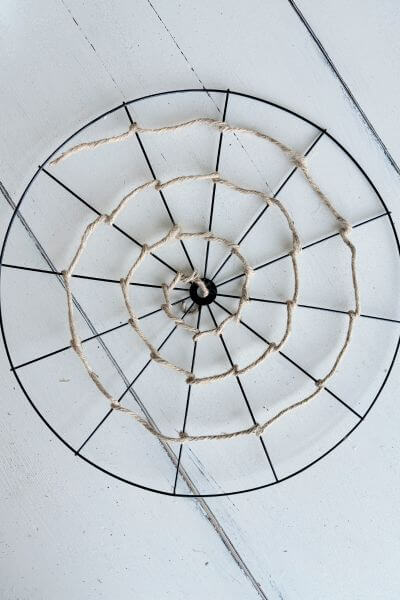
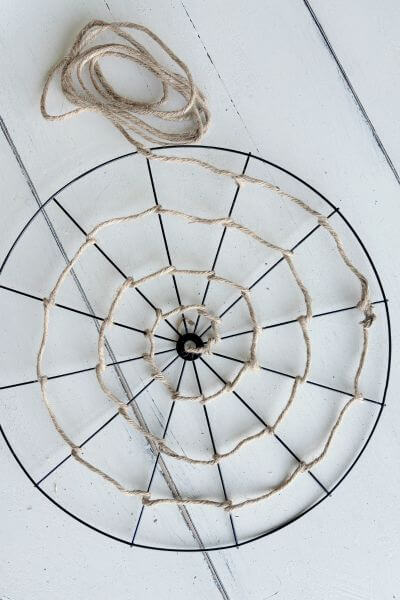
After attaching the second cord, finish the rest of the spider’s web.
Wrap Jute Wire Around Half of the Outer Ring of Wreath
Next, you’ll wrap the jute wire around the outer rim of the bicycle wheel wreath.
Just do half of the wire form, because you’ll be adding leaves next and one half will be covered up anyway.
To cover the area where each spoke attaches, you may need to wrap it around in a crisscross and then continue on to make sure that area is covered by the jute.
Here it is so far. Up until this point I’ve used 2 rolls of the jute wire.
Add Maple Leaves to the Spider Web Wreath
Now it’s time to add the faux floral maple leaves. I picked blue and black maple leaves from Dollar Tree, however you can use whatever color that suits.
Clip the blue maple leaves from the central stem with the wire cutters.

Clip the black maple leaves too.
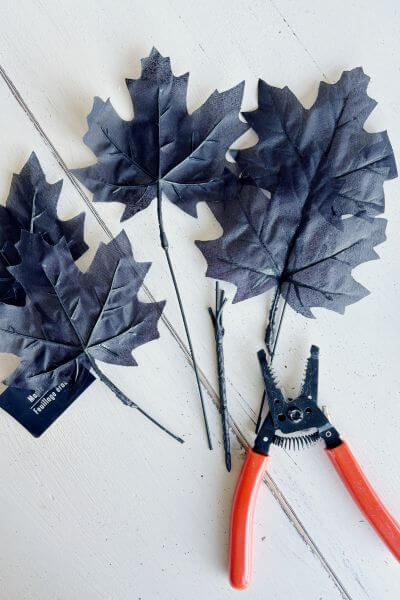
Heat up the glue gun! We’ll be adding the maple leaves to the wreath now.
Place the black leaves behind the blue leaves, then hot glue them to the wreath form, starting about where the jute wire ended.
You may have to bend the stems a little to allow for easier glueing.

Hold until the glue has dried and the stems stay in place, then wrap with jute cord for a stronger hold. Alternatively, you can wrap with floral wire if you have that on hand.
Snip the jute wire with the wire cutters.

Take the next set of black and blue leaves and add them a little below the first set. And secure as before with the hot glue and jute wire.
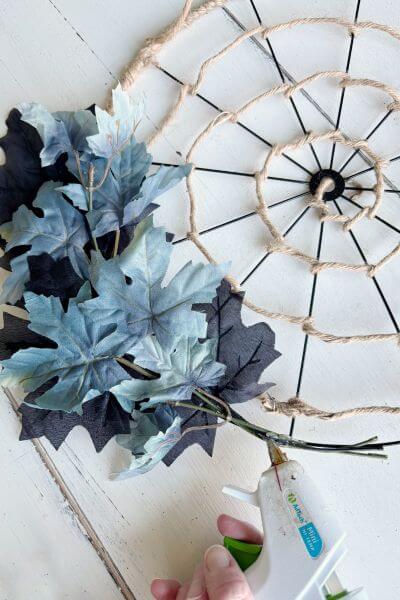

With the next set, add them to the other side beginning just below the jute wire.

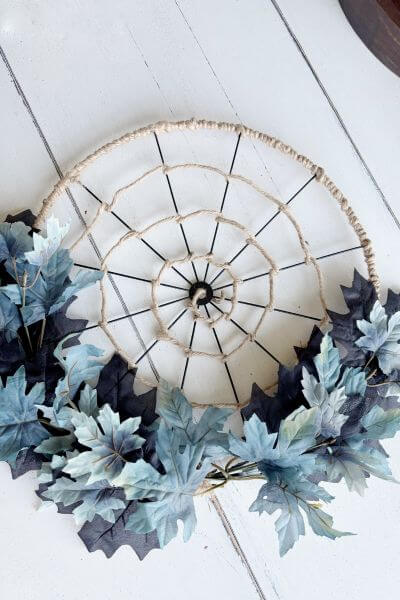
And a second set…this is how it’s looking now. Don’t worry, we;ll cover that all up!

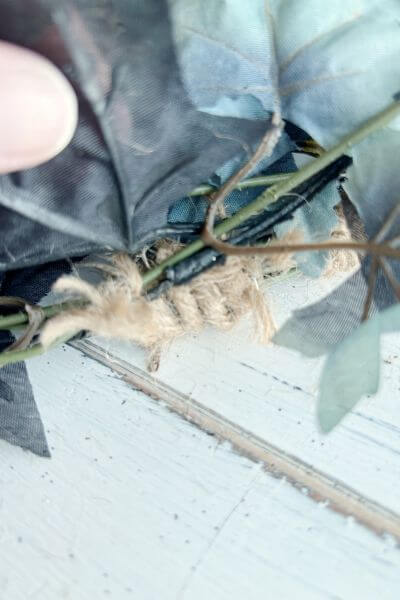
You’ll need two more sets of leaves coming from each direction.
The first one was easy to add…coming in from the left.
The last set of leaves you’ll need to the stems underneath the other ones to hide them.
I tucked mine under and pushed them under the wire that was holding some of the other leaves. Then added hot glue to stabilize them.
Last set!

The last set of stems tucked under the other leaves!
And here’s how she looks so far!

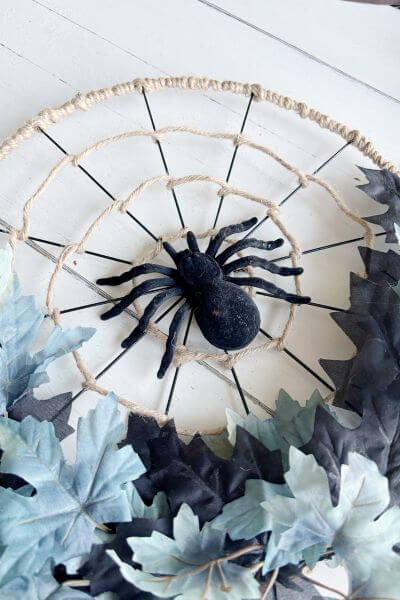
Attach the Spider to the Halloween Wreath
Now the easy part…add hot glue to the inner ring of the bicycle wheel.
Place the spider on it the hot glue, holding it in place till the glue dries.
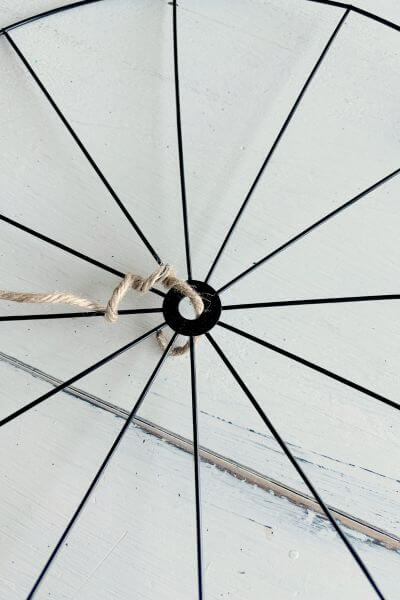
Make Your Wreath Hanger
It’s time to make the hanger! And, of course, you want it to look like a hanging spider web.
Place the jute wire around the front of the top spoke.
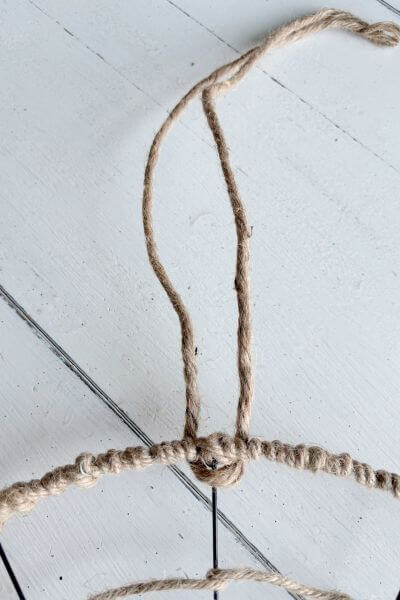
Bring one end in front, across and then back through the wire form.

Now do the same with the other end.
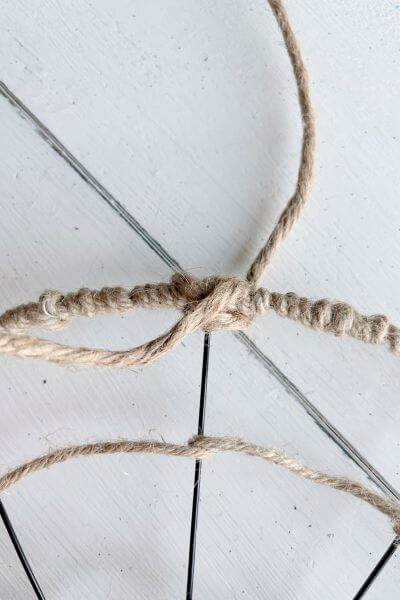
It should look like a knot when you’re done.

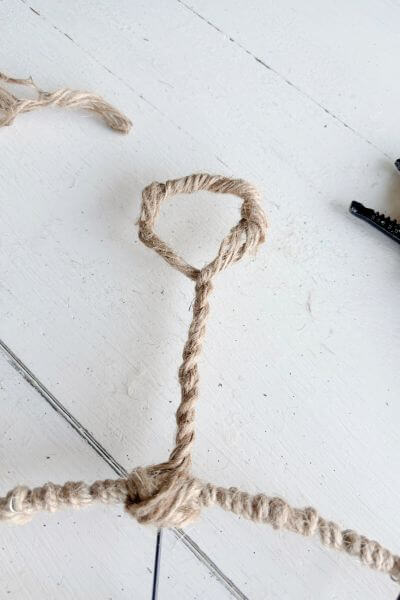
Now twist the wire the length that you’d like and make a loop. I made my loop by twisting the two ends of the wire together.
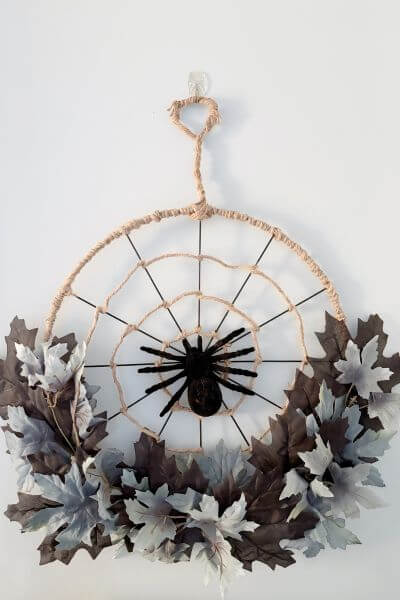
Your DIY spider web wreath is now complete.
Final Thoughts on DIY Spider Web Wreath for Halloween
All in all, do you think this is a fun and easy Halloween spider web wreath DIY?
I love that all supplies come from Dollar Tree except the glue gun and wire cutters. Dollar Tree’s prices went up a bit so most stuff is now $1.50 to $1.75.
That being said, I used 9 Dollar Tree items for this wreath, so even at a buck seventy-five each the price should come in around 15 dollars.
The black and blue maple leaves I wasn’t too sure of at first, but in the end I like the result! There are multiple colors to choose from at the dollar store so you can customize your wreath any way you like. 🙂
I actually had the blue leaves left over from my daughter’s Halloween costume so I was glad to put them to good use!
I think you all are ready to make a neat spider web Dollar Tree wreath now. In fact, I’m sure of it!
Any questions, please post them down below. And, as always, thanks so much for reading!
Now it’s time to head to the dollar store and grab leaves, a bicycle wheel wreath form, a spider and jute wire to craft your own spider web Halloween wreath!
Pin me on Pinterest! ⬇️

Please consider subscribing to my email newsletter below for more DIY ideas 👇