

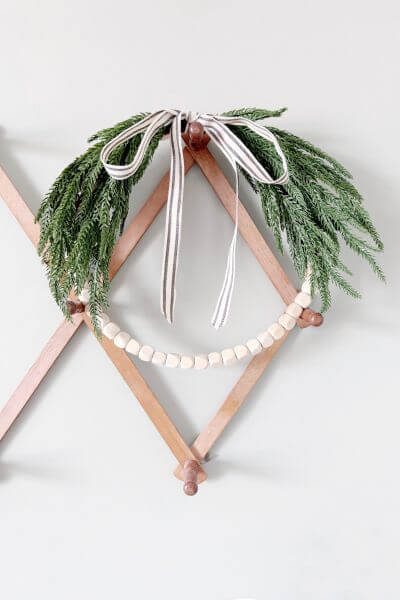
Who’s ready to create a cute evergreen wreath for your winter and Christmas decor? Well then, this wreath is just the thing for you and can be made in under 15 minutes!
I’ve had a few of these wood bead wreaths that I picked up in Dollar Tree sitting with my craft stash for quite a few months.
They are 10-inch, so on the smaller side, but that makes them even cuter. I double checked the Dollar Tree website, and these are still available for order.
Dollar Tree has taken quite a few wreath forms off their website in the past years (boo, Dollar Tree, just boo) but these wood bead wreaths hopefully will stay put! 🤞🏻
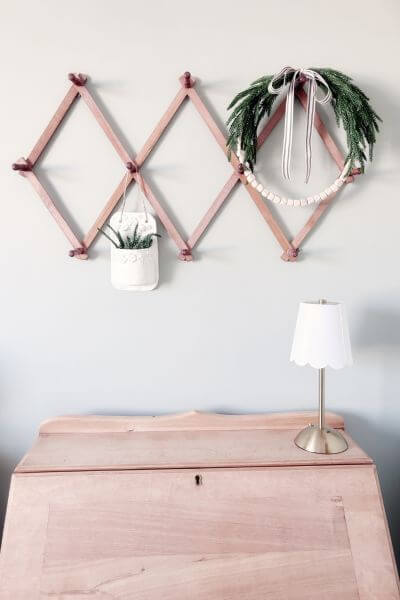
This wreath could be left up all through the Christmas and winter season. This is too small to be a front door wreath, but if you’re like me, I like to hang wreaths in different places all throughout my home.
On mirrors, random hooks and, as shown in the picture, on this old accordion peg rack.
I figure we have a few more weeks of winter before starting to see signs for spring, at least in my neck of the woods. So, let’s get to making this farmhouse-style wood bead wreath DIY.
And this is a good post to save if you want to tuck it away for next winter season! You could make multiple wreaths with the ribbon and evergreen pics for gifting or even selling at craft shows.
This post contains affiliate links. As an Amazon Associate, I earn from qualifying purchases. This means when you click a link, I may earn a small commission at no cost to you. Thanks for your support!
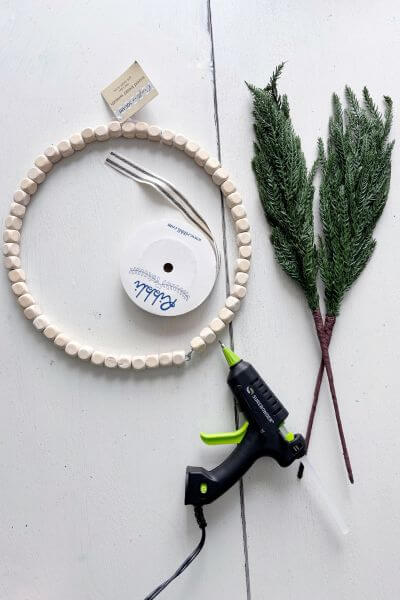
Material List for Wood Bead Winter Wreath
A short list of supplies makes this DIY even easier! I found the wood bead wreath form at Dollar Tree and the rest of the supplies are from Amazon.
- 10-inch wood bead wreath form
- 12-piece Evergreen pics
- Farmhouse style ribbon – 5/8 inch
- Glue gun
- Wire cutters (optional)
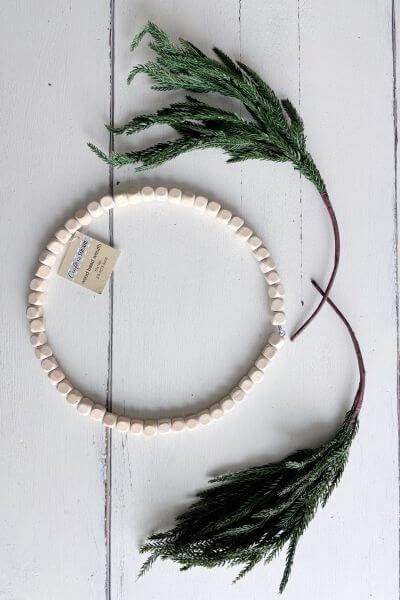
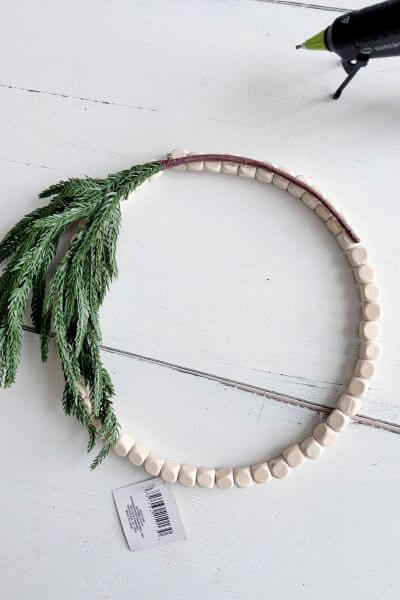
Bend the Evergreen Pics to the Shape of the Wreath Form
First things first, plug in your hot glue gun to get it heated up!
Next, bend the stems of the evergreen pics in the shape of the wood bead wreath. These evergreen stems bend pretty easily.

The top of the wood bead wreath is linked by a metal loop. This is where the evergreen pic stems will criss cross.
Hot Glue the First Evergreen Pic to the Wreath
Place a line of hot glue along the wood bead wreath. You can lay the evergreen pic stem beside it to see how many beads you need to glue.
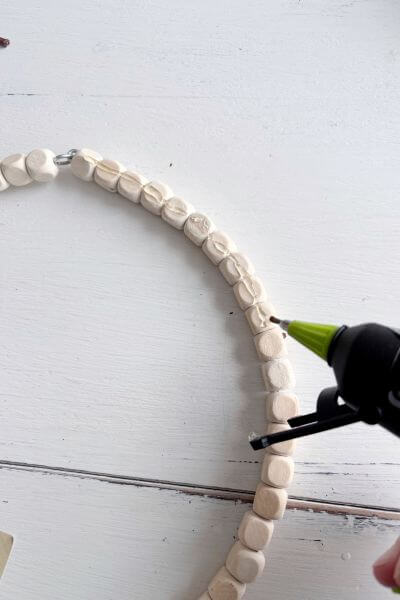
Lay your first evergreen pic stem on the hot glue. If needed, glue alongside of the stem to further secure it to the wood bead wreath.
Hot Glue the Second Evergreen Pic to the Wreath
Once the hot glue has dried for the first evergreen pic stem, it’s time to secure the second one.
Pull the evergreen branches back on the first pic, and carefully apply the hot glue to the wood bead wreath for your second evergreen pic.
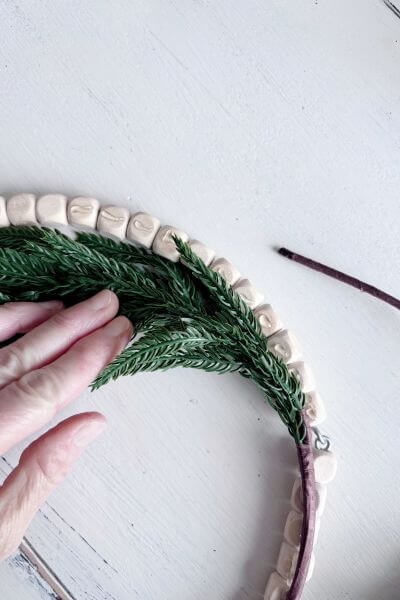
Place the second pic’s stem onto the hot glue. Add extra hot glue as needed around the stem to secure it as needed.
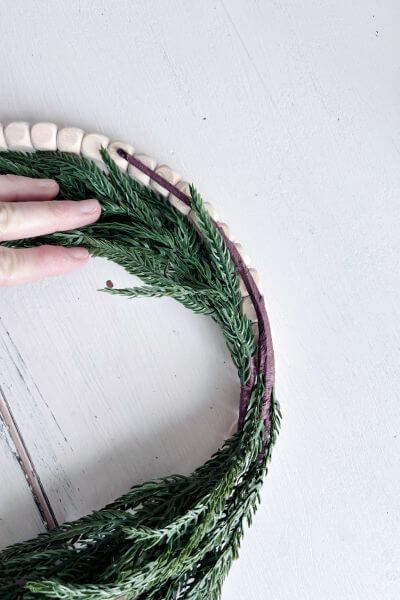
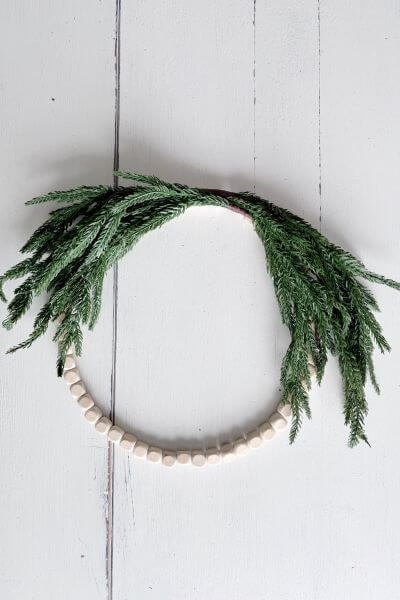
This is how it looks at the top of the wood bead wreath after both pics are secured.
And a look from the front. Ok, at this point, I was thinking the wreath sorta looked like Larry from the Three Stooges. 🤔
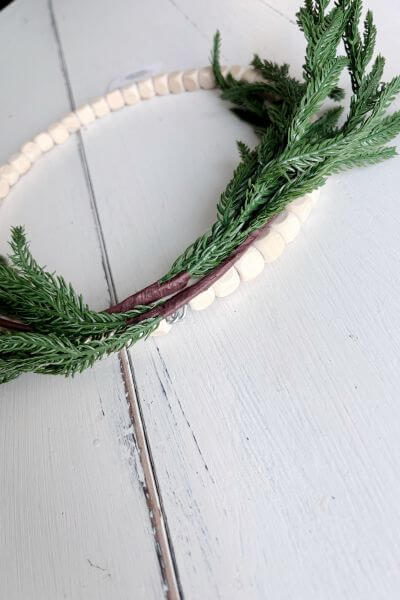
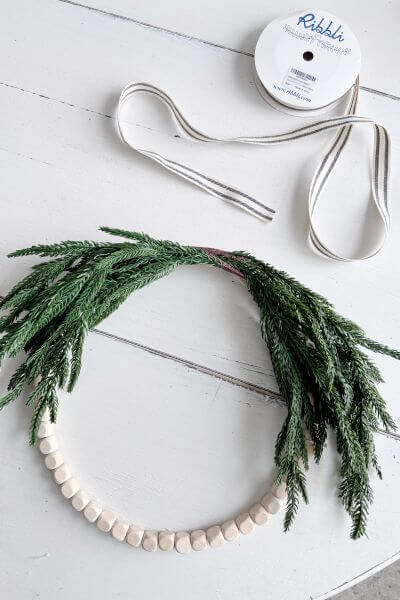
Attach the Ribbon to the Wood Bead Wreath
Now, let’s attach the farmhouse style ribbon to our evergreen wreath. I cut a length of about 47 inches for the length of bow you see in the pictures.
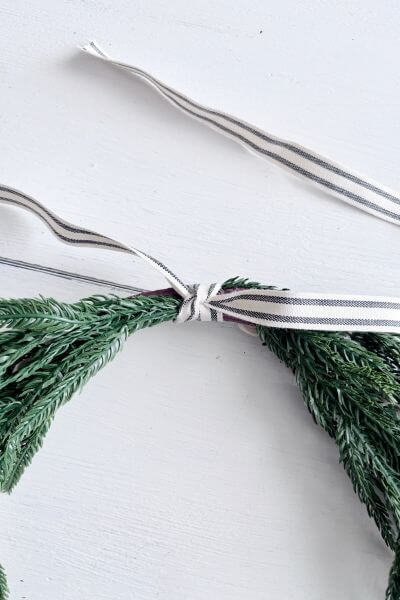
Wrap the ribbon around the top part of the wreath where the two stems intersect.

Tie the ribbon in the front.
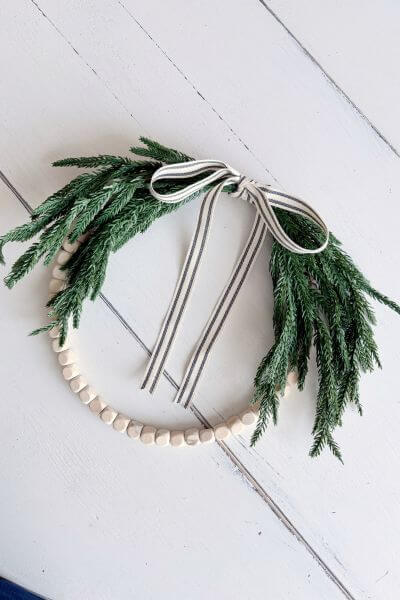
Create a loose bow.

Trim the ends of the bow to whatever length you prefer.

Trim a little triangle into the ends of the ribbon to make it look more finished.
We’re almost done with this evergreen wreath!
This next step is optional.
If you feel like it looks a bit too bushy, you can trim one of the branches from the evergreen pics on each side.
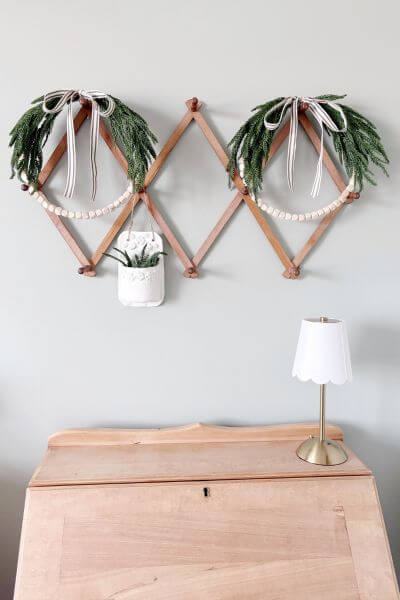
I made two wreaths. One I trimmed and the other one I left as is and honestly, they didn’t look much different. I’ll post that comparison pic below in the wrap up section. 👇🏼


Below is trimmed.

Below is untrimmed.
Hang your wreath and be sure to gift a few to some close friends!
If you’re interested, this cute little wall pocket in the picture below is a DIY as well and you can find that post here…DIY Air Dry Clay Wall Pocket.

Wrapping Up this Farmhouse Evergreen Wood Bead Wreath
This simple and pretty wreath took me under 15 minutes to create, and I was videotaping the process, so it may take even less time than that for you!
Is this a DIY you’d like to make for your home? If you’re a fan of cozy farmhouse styling then just maybe!
The ribbon and pack of 12-piece evergreen pics would allow you to make one to keep, plus more for family and friends.
And the wood bead wreath forms are only $1.25 so hopefully you can find them at the local Dollar Tree store! They are on the website as well.
Below is the picture of the two wreaths I made. The one on the left has a few branches trimmed and the one on the right was left as is. Can’t tell much difference!
And that’s a wrap on this 15-minute farmhouse evergreen wood bead wreath DIY post.
As always, thanks so much for reading. Any questions, or comments please leave them down below.
Now it’s time to grab your 4 supplies and heat up the glue gun! And craft this farmhouse evergreen wood bead wreath DIY in 15 minutes or less!
Pin me on Pinterest! ⬇️

Please consider subscribing to my email newsletter for more DIY ideas 👇🏼